Convergent Series

learning, using & teaching metal clay, and other aspects of life

Archive for October, 2012

A special kind of “Costume” Jewelry!

Posted by C Scheftic on 2012/10/11

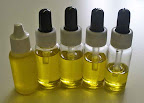
As I was packing everything up to take to a recent off-site workshop, I had made sure that all my little oil bottles were full. I figured, that way, there’d be no way I’d need to pack the big bottle to refill in class: Five individual bottles for 8 to 10 people should be fine.

In the session, as always, I spent a moment talking about the need to place a lubricant between your moist metal clay and (almost all) your tools, and another warning not to use too much, especially when you’ll remove bits of clay you that will later be reused with yet more lubricant because the build-up can create other problems. After I got back and was unpacking everything so I’d be ready for the next workshop in my studio, I noticed the pattern in these bottles, and couldn’t resist taking a photo. Hmmm…. Do you share my impression that various participants focused more on one part of that message than the other?


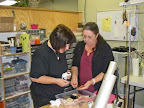
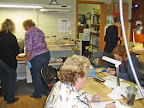
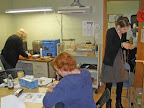
Curiosities aside, it really was a delightful session. (I hope the participants agree!) Brian Russman (shown, under the clock) had invited me to be a “guest lecturer” on metal clay for the graduate students in his Jewelry Making course in the Costume Design Program in the Drama Department at Carnegie-Mellon. I used quotation marks there because there was only a little bit of opening lecture: most of it was hands-on time.

Thanks to Lena, Elisabeth, Lindsey, Mary, Sophie, Ying, as well as Brian, for such a delightful session. I hope you are pleased with the seventeen (17!) pieces you made that day! All very different, I found it a treat to see you figuring out how to express your different choices of style.

Posted in Teaching Metal Clay | Tagged: , | Leave a Comment »

Silver-artists etch copper!

Posted by C Scheftic on 2012/10/10

I wonder about people who are able to write several posts each day: what’s it like in the rest of their life that they have the time to do that? I’m always busy. That’s meant neither as a complaint nor as an excuse. Without consciously trying, I keep busy. And I do prefer that to ever letting myself get bored! Even if that means it sometimes takes me a while to get around to writing posts that I have on my mind.

Which is exactly what happened with regard to the last meeting of the Western PA Chapter of the PMC Guild. I still don’t have time to write a complete narration (especially after having side-tracked myself with three recent posts on tumblers and more) so I’ll first just annotate a few of the photos I took, and end with a few comments on the most surprising outcome.

We met on a Monday night in September in Springdale, PA, where Barbara helped everyone with etching copper. This photo shows Susan looking over Sharon’s shoulder as they discuss design issues:

Lois wasn’t sure if she wanted to draw her own design, so Barbara helped her consider the pros and cons of various stamps that she had. (In the end, Lois did draw her own. More on that shortly.)

Clockwise from the left are Ann, Susan, Lindsay, Donna, and Sharon at work, all at different stages in the process:

From left to right, we have Ann, Donna, and Lindsay from a slightly different angle:

I did not get a shot of the sample pieces Barbara shared with us before we started. Then, she spent her time helping everyone else. (Thanks so much!) But here’s a photo showing the pieces made by Ann, Donna, Lindsay, Lois, Sharon, Susan, and me:

We spread them all out, and compared notes. Of course, there were some “obvious” differences. Beyond variations in both our goals and our basic drawing techniques to begin with (Charlie: the talisman I promised you at your last birthday is in there! I just put it in the mail for you but, until it arrives, can you spot it from its symbols?!) we also used a range of different finishing techniques: some people used Barbara’s polishing wheels, others used her torch to heat-patina the pieces, and so on. Some observations were curious: we noted both the appearance of and differences in patterns of “extra lines” that showed up in some of the designs.

But the result that I think we all found the most interesting was the one we didn’t realize was a surprise until Lois pointed it out. (You may have to click that last photo to get it large enough to really see this in the tall piece at the far right.) The “dots” at the end of each branch on the tree were NOT deliberately drawn by her. At an autumn meeting, she had just felt inclined to draw a tree that had already lost all its leaves. So the “dots” must have been the result of holding her pen such that a tiny bit extra ink pooled at the end of each line, making the metal just a tiny bit more resistant to the etching solution! Though unintended, we all agreed that this was a very pleasant little surprise.

And we wished that the meeting wasn’t about to end: It seemed that just about everyone was eager to start another piece in order to try the “Lois’ Dots” technique!

Posted in Uncategorized | Tagged: , | Leave a Comment »

Some Thoughts on Finishing: Strength!

Posted by C Scheftic on 2012/10/08

One more comment, now that I’ve started down this route. And then I really have to get back to other things….

I have heard people say that they tumble their pieces to work-harden them. Personally, I don’t believe it works quite like that. And it’s not just a theory; it is based on at least one example (well, one series of examples) from my own personal experience.

When I got my first rotary tumbler (the one with the smelly barrel that I hated, which I mentioned two posts back), part of the reason I did so was because I’d heard people talking about work-hardening via tumbling. And I’d seen how mixed stainless steel shot did appear to bang on pieces as they tumbled, so it seemed to make sense. Since I’d started playing around with making rings, I wanted them to be as strong as possible.

Especially because I wanted to make a few adjustable / by-pass / wrap-around rings: the kind that do not have what I think of as the “extra strength of internal connectedness.” (If there is some official technical term for that, I’d appreciate learning what it is! What I’m referring to is how much harder it is to bend the band of a continuous ring, compared to that of an adjustable one.)

And, yes, I do understand that fine silver will never “work harden” to the extent that sterling silver will. (But it does get harder with working than it is after being annealed, and heat anneals it, and firing uses heat, and hammering will un-anneal it even if it does not get it quite as “hard” as work-hardened sterling.)

So there I was, working with fine silver metal clay, and I was willing to make thicker bands to help compensate for its softness; I simply wanted my rings to be as strong as I could make them. And I’m here to tell you that, in teaching myself to make them, I found out that tumbling does NOT yield full strength. If you think it does, you are wrong! I’m not saying it has no effect in that regard: tumbling is better than doing nothing. Yes, in the past few posts I’ve said that the shot does bang on pieces as they’re tumbled, but perhaps I should have used the word peck instead. Thousands, even millions, of little pecks does not equal a handful of good hammered whacks! Those pecks do appear to add a little bit of strength [later clarification: but just to the surface, not the whole way through the piece] which may be enough for earring elements that are not going to take much of a beating while worn. I have not found it to yield the strength needed for things that will get knocked around, such as rings, bracelets, cuff links, etc.

I know that some people will tell you that tumbling is adequate. But you can verify my statements by doing something very much like what I did: Just make yourself a pair of wrap-around rings. (They are the easiest project to use for this test. If you don’t know how to make them, there are sample projects online. Here is a very simple one that is actually pretty good, except for the line that then suggests tumbling to work harden the final results, sigh.) Your two rings need not be identical in design. (I’d suggest making them at least slightly different so you can clearly tell them apart!) But, for this test to be meaningful, they should be very close in size and thickness. Fire them to the maximum (2 hours at 1650 degrees Fahrenheit). You can curve them in the moist clay state and dry them in that shape, but it’s probably better if you fire them flat and carefully curve them after firing: bending a fired-flat piece into shape can be another very useful step in the work-hardening process! (I’d guess that’s the reason Nettie’s project, linked above, has you do that.) But if you are more comfortable shaping them in the moist-clay state, that’s OK; just make both of them the same way so that doesn’t add an extra “effect” to your test.

After your rings have been fired, you should shape or adjust them, as needed, to get a good fit. Tumble one for as long as you think is necessary. Then, take a hammer and a bench block and really work-harden the other one. Or, if you prefer, you can tumble both and then just hammer-harden one of them. (If you don’t know how to do that, either find a local metalsmith who can teach you, or let me know and I can make some suggestions. You really have to know what work hardening means for this test to be valid; but as you keep working on the piece, you should figure it out!)

Finally, with your bare hands, try to open or twist each of them. If you work hardened one correctly, you will feel the difference immediately!

(Full disclosure here: it did take me several tries to really grasp how to do this. At first, I was way too gentle with my attempts to hammer-harden my by-pass rings. But I kept thinking that they were just too soft: no way I’d sell them like that, I didn’t even want to risk wearing them myself. But I also wanted to keep the lovely metal-clay-style texture on my rings. So it took some experimenting with different hammers and mallets, steel blocks with and without some protection (e.g., a bit of leather), and more, even including some consulting with a local metalsmith (and author, Jan Loney) before I really grasped all this. A well-hardened ring will still be “adjustable” but it will become noticeably, ummm, harder to do so.)

For that matter, if you want to take this experiment to the next level, make one pair out of fine silver metal clay and a second pair out of the sterling form, fire each pair as recommended for its type, and do the same test with each pair. The kind of knowledge you can get from such an experiment will go a long way to building your understanding of the metals involved.

And you’ll get a nice collection of rings in the process: to wear yourself, to give as special gifts, or even to sell to help recover the cost of the clay used in this learning episode! (Be sure that any test-rings you pass on to others have really been work-hardened as much as possible…)

Happy claying to all!
-cs

p.s. I learned that lesson early on in my explorations with metal clay, when only the fine silver clays were available, though I did play around with annealing and hardening bits of both copper and sterling silver to get a feel for what was going on. All those results had such a physical feel to them, ones I had no idea how to capture in a photo so I did not even try. But I will close with a photo of a more recent ring; it’s about a year and a half old now. This one does have a connected, continuous band but, because all the flower-petal layers spin around the post holding the ruby, it still posed some particularly interesting challenges in my quest to find effective ways to work harden each and every the element of all my creations….

Posted in General Techniques | Tagged: , , , , , , | 2 Comments »

Some Thoughts on Finishing: Design Considerations!

Posted by C Scheftic on 2012/10/07

Continuing thoughts from yesterday’s post, where I said I was prompted to write some notes by recent comments about tumbling on the Metal Clay group on Yahoo, here I am going to try to make a few points about the intersection between design and finishing that I’ll illustrate with some photos of pieces I was making as I was coming to grips with some of these concepts myself. I apologize for the quality of some of the photos; while the last one was taken recently, the first five were all taken years before I even thought about starting this blog.
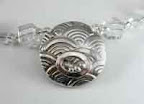
The lentil bead, shown to the right, is the very first piece I ever made using metal clay techniques! At that point, I was focused mostly on the mechanics of construction. While not ignored completely, design was really low on my priority list. I just wanted to make something that worked. This one was tumbled by my first instructor in her rotary tumbler with stainless steel shot. I was perfectly happy with its all-over shine. Well, to be honest, I was utterly thrilled to have made something that could appear that evenly shiny! I did add a slight liver of sulphur (LOS) patina to help emphasize the textured design.

After that, I went on to try making more pieces myself. In general, they had an overall texture of some sort or another, with embellishments or impressions or openings added to that. I tried constructing a variety of shapes. Eventually, I decided to try making a small “pillow” shaped bead, and my first attempt at that is shown in the pair of photos to the left. The top image shows the piece, with its just-fired look straight from the kiln. By the time I tried this, a friend had found a small kids rock tumbler that we’d appropriated for use with tiny fine-silver loads.

Now, the thing about this pillow bead is that, although there is a bit of a textured design on it, much of its surface is just plain smooth. And shot polishes up a piece by banging on it. The bangs are very slight (I’ll say more about this in my next post, on work hardening) and, while the results of those bangs really are not very obvious in highly textured areas of metal, they seem much more obvious on a large smooth surface. I don’t know: could this be why some people report tumbling their silver for 24 hours or more?! The instructions for the rotary tumbler I now have (see my last post, towards the bottom) say that loads should be done in two hours. Back when I was trying to polish this piece, I think I probably ended up running it for 3 hours or a bit more (checking its progress periodically) and it did get better with more time. But, at that point, I decided it had been beaten up enough. Though there is nothing terribly wrong with the results (click on the photo to get a bigger version that may (or, sigh, may not) make this clearer), it just does not look quite as even as I had gone to great pains to make it. And the unevenness did not jump out at me when it was in the kiln-white stage that I so happily noted (with some white-balance error on the camera…) before I tried to tumble it.

All of which taught me that, while tumbling can be great for some surfaces, it’s not necessarily great for every surface.

So, when I fired the next pillow bead I tried, I did not just plop it into a tumbler. I simply checked that it looked OK out of the kiln, and carefully set it aside. In a couple months, I’d be going to a PMC Guild conference, and I was signed up to take a pre-conference class. I decided I’d take this piece with me, and ask the instructor for suggestions on how to finish it.

Lo and behold, for the class she had a magnetic pin polisher for us to use! When I told her what I was hoping to be able to achieve for this piece, she suggested that tool immediately.
Here’s the thing: with a rotary tumbler, you put pieces in and then check on them periodically. After a couple of hours, in general, they appear done. Until they are done, they are simply not-done. It’s hard to describe, but easy to see. I think that what I’m seeing is that the shot keeps banging on the piece until it’s all evenly shiny; when it’s not done, it’s just not yet even. But with the magnetic pin polisher, pieces go through states. It goes from kiln-white to gray to brushed/satin to reasonably smooth to shiny. Oh, and it does that quickly: 10 to 15 minutes usually gets a piece through the entire cycle! You can just take a piece out whenever it’s reached the stage you like. You can leave it like that, or move on to hand tools (e.g., a flexshaft) to further finish select areas. The creative possibilities are thus multiplied!

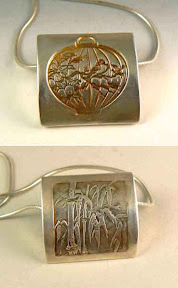
So, for my second pillow piece (shown, right, both sides), I took the piece out when it had reached a nicely polished but still somewhat satin-y stage. I then applied a patina with Liver of Sulphur: I didn’t really care what specific color I’d achieve (knowing that would change over time anyways), but what I did want was to “help the design to pop” from the contrast. On the bamboo side, I just wiped the patina off the high points with a Sunshine cloth, which pretty much preserved the satin finish overall. That was my goal: to give it a look that corresponded to my memory of misty mountainside bamboo gardens from when I’d visited China (in the late 1980s). On the birdcage side, I attacked the high / smooth areas with a Pro Polish pad, which did result in a slightly more polished, shinier, finish while leaving a rougher surface in the hollows. That kind of variation is exactly what I wanted.
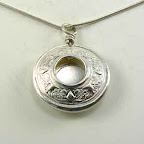
I think that sort of variation is reasonably visible in that pillow-piece photo. I’m not so sure it’s as clear in the lentil bead shown next, to the left, but I’ll still try to describe what I see in it. At that point, I had moved on to exploring the construction of hollow beads with openings in them, varying the size and location of those. Some pieces had little gems inside, others had little textured embellishments. This one simply had a nice, smooth disk. (‘Twas a fluke that resulted from the design I’d pressed into the other side, but I decided I liked it.) What I then wanted was for the inside to end up with a satin sort of look. If I’d put it into a rotary tumbler, first of all, that central disk would have ended up all very shiny but, beyond that, I could not be sure that the shot would be able to polish all the way to the edges inside and that difference might be visible through an opening that large. Again, this is a case where the magnetic pin polisher came to my rescue on the design side! I put the piece in it for (I did not keep notes but assume it was about) 8 to 10 minutes. Once I’d taken it out and rinsed it off, I continued to polish the high points on the outside by hand, using a stainless steel burnisher of some sort (it’s been a while now: I think I was still using stainless steel cutlery at that point, though I may have gotten my first actual burnisher by then).
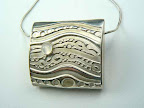
Similarly, with my biggest-ever pillow bead, with one side shown to the right, I did not want all of it all shiny either. I’ve seen a number of pieces made by others using this same texture, and what I wanted for it involved having more contrast between the peaks and the valleys. Magnetic pin polisher to the rescue again! The whole piece was finished to a brushed look, then I went after the peaks and edges with a burnisher.

I know I had my first stainless steel one by the time I made this piece, because I do remember using that burnisher for setting the moonstone. Since I’m admitting all sorts of things here, I will also say that’s only the second stone I ever bezel-set. It was, in fact, almost my first. Until I had the thought that maybe, just maybe, I should try it first on a smaller piece. This “pillow” had been an experiment to see how big of a hollow piece I could make and have it not slump. This one did give ever such a tiny bit in the firing, but it did so in such a way that it really went “with the flow” and looks intentional. Whew! This was back before prices, of silver itself let alone the manufacturing mark-ups, started creeping up. Even then, risking something well over an ounce of silver on an experiment was an adventure! But (true to form, I guess), I digress, so….

Let me close with a more recent piece that is another example of how I see finishing and design to interact on so many levels. In the case of this bronze piece, left, the mini magnetic pin polisher would not have been a good option: its pins are so tiny, they’d have worked their way into the design in ways that would have been impossible to remove. But, even more than that, I just loved the coloration that the kiln-gods chose to give this piece on the flat side, the one with the butterfly. Though I don’t often try to preserve colors in my metal pieces, this was one where I really did think that was worth trying. Problem was, the kiln-color on the other side was sort of yucky. It really was calling out to be shined up. But, if I’d put it in my rotary tumbler, that would have affected the butterfly-side too, removing all the kiln-colors and leaving it just shiny-yellow. There’s no way I wanted that! So I took out my rotary tool and started working my way through various attachments on the curved side. This being bronze, I know I started with some radial bristle disks (yellow, red, blue). Since I hadn’t planned to write about that process (I put far more thought into the color on the other side!) I didn’t keep notes but I also know I didn’t do anything special. Which means that, after the radial bristles, I gave it another quick hit with either a silicone or a rubber polishing wheel (most likely, whichever happened to be closest to my hand at that moment or else, since this is a recent piece, I’d be more likely to remember).

But the reason I wanted to end this post with that piece, in particular, is because the thread in the group that started all this was from someone asking about tumbling her bronze because she was not getting the results she wanted from the burnishing technique she’d been using. I’ve not seen any of her results, so I’ve no clue whether or not she’d consider this acceptable or not. All I know is how happy I was with this particular result, myself, achieved without using any sort of tumbler.

There’s one more issue I’d like to address about tumbling. But I’m out of time now. That one will have to wait for tomorrow….
Posted in General Techniques | Tagged: , , , , , | Leave a Comment »

Some Thoughts on Finishing: Equipment!

Posted by C Scheftic on 2012/10/06

There’s been a lot of discussion lately on the big (i.e., international) Metal Clay group on Yahoo about tumbling and other methods of finishing pieces. I’ve just been waaay to busy the past week or two to comment on individual posts. With a few minutes right now (curiously enough, because I finished a couple other tasks early while I tumble pieces for students from a recent workshop!) I thought maybe I’d start on some posts with a few of my thoughts on two aspects of this issue: (a) deciding how I will polish (and otherwise finish) a piece and (b) what equipment I do and do not use.

Now, in practice, I believe that the design-part should come first, and the equipment-choice second. But to talk about design issues, I will need to mention different kinds of equipment. And if you don’t know what I’m talking about, that could be a problem. So I’m going to start by mentioning just a few of the possible tools one could use. And I’m going to present them in the order that I discovered them, because I’m sure that affected my understanding of them.

As I think I’ve mentioned here before, though I first discovered metal clay while I was living in California but visiting my family home in Florida, I didn’t actually start working with it until after I moved to Pennsylvania. I’d read a lot, had tons of questions, but figured that (rather than waste product experimenting on my own) I wanted to start by taking an introductory class. We made a lentil bead. The instructor (Donna Penoyer) fired it after class, and tumbled it with stainless steel shot in a rotary tumbler (more on these in a moment), before returning our pieces to the shop so we could return and pick them up. I was happy with the piece. I then added a very light patina with Liver of Sulphur, before stringing it to wear. Shown to the right (in the first jewelry photo I ever tried to take … and it shows!) the thing that jumps out at me about it, now, is how evenly-shiny it is all over.

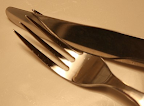
For the next few pieces, ones I made on my own or with a long-time friend (Bonnie) with whom I’d reconnected after my move (and who’d also taken one intro class!), we fired them with a creme brulee torch, brushed them with a brass brush, then burnished them by hand with stainless steel flatware. Yes, that’s right: I did buy a brass brush with my first order of clay, but we had no additional “equipment” for polishing. So I dedicated a knife, spoon, and fork to jewelry making! That approach, though admittedly slower than tumbling, kept me going for months as I spent the odd bit of spare time learning and exploring! Over time, eventually, I did buy an assortment of burnishers but I still pull flatware out during workshops to show that you don’t actually need anything fancier. You may want it, but you don’t necessarily need it!

Not too much later, Bonnie somehow ended up with a child’s plastic rock tumbler. They’re small and lightweight, meaning amazingly under-designed for actual lapidary work. But we cleaned up the barrel, and got a one-pound package of mixed-shape stainless steel shot so we could use a few scant ounces to try tumbling a couple pieces at a time. I would never recommend that someone go buy one of these for this purpose but having access to a rotary-shot tumbler to play with a few times did offer me the chance to explore the finishing process while I decided what I wanted to buy. (I’ll talk about that in the design-post.)

With that experience, I’d decided I didn’t want to start out with a rotary tumbler: I had fallen in love with magnetic pin polishers! The standard ones of these cost start at a price comparable to a full-scale metal clay kiln, and go up quickly from there! For a full-time bench jeweler, that cost can be justified because those machines work their magic so much more quickly than do rotary tumblers. For a part-time art jeweler, however, that seems like a lot of money. But then I found this little item (shown, right, with a blue base) for about $150. Still not cheap, but a price I found manageable. The cup is about the size of a measuring cup, a tad under 3 inches across, but all the action takes place in the very bottom. So I can’t do a lot of pieces at once, and I can’t do anything that’s more than about 2.5 inches across, and for really thick 3-d pieces, I may have to turn them over manually. But I rarely have any reason to exceed its capabilities. Sometimes it’ll take me several cup-loads to finish a kiln-load, but since this machine will complete the job in around 15 to 20 minutes, that means I could do six to eight loads in the two hours that is often quoted for a single load in a rotary tumbler. I must note, however, that while the time savings is a big benefit, the real reason I love this little item will be discussed more in my post on design considerations!

Before moving on, I will say that I’ve seen that some people in the MetalClay group are using a different “under $200” magnetic pin finisher (see photo here), and there seem to be larger (pricier) versions of that model. Overall, the cup on that one is reported to be 3.5 inches across, so a little bigger than mine, but there appears to be some kind of a post sticking up the middle. That would seem to severely limit the size of any individual piece one could put in it to not much bigger than one inch across, if that. (If you have one and want to say any more about that, please feel free to leave a comment!) That one also has a timer, which can be a nice convenience but is also yet one more thing that can break. So I’m neutral on that.

The next piece of equipment I added was a rotary tool. (If you somehow landed here without being familiar with them, I’ll just say that they are like small electric screwdrivers, except you can add all sorts of other attachments to them besides screw-drilling bits.) These are sometimes referred to by brand (e.g., Foredom, Prodigy, Dremel, etc.), and sometimes by handpiece style (e.g., flexshaft). A few of my favorite attachments for polishing (in no particular order) are silicone wheels, rubber wheels, fiber wheels, radial bristle disks and (least often) sanding drums or split mandrels with sandpaper. Other essential but merely human-powered tools that I use include steel bench blocks and an assortment of hammers and such. (I don’t plan on discussing any of that in detail right now. I will likely do so eventually. If you want to talk about them before then, just let me know!)

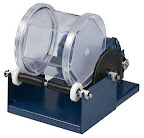
And then, yes, I did go and get myself a rotary tumbler with mixed stainless steel shot. I tried the inexpensive route first, the kind with an imported rubber barrel. It didn’t stay long: the smell of the rubber was just worse than I could bear. I kept having the feeling that I was at the gas station, filling my car, and that the pump was overflowing and would not shut off: that’s what it smelled like to me. I left the barrel out in my garage for six months, to see if it might “air out” over time. No such luck. I sold it to a student who did not seem bothered by the smell. Then I went and bought one made in this country, the kind that has a hexagonal plastic barrel. I still use the mini-mag one more often but, when I want a rotary tumbler, this one does the trick.

This particular model has gotten some negative reviews online, but I don’t consider any of the issues reported to be a big deal at all. Some people complain that the steel shot in the plastic barrel is noisy and, yes, it does make more noise rattling around in plastic than it does in a rubber barrel. But all tumblers sound noisy to me, so I put them in the next room anyway; in that case, the sound of this one does not bother me. It doesn’t have an on/off switch, but I plug it into a power strip that has one, and just use that. (And a power strip is easier to replace than is a tumbler whose switch has died. And, further, I find it convenient to operate the power strip switch with my foot, rather than having to touch a button on the machine with sometimes-wet hands.) It is possible to have little bits of the shot land in the odd small spaces at the top of the barrel (from where the hexagonal sides are spread out to meet the round lid); but a magnet captures those easily and I can just plop them down into the barrel so I never gave that a thought until I read about it later on. (Did the writers perhaps not think to try a magnet?) The lid is the one part that took me a few tries to figure out but, to be honest, so did (in a different way) the one on the rubber barrel. There is a sort of “art” to getting it on just tight enough: not so loose that it leaks, and not so tight that it’s hard to get off. But with a bit of determination, I figured that out too. The only problem reported with which I do agree is that it is possible to have very thin bits stick between the barrel and the lid. But I rarely make metal clay pieces thin and flat enough to get caught; some earwires can get that thin but those are not something I’d tumble anyway. (I’m not doing mass production. I can hammer the odd earwire to work-harden it (more on this in a few days…) or, since I often use Argentium for them, it is even easier to heat-harden that!) Still, though I’m glad I have this one, I don’t use it all that often: mostly, I use it for pieces from beginner classes, where students have not yet learned much about finishing. Just like my very first piece, an evenly-smooth shine everywhere works just fine in that situation. And if folks say they want a more nuanced finish (yep, that’s the big design-related issue!) that’s a perfect lead-in to the fact that I offer workshops on finishing too.

The other major finishing tool that some artists seem to have is a vibratory tumbler. I will admit that I’ve never used one of those. (I’d be game to try it, if you happen to have one that you’d like to offer up for my examination!) At this point, the (many!) finishing tools I have acquired over the years seem to be meeting my needs. If (when) one of the tumblers should go out, then I may make a serious attempt to look into these. At this point, at least, I’ve got nothing at all against them; I mention them simply to acknowledge that they could be on the discussion list too. But, for now, I want to spend more time making new pieces, rather than simply acquiring even more tools I may or may not ever use.

Tomorrow, I’ll try to write some things about how the tools I do have interact with the designs I try to create. I find the interactions between them, and how that has influenced my understanding of design, to be the most interesting aspect of all this!

Posted in General Techniques | Tagged: , , , | 4 Comments »

Garden Picnic

Posted by C Scheftic on 2012/10/02

Which do you think is yummier: the look of that garden or the fact that it’s a cake?!

I’ve mentioned before that I’m also a member of the Penn State Master Gardeners of Allegheny County.

One of our many projects is to maintain several Demonstration Gardens. These showcase flowering plants and herbs that perform well in our climate and soils with minimal maintenance. The gardens include display beds of over 125 varieties of annuals. At the end of each season, the plants are evaluated based on their performance in the garden: the best ones are brought back in subsequent years, while poor performers go on a watch list and will be discontinued if they continue that pattern over several cycles. A separate evaluation is performed regarding the number of pollinators that are periodically recorded in certain specific beds.

For people interested in joining the program, there is an initial interview to ensure that candidates understand their role in utilizing research-based information to educate the public on best practices in consumer horticulture and environmental stewardship, followed by a terrific (and intense!) year-long training program. Since this is sponsored by Penn State, our calendar follows their academic year: interviews happen in August, the training starts in September, and the training year concludes the following August. Then, in September each year we have a harvest-time picnic in or near one of our demo gardens (we rotate around the different sites) to acknowledge our newly graduated members as well as the ongoing efforts of all our long-time participants.

This year the picnic was held at the South Park Demo Garden. The cake shown above is not a replica of the garden itself, but I thought I’d share it because I think it represents the delight of the gardens! And that delight is why floral themes so often appear in my artwork, one way or another….

I wonder if/how that may change next year: we just got approval to open up a new demo garden — on an urban lot! — that will feature edible plants and flowers? I’m really looking forward to working on that project, since those are the kinds of things I most love to grow myself. And I am definitely an urban gardener these days!

Posted in House & Home | Tagged: , , , | Comments Off on Garden Picnic