Convergent Series

learning, using & teaching metal clay, and other aspects of life

Posts Tagged ‘bails’

3.14: Happy Pi Day 2018

Posted by C Scheftic on 2018/03/14

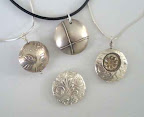
Two Small Pendants that shrank to different sizesI was trying to think about what photo to post today in honor of “Pi Day” 2018 and this one came to mind. It shows something vaguely along the lines of circles and radii, so that does fit.

The real reason I chose it is because it shows similar circles with two different areas, and Pi is all about the ratio between a circle’s radius and its area. I created these two pieces a little over four years ago, shortly after Hadar came out with her “friendly,” “one fire” clays. And I wrote about how, even though they’d started out the same size, they ended up being so different. You can check my post from early February of 2014 if you missed it then (or forgot!) and are curious now.

Or you can just use this as an inspiration for making something yourself, whether that is jewelry, or pies, or something else. If you do, please leave a comment about your creation!

Posted in General Techniques, Technical Details | Tagged: , , , , , , , , , | Leave a Comment »

Combining Inspirations

Posted by C Scheftic on 2015/04/15

Two of my favorite art jewelry makers and teachers are Hadar Jacobson and Mary Hettmansperger. I love many of their designs, though I’m rarely if ever inclined to copy any of them (including those in their project books) exactly as shown. What I like is the way they create designs using techniques that inspire me to tweak a little here and a little there, and somehow end up making something that’s much more my own.

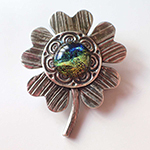
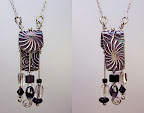
Towards the end of last year, I was browsing through one of “Mary Hetts'” older books, Wrap, Stitch, Fold, and Rivet (© 2008), looking for some tip I thought I’d read in it a while ago, when I was stopped dead in my tracks by a project I’d seen before but had never given much thought to, one she calls a “Bead Shelf Pendant.” In it, she talks about cutting, punching, and heat-coloring copper, but at that moment I suddenly saw a variation on it as a great metal clay project as well. The first photos here show one of several fine silver pieces I made as soon after realizing that as I could find the time.

I wore a couple of them throughout the holiday season at the end of 2014, and I probably got more comment and compliments on those than on any other piece I’ve ever made and worn. I’m not just talking about friends and family comments, I’m including store cashiers, physical therapists (yeah, one of the reasons I’ve been off-line a good bit lately), random people sitting near me at concerts, and so on.

Since I had so much fun both making and wearing those pieces, at the start of the year I tried a few others. The second photo here shows one of the first bronze pieces I made in this style. Bronze is a less expensive metal to purchase than silver, so I felt I could afford to go bigger (wider or longer) with the ones I made that way. Mind you, working with bronze (or any other base metal clay, such as copper or steel) takes more time which I feel, in the end, pretty much balances out most of the savings on the materials. The final retail price for a base metal piece ends up similar to that of a silver one of a similar design, because of the extra time one has to spend on it. The thing bronze does allow me, however, is the opportunity to go a bit bigger without having the price of a piece go out of reach. The one shown here (reversible, with a “fiddlehead fern” texture) is about as long as the silver one, but easily thrice as wide.

But, as I was playing around with my first bronze bead shelves, I had another “gotcha!” moment: Foldies! These are also known as Drapings. There’s a great description of the basics of this technique in Hadar Jacobson’s third book (© 2009), Mixed Metal Jewelry from Metal Clay, on pages 104-105. I’ve made a number of such pieces over the years (and posted a number of photos on this blog) but, while I’ve been happy-enough with the ones I have made so far, I have never been totally satisfied with any of the bail designs I’ve used. But, as I was making those bronze bead shelves, it suddenly came to me: make a bead-shelf-foldie…. You’ve already seen on this blog a photo of the first one of those I ever tried (which, for the time being at least, I’m keeping in my own little stash of personal NFS (not for sale) pieces): it’s one of the pieces I submitted with the application that got me admitted to the Pittsburgh Society of Artists.

The bead-shelf-foldie is fun to make out of clay (thanks, Hadar!) and fun to finish and hang (thanks, Mary!), and I find an extra-bonus in having found a way to adapt ideas from two of my favorite jewelry artists. I look forward to stretching this idea even more in the future.

Posted in General Techniques, Teaching Metal Clay | Tagged: , , , , , , , | Leave a Comment »

Crazy-busy Season

Posted by C Scheftic on 2014/12/01

Life tends to get crazy-busy this time of year, for multiple reasons, some of which I’m sure you can imagine and others would take too long to explain. So I’m just going to list a few events you may want to know about should you be interested in seeing some of my work in person:


  • November 30 – December 7: H*liday mART at Sweetwater Center for the Arts, Sewickley, PA

  • December 5-6-7: Holiday Gift Shop at the Wilkins School Community Center, Swissvale, PA

  • December 5-6-7: Open House in my Studio, to coincide with WSCC’s Holiday Gift Shop

  • December 13: Open House at the Hoyt Center for the Arts, New Castle, PA

  • December 13-14: Open House in my Studio, to coincide with an Art Studio tour in Regent Square (Swissvale, Pittsburgh, Edgewood, Wilkinsburg), PA

  • For other venues, please see the list of Ongoing locations down the right side of this blog.

If you find yourself missing any of those, no problem. Just get in touch with me: leave a comment on this post, or message me via Convergent Series page on Facebook (and, while you’re at it, a Like there would be very much appreciated…). We’ll find a way for you to explore my creations!

I’m not sure how much else I’ll manage to post this month. But I have new designs in the works, new workshop pieces I’m testing out plus, of course, new variations of ongoing favorites in both those categories … and lots more for 2015! I look forward to posting about all of those in the New Year, and I hope you’ll enjoy reading about them too.

Posted in Events, Studio | Tagged: , , , , , , , , , , , , , , , , , , , , , , , , , , , | Leave a Comment »

Softly Draping Hard Metals

Posted by C Scheftic on 2014/05/25

I have to admit something: I love “draping” metal clay! The clay is so soft and pliable, and the end results are so satisfying!

I am impressed with many of the effects that can be obtained via various “metalsmithing” techniques, but this draping is just sooo different from working with “solid” metal (sheet, wire, etc.). Yes, there are a lot of little “tricks” involved in successfully draping a mix of powdered metal, binders, and water, but it still is a relatively easy process for achieving a look that is much more difficult to achieve via any methods used with, say, sheet metal.

All the photos in this particular post were made with Hadar’s new-ish Friendly Bronze metal clay powder. At one point or another, I’ve draped every clay I’ve ever tried: every brand, every metal, etc. (OK, no, I haven’t done this with gold. It should work, but I don’t feel I can afford to use gold for anything this big. Of course, if you can afford it, I’d be absolutely thrilled to “drape” a gold piece for you on commission!) But all the different brands of silvers, coppers, bronzes, steels: yes! I’ve draped those.

In fact, there’s one very-special thing I do with draping that I teach in my metal clay workshops. Yes, while I do share a lot here on the blog, there’s even more that happens in person! You see, this little post is not only about draping metal clay. It’s also a little bit about workshops. (My plan is to mention workshops a few times, in this and several other posts over the next few months, then tie that together with one specifically about classes and workshops, both ones I offer myself and those offered by others.)

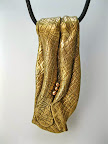
Anyway, the two draped oblong shapes are ones that I made in advance of a recent workshop. They were fun to make. I fired them both before the class; they ended up being about 37 mm long (excluding bail) and 25 mm wide. The idea was for me to have finished polishing one completely, and use the other one in my demonstration illustrating some techniques (and potential issues) in polishing such drapings. They also served to illustrate two of the many different bail-mechanisms that can be used for hanging the piece.

The long and narrow piece was begun during the in-class demo. It illustrates a different kind of draping, and a different kind of bail structure, both of which are harder to describe (but still easy to show) compared to the first two (oblong) pieces. It’s 66 mm long by 24 mm wide, and contains a little over 24 grams of metal.

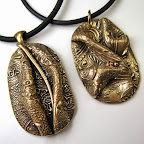
The last photo shows two sides of a fourth piece. Also constructed mostly during in-class demos, it’s the biggest of this lot: 45 mm high by 56 mm wide. It weighs a little over 33 grams (including a CZ on each side, but excluding all the chain on which it’s hung). While I was manipulating it in class, we talked about things like overall size and weight versus maneuverability and polishing constraints. (You may notice this piece has a separate backing, while the two oblong ones do not, and the longer-narrower piece folds over on itself.)

Have you tried draping metal clay yet? If so, please leave a note about it in the comments!

Posted in General Techniques, Teaching Metal Clay | Tagged: , , , , , , , , | 1 Comment »

One Thing Just Leads to Another

Posted by C Scheftic on 2014/02/01

If you’ve stumbled across this blog / post without a lot of previous metal clay experience, you may want to just click on the photos to enlarge them and read the brief notes there. For the rest of you, I’ll start by asking if you remember the earrings I wrote about last week?

For today’s post, I’ll start by saying a little about the steps I went through in making the bronze-parts of the two-metal earring pair I described earlier.

  • Grab a good-size chunk of Champagne Bronze clay.
  • Roll it out to a thickness of four cards.
  • Position cards around it, two cards high.
  • Use a thin, straight edge to cut two distinct sets of five intersecting lines. (This was done freehand, so their positions are similar but not identical.)
  • Use a circle cutter to make two “large” circles.
  • Use another circle cutter to make a “small” circle inside each of the “large” ones. (Again, done freehand, so their positions are similar but intentionally not identical.)
  • Do all the usual clean-up and drying of the various bits of clay.

When the circles had dried, I used the small, matching “inner” circles (where each set of lines all intersect) over some Low Shrinkage Steel XT to make the earrings I mentioned before. So far, so good.

Looking at the dry “outer” circles (washers, actually: the larger circles with their centers removed), I had another idea. Using a texture sheet with some concentric circles, I rolled out two more sheets of clay, one each from Friendly Copper and Low Shrinkage Steel XT. Then I centered one of the bronze “washers” over each of those, and cut a matching circle out of each clay. Finally, I rolled out another pair of those two clays, this time using two different “flowered” textures, and cut out a third circle of the same size from each of those. Both the circles- and the flower-design were rolled to four cards at first and then, with the textures, down to two cards. (I didn’t roll the clay with textures on both sides because: (a) I hadn’t yet decided for sure how I would use them, and (b) I wanted to center the designs on both sides the way I wanted, and doing that separately for each side was easier.) I set all those aside to dry (as well as a few other bits I’ll try to write about another time), figuring I’d use them for something….

A few days later still, I got to wondering about the “high fire” temperature of these new “one fire” clays. In general, even with this new trio, it’s the bronze that’s going to limit how hot the product can get during the sintering process. Would the “bronze embeddable” bails survive that heat? (I use them myself, on occasion, and I often offer them to students, especially in introductory workshops, because they can save a bit of time when compared to having to make one’s own bail.) So I took one of the bronze washers, attached the copper disk with circles and let that dry, then positioned the embeddable bail and attached the copper flower-design disk. Once all that had dried, I filled in a few little gaps, dried it all some more, and finally fired the piece.

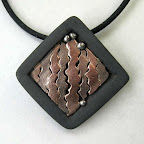
The results were interesting, as shown in the first photo, above. It all sintered just fine. The bail did blister a little bit: not enough to ruin it, but enough that any metal artist “in the know” should be able to spot what happened. But I still think it’s interesting.

There was one small blister on the sintered bronze section. My first thought was that I’d overfired the batch a bit, but then I realized it was exactly over the post on the embeddable bail. Silly me, I didn’t think to capture a photo of that: What I did was to immediately see if I could polish it out. Easy! I’m not done polishing this piece (it was just a spur of the moment creation, not a planned project), but I think the photo I include here (click on it for a bigger version) gives you a hint as to the blistering on the bail (in case you’re someone who uses them too), and to the way it does look like the disk itself will polish up nicely with a little more work.

There’s one other item worth noting: how the bronze in the bail alloyed a bit with the copper on the other side! Look at the side shown to the right in the first photo, up near the bail, and notice the golden-colored patch. Alloying! Again, artistically, I’m OK with its looking like that. But it’s good to know it will happen.

A few days later, I got to wondering, would the bronze wire I sometimes use with such pieces show the same blistering? [Later clarification: I’ve used that wire in the past with pieces made using Hadar’s Quick Fire bronze. That’s a clay that takes a two-phase firing and only mid-fire temperatures and it’s always held up beautifully in pieces fired that way. Here, I’m otherwise reporting on the newer one-phase high-fire clays.]

So I made a simple wire-loop bail out of phosphor bronze (melting temp listed as 1800°F), then took the other (matching) bronze washer and the Low Shrinkage Steel XT disks, and assembled it the same way as I’d done before. I fired that using the same schedule too.

And, again, I noticed a bit of blistering on the bail and, with this wire-design, a bit of fusing across the loops. Again, I think that slightly grainy look is OK. Other than a quick clean-up, I have not yet stopped to polish this one at all. But I decided to post about it quickly because, this time, the main piece shrank much further away from the bail. In its clay state, the loops were pressed lightly down into the piece, but the post-firing separation is visible in the photo. No alloying with the steel though, which is also good to know.

But you have to see the two together to catch what surprised me the most: the difference in shrinkage! They started out exactly the same size, and look how different they are now. The current (as I write this) Hadar’s Cheat Sheet (.pdf) says that, on their own, Champagne Bronze shrinks about 30%, Low Shrinkage Steel XT about 28%, and Friendly Copper about 25%. Combos will be limited, to some extent, by the least-shinkage clay in the mix. But there’s only a 3% difference between LSStXT and FrCu, and it sure looks to me like there’s more than a 3% difference in the results here. What I can feel, but can’t really show here, is that there is maybe a 3% difference in height but it’s in the wrong direction. The one made from copper is a teensy bit thinner (i.e., more shrinkage, not less).

I really do like the results I’m getting with these clays, and the 3-hour firing time is a huge help compared to some of the others. But, with the others (and any of the “older” clays, both precious and non-precious), I think I have a pretty good feel for the shrinkage. With this new One Fire Trio, I’m still exploring….

What are you finding with them? Do leave a comment!

Posted in General Techniques, Learning Metal Clay | Tagged: , , , , , , , , | Leave a Comment »

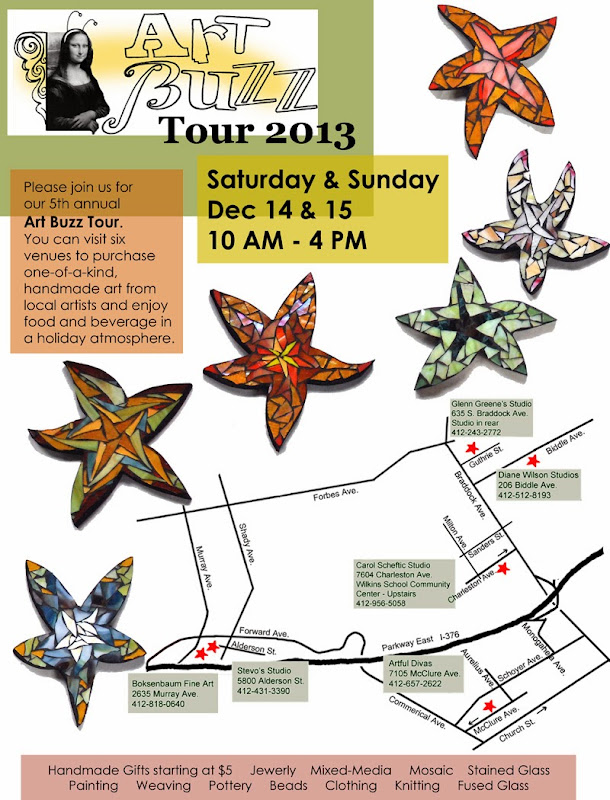
2013 Art Buzz Tour — This Weekend!

Posted by C Scheftic on 2013/12/14

Have you heard the buzz? Six sites! All in the Pittsburgh area’s “East End” this weekend: Regent Square, Swissvale, and Squirrel Hill. And my studio is one of the locations on it again this year.

I’ve got lots of jewelry on offer, plus a handful of other small adornments.

I also have aloe vera plants that need a new home, babies that i repotted from some of the big ones I keep around. (I do work with hot metals here!) BONUS: small ones are free with a purchase of $35 or more (or a discount can be applied to the price of any of the larger ones if that’s what you prefer).

Plus you’re welcome to share some of my cookies and hot mulled cider. (I also got the makings for cranberry-orange frosties but, with all the snow that’s falling, I’ll save that until there’s a request or I run out of cider, whichever comes first.)

Happy Holidays to all!

Posted in Events, Studio | Tagged: , , , , , , , , , , , , , , , , , , , , , , , , , , , , , | Leave a Comment »

2012 Art Buzz Tour — This Weekend

Posted by C Scheftic on 2012/12/03

Have you heard the buzz? It’s even louder this year! Over forty artists! Seven sites! All in the Pittsburgh area’s “East End” this weekend. And my studio is one of the locations on it again this year.

At WSCC (where I’ll be), the Holiday Gift Shop will still be running downstairs, and I am pretty sure that Daviea Davis will have her glass mosaic studio open too, upstairs across the hall from mine.

2012 Art Buzz Map

If you’re in the area, I sure hope you can stop by. To say, “Hello” and “Happy Holidays” at least. If, for some reason, you can’t get yourself there in person, how about leaving a holiday greeting as a “comment” on this blog post. Even having you say just “Hello” or “Happy Holidays” would be much appreciated!

I look forward to seeing / hearing from you, dear readers, so I can extend my best wishes for this holiday season to you too, in return, in a more personal way.

Posted in Events, Studio | Tagged: , , , , , , , , , , , , , , , , , , , , , , , , , , , | Leave a Comment »

Riding a few waves.

Posted by C Scheftic on 2011/02/13

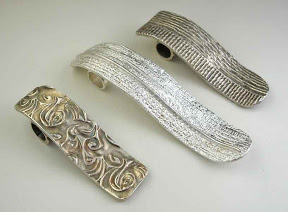
Speaking of inspiration (as I was in my last post) here are a couple photos of three pendants.

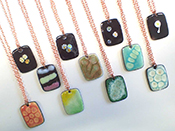
I’ve made a number like this. No two alike, but generally long and narrow and curved with a tube along one concave section to serve as the bail (the part from which you hang the piece).

Where’d the original idea come from? A mix of sources. Having grown up near the ocean, having spent countless hours (as a teenager in particular) at the beach, watching the waves, seems to be one of the (many) reasons that I often think in wave-shapes. (See the toggle clasp at the bottom of my last post!) Having rolled out a number of long, narrow rectangles as I was playing with potential ring-shank designs, I thought to use some for other purposes. Wanting to practice making more tubes, this design is well-suited to using those. Having quickly sold the first few I made, there was incentive to continue. And so on….

But there’s something about those sales. I sell my pieces at a mix of venues: shops, shows, private sales on my own, etc. These wave-strips seem to sell very well at external sites. But I’ve never sold one of these myself!

So, while I see these pieces as fully reversible, I have no clue if my customers see them the same way. And, if they think there is a front and a back, which is which?

Your comments on such matters are welcome!

Posted in Misc. Musings | Tagged: , , , | Leave a Comment »