Continuing thoughts from yesterday’s post, where I said I was prompted to write some notes by recent comments about tumbling on the Metal Clay group on Yahoo, here I am going to try to make a few points about the intersection between design and finishing that I’ll illustrate with some photos of pieces I was making as I was coming to grips with some of these concepts myself. I apologize for the quality of some of the photos; while the last one was taken recently, the first five were all taken years before I even thought about starting this blog.
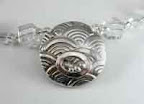 The lentil bead, shown to the right, is the very first piece I ever made using metal clay techniques! At that point, I was focused mostly on the mechanics of construction. While not ignored completely, design was really low on my priority list. I just wanted to make something that worked. This one was tumbled by my first instructor in her rotary tumbler with stainless steel shot. I was perfectly happy with its all-over shine. Well, to be honest, I was utterly thrilled to have made something that could appear that evenly shiny! I did add a slight liver of sulphur (LOS) patina to help emphasize the textured design.
After that, I went on to try making more pieces myself. In general, they had an overall texture of some sort or another, with embellishments or impressions or openings added to that. I tried constructing a variety of shapes.  Eventually, I decided to try making a small “pillow” shaped bead, and my first attempt at that is shown in the pair of photos to the left. The top image shows the piece, with its just-fired look straight from the kiln. By the time I tried this, a friend had found a small kids rock tumbler that we’d appropriated for use with tiny fine-silver loads.
Now, the thing about this pillow bead is that, although there is a bit of a textured design on it, much of its surface is just plain smooth. And shot polishes up a piece by banging on it. The bangs are very slight (I’ll say more about this in my next post, on work hardening) and, while the results of those bangs really are not very obvious in highly textured areas of metal, they seem much more obvious on a large smooth surface. I don’t know: could this be why some people report tumbling their silver for 24 hours or more?! The instructions for the rotary tumbler I now have (see my last post, towards the bottom) say that loads should be done in two hours. Back when I was trying to polish this piece, I think I probably ended up running it for 3 hours or a bit more (checking its progress periodically) and it did get better with more time. But, at that point, I decided it had been beaten up enough. Though there is nothing terribly wrong with the results (click on the photo to get a bigger version that may (or, sigh, may not) make this clearer), it just does not look quite as even as I had gone to great pains to make it. And the unevenness did not jump out at me when it was in the kiln-white stage that I so happily noted (with some white-balance error on the camera…) before I tried to tumble it.
All of which taught me that, while tumbling can be great for some surfaces, it’s not necessarily great for every surface.
So, when I fired the next pillow bead I tried, I did not just plop it into a tumbler. I simply checked that it looked OK out of the kiln, and carefully set it aside. In a couple months, I’d be going to a PMC Guild conference, and I was signed up to take a pre-conference class. I decided I’d take this piece with me, and ask the instructor for suggestions on how to finish it.
Lo and behold, for the class she had a magnetic pin polisher for us to use! When I told her what I was hoping to be able to achieve for this piece, she suggested that tool immediately.
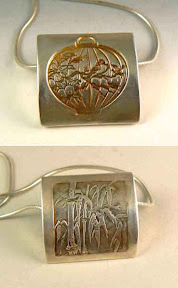 Here’s the thing: with a rotary tumbler, you put pieces in and then check on them periodically. After a couple of hours, in general, they appear done. Until they are done, they are simply not-done. It’s hard to describe, but easy to see. I think that what I’m seeing is that the shot keeps banging on the piece until it’s all evenly shiny; when it’s not done, it’s just not yet even. But with the magnetic pin polisher, pieces go through states. It goes from kiln-white to gray to brushed/satin to reasonably smooth to shiny. Oh, and it does that quickly: 10 to 15 minutes usually gets a piece through the entire cycle! You can just take a piece out whenever it’s reached the stage you like. You can leave it like that, or move on to hand tools (e.g., a flexshaft) to further finish select areas. The creative possibilities are thus multiplied!
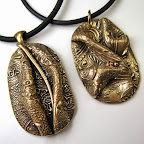
So, for my second pillow piece (shown, right, both sides), I took the piece out when it had reached a nicely polished but still somewhat satin-y stage. I then applied a patina with Liver of Sulphur: I didn’t really care what specific color I’d achieve (knowing that would change over time anyways), but what I did want was to “help the design to pop” from the contrast. On the bamboo side, I just wiped the patina off the high points with a Sunshine cloth, which pretty much preserved the satin finish overall. That was my goal: to give it a look that corresponded to my memory of misty mountainside bamboo gardens from when I’d visited China (in the late 1980s). On the birdcage side, I attacked the high / smooth areas with a Pro Polish pad, which did result in a slightly more polished, shinier, finish while leaving a rougher surface in the hollows. That kind of variation is exactly what I wanted.
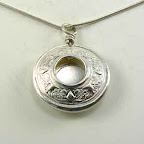 I think that sort of variation is reasonably visible in that pillow-piece photo. I’m not so sure it’s as clear in the lentil bead shown next, to the left, but I’ll still try to describe what I see in it. At that point, I had moved on to exploring the construction of hollow beads with openings in them, varying the size and location of those. Some pieces had little gems inside, others had little textured embellishments. This one simply had a nice, smooth disk. (‘Twas a fluke that resulted from the design I’d pressed into the other side, but I decided I liked it.) What I then wanted was for the inside to end up with a satin sort of look. If I’d put it into a rotary tumbler, first of all, that central disk would have ended up all very shiny but, beyond that, I could not be sure that the shot would be able to polish all the way to the edges inside and that difference might be visible through an opening that large. Again, this is a case where the magnetic pin polisher came to my rescue on the design side! I put the piece in it for (I did not keep notes but assume it was about) 8 to 10 minutes. Once I’d taken it out and rinsed it off, I continued to polish the high points on the outside by hand, using a stainless steel burnisher of some sort (it’s been a while now: I think I was still using stainless steel cutlery at that point, though I may have gotten my first actual burnisher by then).
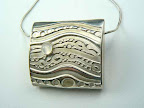 Similarly, with my biggest-ever pillow bead, with one side shown to the right, I did not want all of it all shiny either. I’ve seen a number of pieces made by others using this same texture, and what I wanted for it involved having more contrast between the peaks and the valleys. Magnetic pin polisher to the rescue again! The whole piece was finished to a brushed look, then I went after the peaks and edges with a burnisher.
I know I had my first stainless steel one by the time I made this piece, because I do remember using that burnisher for setting the moonstone. Since I’m admitting all sorts of things here, I will also say that’s only the second stone I ever bezel-set. It was, in fact, almost my first. Until I had the thought that maybe, just maybe, I should try it first on a smaller piece. This “pillow” had been an experiment to see how big of a hollow piece I could make and have it not slump. This one did give ever such a tiny bit in the firing, but it did so in such a way that it really went “with the flow” and looks intentional. Whew! This was back before prices, of silver itself let alone the manufacturing mark-ups, started creeping up. Even then, risking something well over an ounce of silver on an experiment was an adventure! But (true to form, I guess), I digress, so….
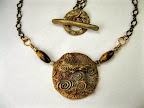
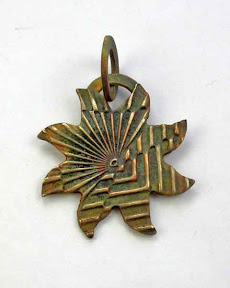
 Let me close with a more recent piece that is another example of how I see finishing and design to interact on so many levels. In the case of this bronze piece, left, the mini magnetic pin polisher would not have been a good option: its pins are so tiny, they’d have worked their way into the design in ways that would have been impossible to remove. But, even more than that, I just loved the coloration that the kiln-gods chose to give this piece on the flat side, the one with the butterfly. Though I don’t often try to preserve colors in my metal pieces, this was one where I really did think that was worth trying. Problem was, the kiln-color on the other side was sort of yucky. It really was calling out to be shined up. But, if I’d put it in my rotary tumbler, that would have affected the butterfly-side too, removing all the kiln-colors and leaving it just shiny-yellow. There’s no way I wanted that! So I took out my rotary tool and started working my way through various attachments on the curved side. This being bronze, I know I started with some radial bristle disks (yellow, red, blue). Since I hadn’t planned to write about that process (I put far more thought into the color on the other side!) I didn’t keep notes but I also know I didn’t do anything special. Which means that, after the radial bristles, I gave it another quick hit with either a silicone or a rubber polishing wheel (most likely, whichever happened to be closest to my hand at that moment or else, since this is a recent piece, I’d be more likely to remember).
But the reason I wanted to end this post with that piece, in particular, is because the thread in the group that started all this was from someone asking about tumbling her bronze because she was not getting the results she wanted from the burnishing technique she’d been using. I’ve not seen any of her results, so I’ve no clue whether or not she’d consider this acceptable or not. All I know is how happy I was with this particular result, myself, achieved without using any sort of tumbler.
There’s one more issue I’d like to address about tumbling. But I’m out of time now. That one will have to wait for tomorrow….
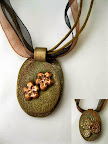
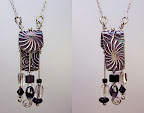 Towards the end of last year, I was browsing through one of “Mary Hetts'” older books, Wrap, Stitch, Fold, and Rivet (© 2008), looking for some tip I thought I’d read in it a while ago, when I was stopped dead in my tracks by a project I’d seen before but had never given much thought to, one she calls a “Bead Shelf Pendant.” In it, she talks about cutting, punching, and heat-coloring copper, but at that moment I suddenly saw a variation on it as a great metal clay project as well. The first photos here show one of several fine silver pieces I made as soon after realizing that as I could find the time.
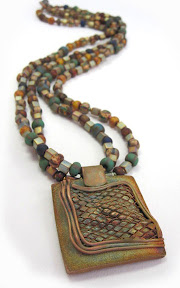
 Since I had so much fun both making and wearing those pieces, at the start of the year I tried a few others. The second photo here shows one of the first bronze pieces I made in this style. Bronze is a less expensive metal to purchase than silver, so I felt I could afford to go bigger (wider or longer) with the ones I made that way. Mind you, working with bronze (or any other base metal clay, such as copper or steel) takes more time which I feel, in the end, pretty much balances out most of the savings on the materials. The final retail price for a base metal piece ends up similar to that of a silver one of a similar design, because of the extra time one has to spend on it. The thing bronze does allow me, however, is the opportunity to go a bit bigger without having the price of a piece go out of reach. The one shown here (reversible, with a “fiddlehead fern” texture) is about as long as the silver one, but easily thrice as wide.
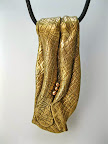
  But, as I was playing around with my first bronze bead shelves, I had another “gotcha!” moment: Foldies! These are also known as Drapings. There’s a great description of the basics of this technique in Hadar Jacobson’s third book (© 2009), Mixed Metal Jewelry from Metal Clay, on pages 104-105. I’ve made a number of such pieces over the years (and posted a number of photos on this blog) but, while I’ve been happy-enough with the ones I have made so far, I have never been totally satisfied with any of the bail designs I’ve used. But, as I was making those bronze bead shelves, it suddenly came to me: make a bead-shelf-foldie…. You’ve already seen on this blog a photo of the first one of those I ever tried (which, for the time being at least, I’m keeping in my own little stash of personal NFS (not for sale) pieces): it’s one of the pieces I submitted with the application that got me admitted to the Pittsburgh Society of Artists.
 Artsmiths of Pittsburgh
 Hoyt Center for the Arts, New Castle, PA
 Portage Hill Gallery, Westfield, NY
 _Open Houses in my Studio
 _Or…contact me about hosting a private party!
