Well, I’d started writing up reports of various aspects of the PMC Guild Conference at Purdue (for any readers, but these were intended in particular for my local guild-chapter mates who were unable to join Debbie, Donna, and me there this year). Then I got distracted by a few other developments. But here’s another of those reports.
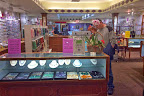
Many of the vendors who sell metal clay and related products participate in a Vendors Hall. Particpating vendors in 2010 included (in alpha-order):
and one or two others that I am blanking on at the moment. (If you can identify any others who were there, please leave a comment to help me out and I’ll be happy to update that list!)
I didn’t buy as much this time as I did in 2008: a little bit of that is “the economy” but mostly ’twas because I’ve done a pretty good job of stocking my studio since then. Yes, there are some items I still want, but either they are pricier things (I have to sell some more pieces to earn the money for those) or they just weren’t available at the show. But I did go for one “splurge”….
I’ve been getting e-mailings from Metal Clay Findings for some time now, but had not actually bought anything from them before last week. They have a lot of interesting fine silver components, plus bronze and copper ones, that work well with metal clay (ring shanks, for example, that you can embellish, and embeddable eyelets and bails), although I’ve remained happy working out ways to make my own. But the thing that drew me in this time was this tool:

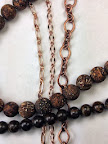
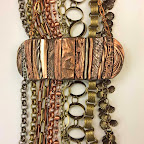
On the right side of the photo is a little piece I made using the tool at their booth with their sample materials. (Yep, I’ll bring it to Clay Play Day this month for local folks to see.) There’s a rectangular copper blank to which iI added a bronze bail and a little bronze star. Both are riveted on: the bail, with a close-top rivet, and the star with a tube-rivet. You use a separate setting bit for each of those, so that’s the extra handle and little round seat; the allen wrench is what you use to swap that part out.
What the hardened steel tool does is to punch a hole of exactly the right size to accommodate either kind of rivet. Not that one can’t do this by hand, of course, but with this tool it is just soooo easy and quick and smooth. In finished products, what I’ll be trading is this: spreading out the cost of the tool instead of charging for my time to do them laboriously by hand. This may come easy to you, and I’m not too bad myself with larger rivets, but these are lovely little jewelry-size ones! Fiddly to work with, but super-easy to set with this device! I’ve been doodling design ideas, and hope to have some samples shortly. (For me, please note, “doodling” means cutting out and building little 3-D models more often than it means sketching ideas on paper, so that step often takes me a while…)
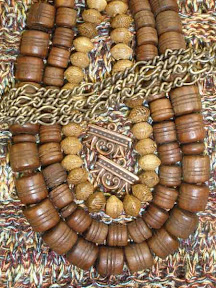
 I also bought a collection of pre-cut rivets and eyelets to use with the tool (though, over time, I will experiment with comparing the use of these versus making my own).
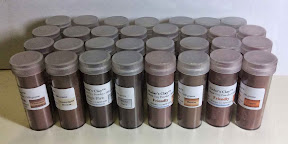
Just for the sake of comprehensiveness, I’ll mention the other “little” things I picked up:
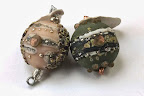
 Since I’d broken down and started buying from Metal Clay Findings, I also tucked in a small sample of their bails and embeddables. I look forward to comparing the use of these to the ones I’ve cobbled together by hand:
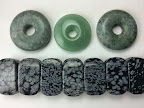
 I’d been perfectly happy using hockey pucks as rubber bench blocks, shown in the upper right of this photo (Go, Penguins!), but I decided to spring for one with a hole in the middle too (upper left). And, rather than have to remember to take brushes from my studio to class sites, I picked up a couple extra of those (one each, brass and steel) so I can just pack a set (probably my older ones) in my class-kit.
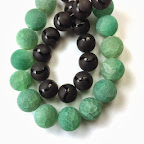
 And then Gem Resources had a little bin with “3 packs for $10” CZs, so I picked up three sets of cut triangles, in three different sizes. I’ve not done much with ones that shape, but figured this was a chance to give a few a try.
If you were there and found any other goodies, please feel free to leave a comment describing them!


") Artsmiths of Pittsburgh
Artsmiths of Pittsburgh") Hoyt Center for the Arts, New Castle, PA
Hoyt Center for the Arts, New Castle, PA") Portage Hill Gallery, Westfield, NY
Portage Hill Gallery, Westfield, NY") _Open Houses in my Studio
_Open Houses in my Studio _Or…contact me about hosting a private party!