Convergent Series

learning, using & teaching metal clay, and other aspects of life

Archive for October, 2011

What constitutes a “fair” price? (part 2 of 3)

Posted by C Scheftic on 2011/10/26

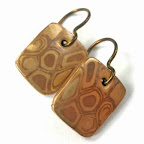
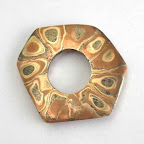
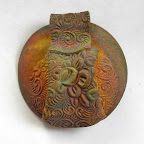
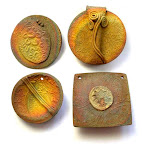
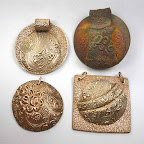
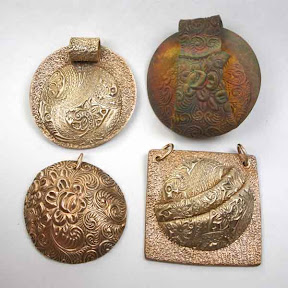
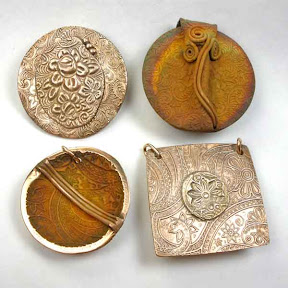
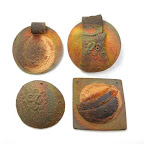
In Part 1 of this series, I raised the issue of how to determine reasonable prices for the pieces I create, prices that appear consistent across various designs and media. This is getting trickier as I have added materials such as bronze, copper, and steel to my repertoire, and thus moved beyond the silver and, occasionally, gold that I started with. In that previous post, I talked about issues such as the time directly involved in various aspects of creation, including that devoted to preparation, firing, and finishing of each piece. In this one, I will address a number of business-side issues: they include some aspects of creation that are perhaps better grouped together under the category known as …

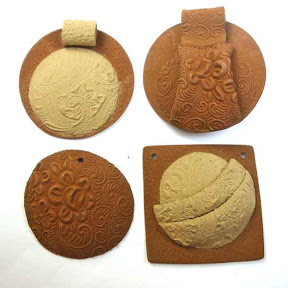
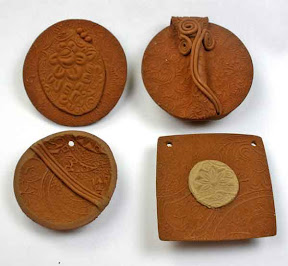
Overhead. Even though the bronze / copper / steel raw material itself costs less than silver, there are many other higher or additional cost involved in working with the non-precious metals. Here are just a few examples from “behind the scenes” with those:

  • Beyond how the firing requirements of these metals impact my time (discussed last time), each piece that size also puts 8 times the wear & tear on my kiln when compared to a similar piece made from fine silver. On top of that, other kiln-related factors like the time and temperature combinations and the oxygen-reduced atmospheres used with these clays will further shorten the expected lifetime of the kiln. While I do still expect the kiln to last for years, I also figure that I need to add a bit more to the price of each base-metal piece so that, when the time comes, I will be able to replace that relatively expensive piece of equipment earlier than might otherwise be expected.
  • Covering the cost of firing boxes and carbon will also add a little bit to each copper, bronze, and/or steel piece too; they are not needed with the precious metals.
  • Each time I use a new kind of box or of carbon, there’s both time and material involved in testing the firing schedule. I should somehow spread that (small but real) cost over a range of subsequent pieces too.
  • I’m still working out which tools to share across the various metals (meaning I have to spend time cleaning them thoroughly each time I switch between the precious and non-precious metals) versus which tools I use often enough that I should just buy another copy of the same one to use with the base metals (and clearly label each so I don’t get them confused, and have to spend time washing anyway). Either way, however, there are small portions of the total cost to be spread across a number of items I’ll make with them.
  • I ended up buying a small refrigerator for my studio too: while there is a nice little bonus in having that to keep some lunch and beverage items cold, I see it as overhead for these pieces because I need to freeze any pre-mixed clay that I don’t use in a single session.
  • For pieces that require extra finishing time, there is also the cost of extra items used for sanding and finishing since they will thus wear out much more quickly. That also adds a little more to the cost of each such item.

That’s not even a complete list of the extra costs, but it’s a good sample of them. Now, none of those involve earth-shattering amounts. But there are other forms of “overhead” to be accounted for with every piece made, regardless of medium, and then every time you add a few cents for this, and then a few more for that because you’re working with base metals, and then you apply the appropriate mark-up factors (e.g., gallery commissions) to the whole thing …. well, the sum-total of such additions simply runs up the final price of any artwork.

(It is probably worth noting that some price formulas treat various overhead costs in entirely different ways. Some approaches do exclude a lot of factors directly, on a theory that goes something like this: If, for example, Ethel’s studio rental is $X / month, while Fred’s studio costs half that and Lucy works out of her home, and they all do comparable work, does that automatically make Ethel’s products twice as valuable as Fred’s, and even Fred’s more valuable than Lucy’s? Instead, all three could charge an appropriate amount for their time, and then pay any rent out of those earnings. If Lucy and Fred are able to work in cheaper spaces than Ethel, then any money left over after paying the rent would result in a “bonus” for finding economical work-space. Even if I go that route, however, I still need to be sure I’m charging enough somehow to cover “overhead” costs out of earnings.)

But that’s enough from me now on overhead for now. Have you encountered any other important factors, ones that I’ve overlooked here, in working with base-metal clays, that you feel drive up their price? Stay tuned, too, because I’ve got one more post dancing around in my brain that addresses a few other issues related to all this. (The big question, as ever, is when I’ll find the time to get those ideas to move from my brain down to my fingers and onto a blog post! It’s likely to be at least a week, maybe more….)

[Update: Yes, well, that “maybe more” was right. I got sidetracked into a variety of other projects in a number of other areas. And, with metal clay, I’ve been trying to work out a number of new ideas. I’ll be discussing a few of those next. I do still plan to return to this topic but, when I didn’t finish it up in October, I’m thinking I may now just put it on hold until after the holiday season. More shortly….]

Posted in Misc. Musings | Tagged: , , , , , | 1 Comment »

What constitutes a “fair” price? (part 1 of 3)

Posted by C Scheftic on 2011/10/21

I sure like working with many of the “base metal” clays (various versions of copper, bronze, and steel). I like the results I can achieve. But I also struggle with how to price these: How do I find that balance point where customers think my prices are fair while I feel adequately compensated?

Now, I do understand the various “formulas” that makers might use to calculate the price for their work. I’m fine with numbers, whether straight from such a formula or even after “tweaking” them a bit. I can figure the cost of the materials, a price for my time and/or an amount for general overhead (rent, insurance, equipment, consumables, etc.), plus a factor for the retail side (to cover commission to a gallery, entry costs for shows, etc.). I will price a number of pieces, sort them by price, compare that to recent history of items that have sold or remain unsold, and look to see if anything seems out of line. I may adjust individual items up or down a small amount: I’ll then bring in a bit more or less on some individual pieces but, overall, I want prices to look both consistent and reasonable.

I have been getting some very positive responses to the look of pieces I’ve made this year in copper, yellow- and rose-bronze, and steel. But a few people have indicated that they would expect those to be very inexpensive, because of the material. I try to explain that the price includes factors for both material and time, and that the time for design and basic construction does not go down for a unique “art jewelry” piece just because the metal itself costs less. At that point, I’ll try to steer the discussion away from price and more into the artistry involved in various pieces.

But, really, there’s more to it even than that, things I don’t tend to go into with a typical customer. (I may cheerfully offer something like, “You’d be welcome to take one of my workshops, and learn what all is involved! This material is relatively easy to work with, and fun, and you’ll see how making a piece can take a number of hours. Give it a try!” If that gets a positive response, then I may add a few more details: “a minute or so of free lesson right now!” Though I aim to keep that light and non-technical, I may point out something like the extra steps it takes to combine several metals in a single piece.) Still, I find myself wanting to think through a bit of what else is involved, to get a better grasp on it myself. I figure I can share some of those details here … and welcome your comments!

Once I’ve figured out what seem to be the most important factors, I can try to figure out how to distill those down for a short response to a potential buyer. In this post, I plan to address prep time, firing time, and finishing time. In a day or two or three, I’ll add a second post looking at overhead costs; and finally (it may take me a bit longer to get to that one) I hope to post about some other factors, like learning curves, brand variations and, perhaps, a few other issues.

Preparation Time. I really like working with Hadar’s delightful clays. Each of those comes as a powder that must be mixed with water before you can use it. This is not difficult, but it takes some time. How much to mix? If you don’t mix enough for a particular session, then you have to take the time to stop and mix up more. So it seems better to mix up a bit more than you think you will need (although you then have to find a way to store the excess, which I’ll address in my next post, on overhead costs). That mixing-time adds to what you have to include in the time it took to make each individual piece: it doesn’t take a lot of extra time, but there is enough to count.

Firing Time. This is probably the biggest issue. Together, those four rose bronze pieces I posted about last week “filled” the firing box in my kiln. Because I need not worry about creating an oxygen-reduced atmosphere when I fire precious metals, had I made silver pieces the same size I could have fit at least four times as many into a single firing. (I could have fit at least twice as many on a kiln shelf (probably more!), and I certainly could have fired two shelves at a time.) And, since these clays must be fired twice, that means I could have fired thirty or more silver pieces in the time it took me to fire those four bronze ones!

(And, this particular issue gets magnified even more when you consider the “overhead” issues involved in all the extra firing. I’ll discuss that further in part 2.)

Finishing Time. Some designs (e.g., inlays and mokume gane effect) are very interesting to see and lots of fun to make, but do require that a lot of time and effort be expended on post-fire polishing to come out looking really great. Other styles (e.g., basic textures) are more comparable in the time they take to finish across all the different products (precious and non-precious metals alike). Still others, however, seem to come out somewhere in between (e.g., various “draped” pieces), and I’m still exploring how best to approach building those so that they are appealing to look at yet not way out on the difficult end of the scale to finish.

Those three aspects are probably the easiest to address, in very simple terms, concerning “hidden factors” in the price of a product. In subsequent posts, I’ll outline a few others. As ever, I welcome comments from fellow artists, students, customers, and other readers of this blog….

Posted in Misc. Musings | Tagged: , , , , , , | 1 Comment »

Trying Rose Bronze (Part 4 of 4 … for now, at least)

Posted by C Scheftic on 2011/10/15

Before I end this series of posts about rose bronze, I’ll note the one major lesson learned (or, more accurately, re-learned) while working with that form of metal clay for the very first time:

Precious Metal Clays (silver, gold) and Non-precious ones (bronze, copper, steel) differ in how they dry! I can’t quantify the difference, but it’s there, mixed in with a number of related factors. With silver, for example, I will often just let pieces air-dry. I will have several pieces under construction at once so, while one is drying, I’ll work on others. If I want to finish a particular piece more quickly, I’ll put it in dehydrator. (I have a very old Excalibur that I use in my studio. For workshops elsewhere, I cart around a hairdryer and a cardboard box with a hole for the dryer nozzle.) I have several mug warmers, but rarely use them.

With non-precious metals, “the word” is that they may not sinter as well if they’ve been air-dried: It’s best to dry them as quickly as possible. When Hadar was here last March, we did use mug warmers in that workshop. I’ve done that with other pieces made since then too: not a deliberate choice, but more because I was rearranging furniture in my studio and didn’t have a good place for the dehydrator during the stretch when I made a lot of other bronze and copper pieces. With these, however, I just stuck them into the dehydrator, like I do with silver I want to dry quickly. Wrong!!! ‘Tis best to keep this stuff right in front of you, on a mug warmer, so you can flip them over frequently to avoid warping. (Silver may warp too, but there’s a difference: either it takes a bit longer to happen, such that it’s easier for me to catch before it gets really bad, or else I somehow work more quickly with the product, such that I’m setting a new piece off to dry and thus checking on previous ones more quickly. I am tempted to believe it’s the former but, since before this I never thought to time it all, I can’t rule out the latter.)

I had to apply some serious repair techniques to several of these, to restore flat surfaces that had warped so much that elements I’d planned to pair up and attach together no longer fit snugly against each other. It wasn’t that difficult to do, but having to re-moisten the warped surfaces and press them between two flat surfaces did take up both time and workspace area that could have been used more productively.

Hadar does say that flat pieces are the most likely to warp while drying but, in this case, even the simple domed piece (lower left) warped slightly out of round. I did not try to repair that. I decided that, by sheer luck, that piece looked fine even if it is slightly oval. But I’ll have to pay more attention to domed pieces in the future too, because there are times when that will matter.

Still, I think the all turned out fine in the end and I had lots of fun making these pieces. Plus, working on them helped to generate some other ideas I want to try out with these clays too. As ever, the question remains: how to find the time to make them! Please stay tuned for reports on that….

Posted in General Techniques, Learning Metal Clay | Tagged: , , | Leave a Comment »

Trying Rose Bronze (Part 3 of 4)

Posted by C Scheftic on 2011/10/14

So far, I’ve polished five of the eight sides, plus just the edge of a sixth. I may or may not polish the remaining three.

The thing about polishing is that it removes all the really vivid coloring that often comes out during the firing. And, although you can still see a bit of contrast between the yellow- and rose-bronze colors, even that is no longer anything like the difference that was there before the pieces were fired. But polishing does give that more-expected “metal” look to the pieces. I like the result of polishing, but I also like the look from not polishing absolutely everything. What about you?

The one thing that is tempting me to polish at least part of the double-drape piece in the upper right position is to check its color. (Or, I could just wait and check this with some other pieces later on.) Because it seems that the “rose” of the domed circle (lower left), as shown on its one fully-polished side, is darker than the “rose” of the two that have some yellow bronze elements in addition to ones in rose bronze (upper left and lower right). Did the addition of the yellow bronze lead to that? Or is it, at this point, just a spurious correlation from insufficient data?

Time will tell, I guess: How might the color of these pieces change over time? Will I see the same effect in future pieces of pure rose bronze, of rose with yellow bronze, of rose bronze with copper, etc.? What if I made several more “pairs” of pieces, with half having different “color” elements attached as I’ve done here, and the other half with elements attached (perhaps riveted?) together after firing? Hmmm, thinking about how to test that has prompted a few new designs entirely in my mind.

That’ll take me a while to get to. In the meantime, I’ll finish this series shortly, with one more post where I’ll share some notes to myself about what I want to remember from the making of these pieces.

Posted in General Techniques, Learning Metal Clay | Tagged: , , | Leave a Comment »

Trying Rose Bronze (Part 2 of 4)

Posted by C Scheftic on 2011/10/13

Returning to the same four pieces I introduced in my last post, the photos here show what they looked like straight from the kiln. All the colors, from the vivid yellow and rose ones to the charred black, are simply what the kiln chose to give me.

Perhaps I should add that the “charred” black is just a “color” — the texture of the metal itself held up just fine.

Notice that, at this point, only the flat side of the square one (lower right in the second photo) really seems to show that I used two different colors of bronze.

The other thing I notice is that the “convex” sides are, in general, darker than the “other” sides. When placed in the firing box, I just happened to position them so all the convex sides faced up (i.e., like the first photo in each pair that I’m using with the posts in this series). At this point, I suspect that positioning, not doming, is the cause of that darkening, but it’s something I’ll try to remember to keep checking in the future.

After taking those photos, it was time to go do some post-fire polishing. I’ll show the results from that shortly….

Posted in General Techniques, Learning Metal Clay | Tagged: , , | 2 Comments »

Trying Rose Bronze (Part 1 of 4)

Posted by C Scheftic on 2011/10/10

As I’d mentioned a couple of posts ago, I finally got around to seeing what it’s like to work with some of Hadar Jacobson’s Rose Bronze metal clay. Shown with this post are the first four pieces I tried.

Let me begin with this question: what is rose bronze? To answer that, it helps to know what bronze is, in general: an alloy of copper and tin. If you put in “enough” tin, the result moves from the reddish “copper” color to more of a yellow or brown that we typically think of as the “bronze” color (as well as giving it the strength and other characteristics of bronze). If you use less tin, and thus more copper, the final product retains more of that coppery-color while still acting much like bronze in general. (Similarly, rose gold is an alloy that contains both gold and copper, such that it there is enough copper to give it that rosy-coppery color.)

So the questions that I had about this product were:
(a) How would it work, in general (would it act much like regular bronze)?
(b) How would it work in combination with other metal clays (starting with the standard yellow bronze, for now, but eventually I’ll check others too)?
(c) What would it look like, in comparison with, and contrast to, copper and bronze?

For my first attempts then, until I was sure of how it would work, I didn’t spend very much time either designing or making the pieces. Then again since I had every reason to believe it would work much like cooper and bronze do, my first pieces involved more than the simple “charms” I often use for testing a completely new product. Still, I did not go much beyond the very basic techniques of rolling, texturing, draping, layering, and doming, though I did try a mix of flat and curved shapes.

Of course, this being me … I did make all four of my first “test” pieces reversible! In the first photo, above, you can see that each of them has some curvature to it, with one side that is clearly convex (like the bottom or underside of a bowl). The second photo, to the left, shows the range I first tried on the “other” side of each one: perhaps concave (like the inside of a bowl), or else flat and layered, or even another convex draped shape. I don’t consider the sides shown in the second set to be the “back” of any piece: I just consider those to be the “other” sides, ones which could easily be worn in front.

Note that, while I used mostly the darkish reddish “rose bronze” clay, three of the eight sides also contain one or more elements made from regular “yellow bronze” too. While the difference in color between the two is highly obvious with pieces in the greenware (dried clay) state, I suspected that they’d end up almost similar after being fired. And I was right!

More on that shortly….

Posted in General Techniques, Learning Metal Clay | Tagged: , , | Leave a Comment »

A Room of Her Own … for a year already!

Posted by C Scheftic on 2011/10/01

Officially, I’ve had my studio for a whole year now, at the Wilkins School Community Center in the Regent Square section of Swissvale, just over the eastern border from Pittsburgh, PA. The photos shows what the then-empty room looked like back when I first took the plunge.


In fact, I got the keys a couple of days before October 1, and spent a few weeks after that moving in, so the exact anniversary-date is debatable. I’ll post a one-year-later update closer to a year from the day I really opened the place to others. But I couldn’t let today pass without at least noting the date.

Still, no matter how I count the days, it’s been quite a year….

Posted in Studio | Tagged: | Leave a Comment »