A Bit of Background (skip to next section if you already know the science behind metal clay firing):
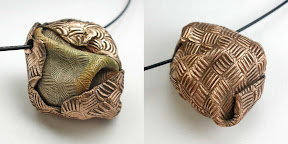
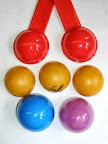
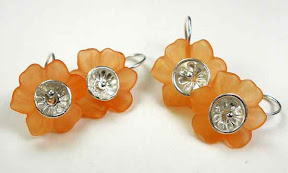
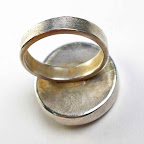
Stainless Steel Bowl with
base metal greenware
(yellow bronze and
burnished brilliant bronze).

|
The firing of fine silver metal clays is easy! Design, construction, and finishing are each more complex than the firing itself. Yes, firing does involve some details but, once you’ve sorted out placement, position, temperature, and time, you may just turn on the kiln and go do something else while the binder burns out, the metal particles sinter, and the load finishes.
Metal clay artists working with other metals, however, know that the firing process for those is much more complex. The difference is that precious metals don’t react with oxygen when they’re heated, but non-precious metals do react. This may cause undesirable color changes (such as firescale from the copper in sterling silver). Even worse, though, these reactions can change and damage the actual structure of the solid metal even if you’re working it at temperatures lower than where they’d melt. (This is not specific to metal clay: you can destroy other metal forms the same way.) Could you just restrict the amount of oxygen during the sintering process? Not exactly! Because the “clay” in metal clay involves binders, you first have to burn off all the binder before the metal particles can sinter. And, to burn off the binder, you need oxygen. In short: at first, you do need oxygen and then, later on, you don’t want to have it.
So each “base metal” clay product provides its own instructions for firing. These offer their approach for how to (a) allow enough oxygen to burn off the binder, while (b) still allowing the metal to sinter successfully. If you understand that as the goal, and like to play around, you can try various ways to make it happen regardless of what any particular manufacturer recommends.
(A couple of years ago I wrote a series of ten posts about my experiences firing Art Clay Copper according to their instructions. In the end, I decided that I was going to abandon Art Clay’s all-open-air approach, and stick to one of the strategies that restrict oxygen during sintering even for that product.)
Now, to the Point of this Post:
For many years, in the instruction manual provided on her blog, Hadar Jacobson recommended a two-phase firing schedule for her clays (which also required a cooling phase in between). It took a long time to complete a full firing cycle (basically an entire work day), but it worked. The length of the firing process did somewhat limit the number of production runs a metal clay artist could complete, depending on how many kilns you had available, but it was even more limiting in relation to most class and workshop settings.
At some point in the last year or so, Hadar started talking about a different approach. This one used something she called pre-firing (a relatively short (half-hour-ish) firing on top of carbon to burn off the binder) followed by one full-scale firing (where you then cover the pieces with carbon and fire for a couple hours to sinter the metal). Best of all, there was no need to wait between the two! Once pre-firing was done, you could proceed straight to the final firing. That pretty much cuts in half the time required to fire a complete load.
Hadar offered two suggestions for doing this pre-firing. In each, you place the pieces on top of a layer of carbon inside an appropriate firing vessel. Then you burn off their binder either:
- on the top of a gas stove burner, or
- inside a kiln.
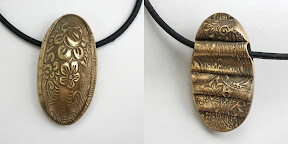
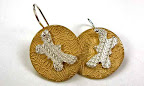
No Flake Foil Box with
six pieces of
base metal greenware &
one repair to re-fire.

|
Regardless of which device you chose to use, you would then cover the pieces with carbon and follow up with a firing that was pretty much the same as her old phase-2 process.
I tried it both ways and, suddenly, I began having all sorts of problems. Yes, they were ones I had seen before, but then only rarely, and they had provided enough clues for me to quickly diagnose any problems and fix them. Now, however, I was not finding ways to fix things. And, hey, the old method might have been long, but it worked for me. So I kept on using it.
But with the latest version of her Instruction Manual, Hadar has stopped even mentioning the old way. And pretty much everyone in the group of teachers going for accreditation in her program seemed to have shifted over. So, sigh, I’ve spent the last few weeks simply trying to figure out open-air pre-firing for myself.
I have not yet mastered the in-kiln method, but it seems I’m not the only one having some trouble with that one. The problem there is that, sometimes, part of the binder on the “down” side of pieces does not burn out, so the metal then cannot sinter. This may stem from the fact that, with no heat coming up from the bottom, the carbon is insulating that area too well. Heat will reach that side of each piece, eventually, once the carbon itself gets hot enough, but that may risk leaving top-sides exposed to oxygen for too long. Another approach, trying to solve that by turning the pieces over during the pre-firing, means handling very hot pieces in their most fragile state, de-bindered but un-sintered. No, thank you! Some people seem satisfied to solve this dilemma by simply firing their pieces twice, once with each side up; but if it takes that much to get them to sinter I figure I might as well just stick with the older method.
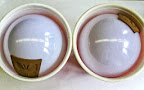
Stainless Steel Bowl with
de-bindered base metals.
(Re-fired piece is the one not black.)

|
But I think I am finally getting the hang of the stove-top method!!! The problems I’d been having were that my pieces were curling and/or cracking, which I knew meant they were getting too hot too fast. Hadar kept talking about turning the heat down if you saw the pieces on fire, but I never saw any flames. She talked about turning the heat down once you saw binder-smoke starting to appear, and I was taking a lot of care to do that immediately. She and the other instructors talked about how long their pre-firings took, and mine were well within those limits. After multiple attempts, I finally figured out that I really did have to heat the pieces on a very, very low flame. Maybe it’s just my stove, but I’m down to a mere fraction of the flame I’d use simply to boil water. Curiously, doing it this way does not seem to take much longer over-all than what I’d been doing before: it takes a bit longer before I see any binder burning off, but the pieces blacken completely rather quickly.
Another problem I’d had was that sometimes one or even a few pieces would not seem to burn off their binder. But I’m getting better at moving the container around over the flame, when that does happens, which seems to solve that.
I am still having the occasional failure (i.e., a bit more often than the old way), but I’m clearly making progress here. All seven butterflies in my last mid-fire load, for example, turned out fine.
Seven Butterflies
with two polished
to confirm sintering.

|
But, there’s something else to consider. In addition to the time that is “lost” to the occasional failure, one also has to actively watch the entire pre-firing process. You can’t do anything else useful. Well, maybe you can; but I sure can’t. It happens too quickly to catch a brief nap (yeah, I’ve been known on occasion to sleep through an entire silver-load); and it takes too much attention to spend time doing fine-finishing on pieces from the last load (which is what I usually try to do during firings). With silver pieces, I never really counted any “firing” time into their cost because I could accomplish other things while that was happening; with these pieces, however, now I do have to factor that into the price I charge for them. (I’d have that same dilemma with the in-kiln pre-fire method.) So I’m still trying to figure out how I feel about all this, but at least I have that feeling of accomplishment over approaching mastery of what currently seems to be the most popular method for pre-firing Hadar’s clays.
Seven Butterflies with
preliminary polishing complete.

|
By the way, even though I really am kind of swamped with to-dos, I finally figured out a way to add captions to photos that would work with this blog! It was easy, once I spent a bit of time on the task. I mention it, however, because there are some other metal clay hints buried in those notes; I’m really hoping to find time to write more about other aspects of firing in the coming weeks….
Oh, and all the pollinator-pieces used as illustrations here will be available at the Western PA Garden Marketplace on April 20. It’s not an art-event: the emphasis is on gardens and landscaping. My being there is just a little “bonus” treat, on top of all the plants and garden supplies. But if you’re reading this from the western PA area, it’d be great if you were to stop by and say “Hello!” on Saturday.


") Artsmiths of Pittsburgh
Artsmiths of Pittsburgh") Hoyt Center for the Arts, New Castle, PA
Hoyt Center for the Arts, New Castle, PA") Portage Hill Gallery, Westfield, NY
Portage Hill Gallery, Westfield, NY") _Open Houses in my Studio
_Open Houses in my Studio _Or…contact me about hosting a private party!
 Life tends to get crazy-busy this time of year, for multiple reasons, some of which I’m sure you can imagine and others would take too long to explain. So I’m just going to list a few events you may want to know about should you be interested in seeing some of my work in person:
 If you find yourself missing any of those, no problem. Just get in touch with me: leave a comment on this post, or message me via Convergent Series page on Facebook (and, while you’re at it, a Like there would be very much appreciated…). We’ll find a way for you to explore my creations!