 Several of my posts so far this month have included “after” photos of my new bronze + copper pieces, some with steel too. The opening shot in my very last post (below) showed a before-piece of “greenware” clay (dried but unfired). But, what happens in between those stages?
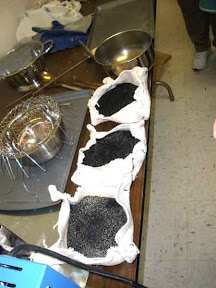
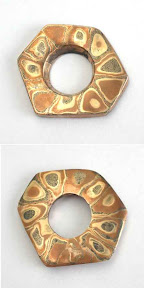
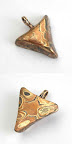
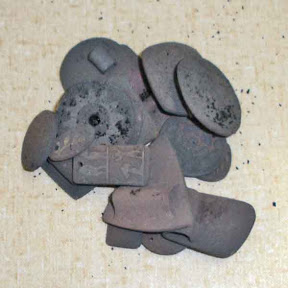
Well, let me tell you, each piece goes through a phase in the middle when it barely resembles what it looks like at either end! The opening photo with this post shows all the pieces from the first round of firing in Hadar Jacobson’s recent workshop in Pittsburgh. No, I did not switch to black-and-white photography for any of the images on this page! This is how they came out of the kiln! Sort of center-left you can see my round “gear” piece. I think those are Deb’s “people” just under it; then Donna’s triangle-shield, upside-down-and-backwards, under that; then maybe the back of Stephania’s obong under that. I’d love to have photos of my classmates’ finished pieces so I could better identify more of them here (hint, hint: I know some of you are out there reading this…), and maybe I could even post a few of their finished pieces while I’m at it (repeat hint).
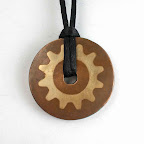
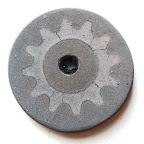 But, since what I have to work with here are my snapshots, let’s talk about the gears to the left. The rumor that eventually developed later was that, because of their varying shrinkage rates, copper inlaid in bronze is less prone to cracking than is bronze inlaid in copper. And, yes, this is bronze inlaid in copper … and it sure shows some cracks!
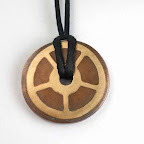
And, of course, this “gear” was a particularly challenging choice for doing it “backwards” because it’s connected the whole way around! Not a crisis, but it means this needed to be cleaned, patched, and refired before I could proceed with it. I did say I was in the workshop to learn, so I’m glad I had the chance to learn about such problems, and their solutions, right there in class!
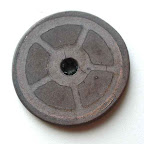 While I was taking photos, I made a point of capturing the other side as well. The “wheel” showed evidence of cracking too. Same situation: all the bronze components were “connected” to each other, so the only way they could shrink as much as they wanted was to open up some gaps in the bronze. Since the fired sections have already shrunk as much as they are going to shrink, any patches should fill in safely without causing more problems. (“Should” of course, is the important word in that sentence… There’s always the chance that it can take several tries to get the patch right … among other things that can continue to challenge too.)
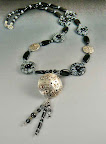
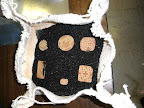
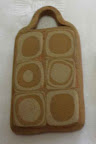
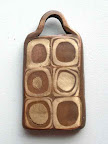
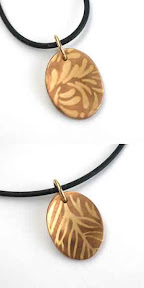
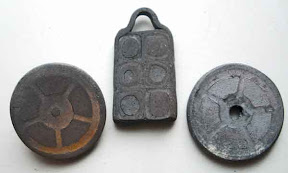 So I patched it, and got it in the next round of firing. The photo to the right shows the next three of my pieces that got fired, all on the second day but spread across different kilns. They are, from left to right:
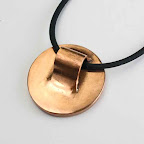
- The first piece I achually made, wheel on front and “hidden bail” behind, that didn’t get fired until the second round;
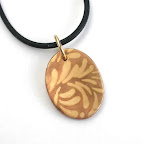
- The fourth piece I made, the one with the canes, whose topography clearly illustrates here the difference in shrinkage rates between the bronze (shrinks more) and copper (shrinks less); and
- The second piece I started (its wheel-side showing here too), the first one that was fired, but now you can see what it looked like after being repaired and refired.
The “first piece” (leftmost in the above photo) was fired in a different kiln from the other two. The pieces from that load were crash-cooled with water, which makes it a bit easier to just use your finger to rub off some of the black coating. If you want your pieces to have that old, rough, and worn look, that’s clearly the way to go. (Sometimes you can find great colors hidden underneath the black, but that will go away if you start polishing.) But if you want a more clean, sleek, and modern look, it doesn’t matter as much. Regardless of how you cool it, there’s still a lot of polishing to be done.
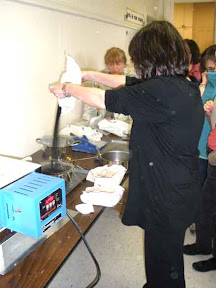
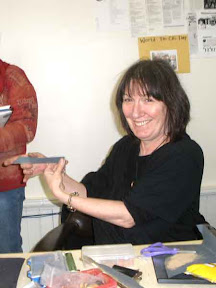
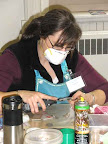 I include a photo of Michelle kitted up with a safety mask since we didn’t want to be breathing any of the stuff that’s being ground off! Here she’s using sandpaper fitted into a slotted mandrel on a rotary tool. I can’t say whether, at this point, she was grinding off the black crud, or grinding the copper down to the level of the bronze, or smoothing out the copper and bronze to a nice, even finish; though she would definitely be using a different attachment if she were matting that perfect-polish back down to a slight satin effect that is useful in working with a patina to accentuate the different metals.
One thing I can say for sure is that this takes a lot longer than what many people do with silver (dump it in a tumbler and go spend your time doing something else constructive). Even for those of us who hand-finish a lot of our precious metal pieces, this stuff takes a lot of time and effort merely to get it to a state comparable to the starting-point with those.
So that’s a heads-up / reality check (depending on whether you are a shopper or a maker, respectively): even though the “base” or “common” metals may come in less than do the “precious” ones in sheer materials cost, the extra time and attention needed to first “fire” and then to “finish” a piece is going to add a good chunk back to its final price….
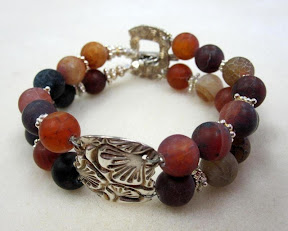
 Other than that, though, it sure is fun to watch each piece evolve! I think Stephania was the first person to finish her first piece. (If she wasn’t actually the first to finish, she was surely the first classmate I caught wearing her initial creation with an aura of success!)


") Artsmiths of Pittsburgh
Artsmiths of Pittsburgh") Hoyt Center for the Arts, New Castle, PA
Hoyt Center for the Arts, New Castle, PA") Portage Hill Gallery, Westfield, NY
Portage Hill Gallery, Westfield, NY") _Open Houses in my Studio
_Open Houses in my Studio _Or…contact me about hosting a private party!
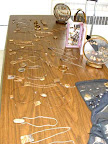
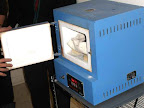
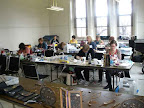
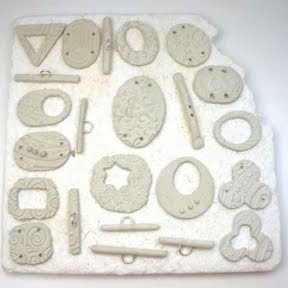 One of the participants last night had a number of questions about kilns for use with metal clay. One of her questions was how many pieces you could fit on one kiln shelf. Well, the answer is, just about as many pieces as all of us made last night! Here’s one of my kiln shelves (the upper right corner has been missing since I first got this shelf…) ready to go into the kiln (though I moved Ellie’s toggle bar, up on the top row, down a little bit just before I put it in).