Convergent Series

learning, using & teaching metal clay, and other aspects of life

Posts Tagged ‘postaweek2011’

Plan – Execute – Be Surprised…

Posted by C Scheftic on 2011/11/26

Another unplanned gap in posting here, sigh. I just did a couple of things that, I’m told, are not what others think of as typical for a grandmother. What can I say? So what if I went to visit the week before Thanksgiving? And spent part of the time helping the younger one with his statistics class? Between my schedule and theirs, my interests and theirs, it sure made sense to me.

For reasons not worth going into, however, on top of that there was also a bit of a problem with ‘net connections. I could get on, but it involved either various contortions (due to short cables instead of my usual wireless set-up) or tiny keyboard (on phone instead) rather than comfortable seating. So I just figured I’d take time to enjoy the people I was with, give thanks for that opportunity, and think about posting again after I got back to my own home. Even though, now, I’m into the crush of holiday-events, I’ll keep trying to find spare moments….
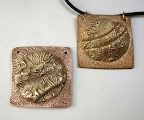
So, given those surprises, let me re-start with something else that surprised me.

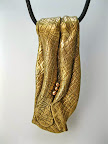
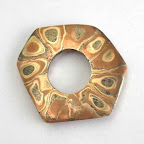
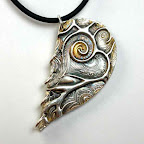
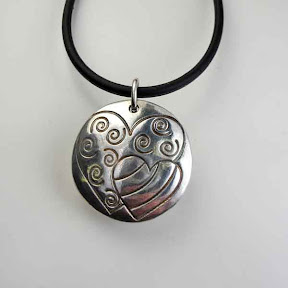
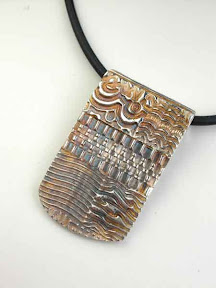
Regular readers of this blog will have already seen the piece in the upper right of the first photo with this post (the one, in that photo, with the black cord). It contains a draped-disk of bronze positioned on a square of rose bronze. The other piece in that photo, in the lower left position and not yet hung from anything, includes a draped-disk of bronze positioned on a square of copper that I finished about a month later (just a few days before I headed out of town).

To summarize: both the draped disks are made from (regular) yellow bronze; the backing disks are made of either copper or (special) rose bronze. At first glance, all the colors seemed fairly close to each other: both yellow-bronzes looked the same, and the copper was pretty close in color to the rose bronze. There was just a tiny bit of “aging” visible on the older, all-bronze piece. I liked how both of them had turned out, so they were among the ones I packed up with chains, beads, stringing material, crimps, jump rings, clasps, plus of course a collection of tools, and headed south on my trip to spend time with “the kids.”
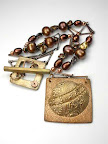
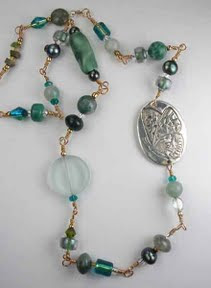
A day or so later, I took out the first one, and chose an assortment of items to hang it from. On multi-strand beading wire, I made little segments of some copper- and bronze-colored freshwater pearls, connected them with chain segments, added one of my hand-made bronze toggle clasps (embellished with a little coil of copper), and connected all the bits together. So far, so good.
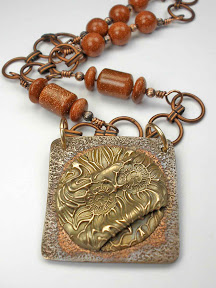
The next day, I took out another assortment to work on. This time, I used bronze wire to build up little segments of goldstone beads, and connected them with bits of chain (different than I’d used the previous day). There were more events going on that day so, once I had what I thought was a good length of that, I went off to play.

On the third day, I took out the bronze on copper focal bead. I wasn’t particularly surprised that the copper had begun to “age” already, darkening more (much more quickly) than had the rose bronze piece. But I did find three surprises: (1) the yellow bronze on this piece had started to darken with a distinctly green-ish hue; (2) there were bits of copper near the draped dome that (I am guessing) must have alloyed with the bronze in that (to a sort of rose-bronze that had not been immediately apparent) and those areas were not aging as quickly, leaving them a bit lighter; and (3) that this difference (alloying?) was also visible on the flat side of the piece, where a huge “central’ area of the texture was slightly lighter too. Once I recovered from my surprise, I decided I was delighted with these changes. I finished assembling everything: two more pieces done and ready to be given the opportunity to go to new homes themselves.
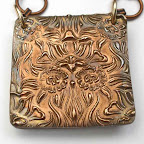
As soon as I got back, these were among the pieces I delivered to the Sweetwater Art Center for their annual (and delightful) “h*oliday mART” show. If you’re in the area (they are in Sewickley, PA, just down the Ohio River a few miles from its beginning in Pittsburgh), do check it out; it’s one of my favorite local art shows each year. It will run from November 27 through December 4. (Well, actually, it opens with a preview party / fundraiser tonight, and I’ll be there!)
Posted in Learning Metal Clay, Technical Details | Tagged: , , | 3 Comments »

It’s always something, isn’t it?

Posted by C Scheftic on 2011/11/12

Sorry I’ve appeared quiet here lately: It’s busy-season once again. Why do the peaks of show-prep and garden-season always coincide? Both spring and fall! Life is pretty full already, on an ongoing basis, but when the crunch-times hit, well….

Anyway, I’ve been busy, happily-busy but busy nonetheless, building up inventory in advance of the special holiday-sales season. And, as I mentioned in several previous posts, working in non-precious metals seems to ramp up the time-commitments even more, with extra time in clay prep, kiln-tending, post-fire finishing, and such.

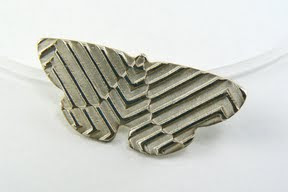
Plus, there are always surprises. I was making a number of “focal beads” in a range of combinations of copper and various bronze formulations, and thinking about how I would hang them. So I decided to stock up on a few hand-made bronze toggle clasps while I was at it. Five are shown in the first photo with this post, above.

Basically, that’s what they looked like straight from the kiln. The more-metallic looking one (upper right) was given a quick polish (with one of the 3M radial bristle disks—if you want technical detail, ’twas the yellow one @ 80 grit) just to test whether it had sintered properly. I’ll get around to giving all of them a proper polishing as soon as I can.

But the thing about time and surprises and such is this: one of the five toggle bars I made to accompany those came out with a big crack. (See the lower-left piece in the second photo, which was enlarged a bit to show more detail.) And, of course, it did so in the last batch I’d planned to fire at the moment using the usual “bronze” schedule. (A copper load is ablaze as I write this, but bronze will melt at copper temperatures….)

The crack is mostly aesthetic. That is, there’s enough still holding that I’m not worried about its breaking. It’s just that I have to patch the crack — which will both make it look right and further strengthen it — and then refire the whole thing. Though that’ll mean hours-more of kiln-tending… Might as well sink time into making a few more piece, and fire them at the same time while I’m at it…. That, of course, is part of the “addiction” of working in this medium!

And then I’ll start assembling elements, deciding which clasps I want to go where, and polish and/or patina them as appropriate to where they’ll be going.

The re-fring is not a crisis. It’s just another one of the seemingly infinite “time sinks” this time of year. When I really want to be out in the lovely autumn light, playing in the gorgeous fallen leaves. Will I ever get far-enough ahead to manage something like that?

[Update: I just added the “oops” tag I’d oops-ily omitted from the original post.]

Posted in Misc. Musings | Tagged: , , , , | 1 Comment »

What constitutes a “fair” price? (part 1 of 3)

Posted by C Scheftic on 2011/10/21

I sure like working with many of the “base metal” clays (various versions of copper, bronze, and steel). I like the results I can achieve. But I also struggle with how to price these: How do I find that balance point where customers think my prices are fair while I feel adequately compensated?

Now, I do understand the various “formulas” that makers might use to calculate the price for their work. I’m fine with numbers, whether straight from such a formula or even after “tweaking” them a bit. I can figure the cost of the materials, a price for my time and/or an amount for general overhead (rent, insurance, equipment, consumables, etc.), plus a factor for the retail side (to cover commission to a gallery, entry costs for shows, etc.). I will price a number of pieces, sort them by price, compare that to recent history of items that have sold or remain unsold, and look to see if anything seems out of line. I may adjust individual items up or down a small amount: I’ll then bring in a bit more or less on some individual pieces but, overall, I want prices to look both consistent and reasonable.

I have been getting some very positive responses to the look of pieces I’ve made this year in copper, yellow- and rose-bronze, and steel. But a few people have indicated that they would expect those to be very inexpensive, because of the material. I try to explain that the price includes factors for both material and time, and that the time for design and basic construction does not go down for a unique “art jewelry” piece just because the metal itself costs less. At that point, I’ll try to steer the discussion away from price and more into the artistry involved in various pieces.

But, really, there’s more to it even than that, things I don’t tend to go into with a typical customer. (I may cheerfully offer something like, “You’d be welcome to take one of my workshops, and learn what all is involved! This material is relatively easy to work with, and fun, and you’ll see how making a piece can take a number of hours. Give it a try!” If that gets a positive response, then I may add a few more details: “a minute or so of free lesson right now!” Though I aim to keep that light and non-technical, I may point out something like the extra steps it takes to combine several metals in a single piece.) Still, I find myself wanting to think through a bit of what else is involved, to get a better grasp on it myself. I figure I can share some of those details here … and welcome your comments!

Once I’ve figured out what seem to be the most important factors, I can try to figure out how to distill those down for a short response to a potential buyer. In this post, I plan to address prep time, firing time, and finishing time. In a day or two or three, I’ll add a second post looking at overhead costs; and finally (it may take me a bit longer to get to that one) I hope to post about some other factors, like learning curves, brand variations and, perhaps, a few other issues.

Preparation Time. I really like working with Hadar’s delightful clays. Each of those comes as a powder that must be mixed with water before you can use it. This is not difficult, but it takes some time. How much to mix? If you don’t mix enough for a particular session, then you have to take the time to stop and mix up more. So it seems better to mix up a bit more than you think you will need (although you then have to find a way to store the excess, which I’ll address in my next post, on overhead costs). That mixing-time adds to what you have to include in the time it took to make each individual piece: it doesn’t take a lot of extra time, but there is enough to count.

Firing Time. This is probably the biggest issue. Together, those four rose bronze pieces I posted about last week “filled” the firing box in my kiln. Because I need not worry about creating an oxygen-reduced atmosphere when I fire precious metals, had I made silver pieces the same size I could have fit at least four times as many into a single firing. (I could have fit at least twice as many on a kiln shelf (probably more!), and I certainly could have fired two shelves at a time.) And, since these clays must be fired twice, that means I could have fired thirty or more silver pieces in the time it took me to fire those four bronze ones!

(And, this particular issue gets magnified even more when you consider the “overhead” issues involved in all the extra firing. I’ll discuss that further in part 2.)

Finishing Time. Some designs (e.g., inlays and mokume gane effect) are very interesting to see and lots of fun to make, but do require that a lot of time and effort be expended on post-fire polishing to come out looking really great. Other styles (e.g., basic textures) are more comparable in the time they take to finish across all the different products (precious and non-precious metals alike). Still others, however, seem to come out somewhere in between (e.g., various “draped” pieces), and I’m still exploring how best to approach building those so that they are appealing to look at yet not way out on the difficult end of the scale to finish.

Those three aspects are probably the easiest to address, in very simple terms, concerning “hidden factors” in the price of a product. In subsequent posts, I’ll outline a few others. As ever, I welcome comments from fellow artists, students, customers, and other readers of this blog….

Posted in Misc. Musings | Tagged: , , , , , , | 1 Comment »

It’s been a while, hasn’t it?

Posted by C Scheftic on 2011/09/29

I just realized it’s been almost two weeks since I posted anything. Sigh… I realized that around the same time it hit me that it’s been just under a month since I last fired up my kiln. Yikes! Where has the time gone?!

It’s not that I’ve been completely slacking off, mind you. It’s more that I do not see this whole art-jewelry adventure as a “full time job” (and do not ever want to see it that way … by which I mean that, no matter how many or how few hours I work at it, I don’t want to ever let it even approach a feeling of drudgery!). So sometimes I decide to take things a little bit easier, to take time to just enjoy what I’m doing. In addition to the things I have posted about in recent weeks, I’ve attended market-shows, visited museums and galleries, and so on.

Mid-month, I held an Open House in my studio, where I did make a number of pieces just to demonstrate the process for visitors. Because those were done to illustrate one or more points about working with metal clay (rather than from some specific design I had in mind), I then just smushed most of them back up afterwards so I could use the clay in a more deliberate manner later on. I did finish and keep a few but, feeling no pressure to complete them immediately, I just set them on my to-be-fired tray for when I had more of a kiln load. I guess I could have taken photos and written about any or all of those activities, but I decided to simply enjoy doing all those things, without thinking about using them here. Same thing with most of the other activities I’ve been involved with recently, like events with the Master Gardeners (as well as with my own garden), spending time with friends visiting from out of town, etc.

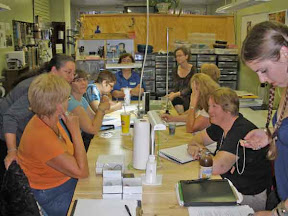
We did have a meeting of the Western PA Chapter of the PMC Guild. That was on Tuesday, out at the Four Directions Jewelry Studio that chapter-member Barbara Kaczor recently opened out in Springdale, PA. The photo shows some of the folks in attendance that evening. (That’s Barbara on the left, standing up and leaning over between Alice and Michelle.) The group had not had a formal meeting in a while, so it was great to get together with everyone again, see what all they’ve been up to, and share inspiration and discoveries. As always, we started out with a Show & Tell session (which included metal clay pieces and traditional metalsmithing, but also reports of surgeries, weddings, and travels… we’re pretty flexible about what gets included!). We dealt with some “business issues” and had some refreshments (for which, thanks to new-participant Susie, I was not the only one who brought a dish containing edible flowers!). We finished up with a lively discussion of making your own textures using the “tear-away technique.”

Since that ran late, and Alice lives a lengthy drive away, she stayed over at my place. We went back to my studio the next morning, right after breakfast. Alice sat down at one table and began designing a bracelet she wants to make, and I spent a bit of time getting studio back in order for working. (It had been in Open House configuration.) I just sat down to start working when Alice got a text from her husband, asking if she’d be back in time to go out for dinner with “the Holders.” Problem is, she couldn’t think of anyone named Holder! After several more text messages, the situation was clearer: the “Holders” is what his phone thought he meant when he tried to type in “the golfers” — meaning the people that he was out with for the day! Once she finished her design, in its preliminary state at least, she decided that it was too complex to finish in one afternoon, so she’d be better off heading home. She said her farewells, and I got back to serious work.

I spent the afternoon and evening making several “trial” pieces out of Hadar Jacobson’s relatively new “Rose Bronze” clay! Though I’ve enjoyed working with many of her other products, that was my first-ever use of the rose bronze. Those pieces are in the kiln now: noting their firing in my log book is what showed me how long it had been since the last time I’d fired it up.
I don’t like to sit right in the room as binders are burning away, but neither do I feel comfortable just leaving the building as the kiln fires. So I took my laptop over to another room in the building that houses my studio, and started this post.

These pieces are only going to get their first-phase firing tonight; when they’re done, I’ll take them out of the kiln. They can cool down on their own, but too much carbon will burn up if I just leave them in the kiln. (That extra fiddling, and multi-phase firings, are among the reasons that creating with the base metal clays seems more labor-intensive than do the precious metals!) It may be a couple days before I find time to fire the second phase. I’ll post results, good or bad, once I see what I’ve gotten and done some post-fire finishing on them. Please wish us good luck!

Posted in Guild, Misc. Musings | Tagged: , , , | Leave a Comment »

Yet Another Ring.

Posted by C Scheftic on 2011/09/17

To understand what I mean when I say (as I did in my last post) that, relatively speaking, I don’t make a lot of rings, you probably need to know how many other pieces I make. I don’t have that number handy, but it’s a lot.

What I do have, however, is another example of a ring I recently made for myself. A few weeks ago, I wrote about one that I said was a practice piece, and that I had plans for additional pieces. Here is one of its successors:

I built it from components, using a design that required multiple firings. The flower was built atop a slightly squared-off band: because the top is heavy, that shape helps to hold it upright on my finger when worn.

The stone was set in a fine-silver bezel. I fired that combo in place as part of the last step (unusual for me: I tend to set stones post-firing), so I had to use one that could handle the heat of the kiln. I chose a lab-created ruby cabochon.

But the main treat, for me, is that all three of the flower-petal layers spin! Do you like, as I do, jewelry that you can play with? (I do try to be discreet about when I do that, but there are moments when it’s just so much fun…!)

Posted in General Techniques | Tagged: , , | Leave a Comment »

Workshop ideas can come from workshop participants too!

Posted by C Scheftic on 2011/08/27

Jane and Rose, delightful students both, have taken several of my workshops. The last time we were together, Jane asked if I could please offer a workshop on making little fine silver books that could be worn as pendants. Yes, of course, great idea!

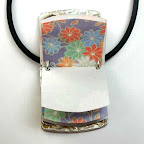
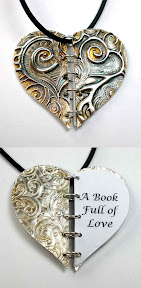
I asked Jane to show me sort of what she had in mind, just to be sure we were thinking in compatible ways. Shown with this post, are two of my simplest interpretations of her ideas. I’m working on a few others too, in between everything else that’s a part of life, but I wanted to let folks know this is in the works via a couple of the simplest interpretations, ones that anyone can do. Yes, anyone: that does include even those of you who keep reading and thinking about metal clay without ever trying it to actually see and feel what it’s like!

Before I offer a workshop, I always make a collection of sample pieces. Partly, that’s so participants will be able to see some variations (to get their imaginations going); but, even more, it’s so I can try to do some things right, and some things wrong—I can be sure of what works how and where I can and cannot safely push the limits of what folks might want to try. So far, I’ve focused on the metal covers, not so much the contents. But I believe it’s the inside that makes this project particularly special: you can put anything inside your special little book that you want. You can put in blank pages, and write little notes on them. You can print something out. Or cut pictures or bits of text out of magazines. Or include photographs. Even little bits of pretty fabric, or would work. So could relatively thin “found objects” such as pieces of plastic or metal trimmed to fit. That part is entirely up to you!

In the piece shown above, I used little bits of origami paper, white on one side with a design on the other; you could add drawings or text to the white side, or used papers with patterns on both sides, or…. Note how it hangs from its “binding” loops: that turns out to be a great yet easy way to handle both the “binding” of the book and how to “hang” it as a pendant.

I made another piece, “A Book Full of Love” (shown both closed and fully open) in order to illustrate how you’d actually have to factor in gravity if you wanted the “binding” to run down the side: because the top loop is in a corner, it’s going to want to hang with that at the top, and the rest will just naturally angle down from that. If you want that look (which, conveniently, also helps to keep the book closed), great: gravity just gives it to you! If you don’t, however, then you’ll have to think of other ways to counteract the way it will want to balance. You could, for example, embellish the whole thing with some additional elements (e.g., beadwork), and then dangle some more beads from the bottom hinge piece to pull it down and into place. There are lots of other options too, of course, which is yet another way in which this is a very versatile project. (I’ll get some more photos up, eventually, though it might not be until after the actual workshop….)

Here are a just few other points, to keep you thinking about this: while the jump rings I used to hold everything together in these particular samples are an easy way to do this, what else could you use to bind the pages and covers together? How many places do you want to loop through (these samples used two sets of holes, and then five, respectively) and how much might that vary depending on whether you chose a different mechanism for your binding (or content for your insides)? Where and how do you anticipate this piece being worn: that is, do you need to make sure the pages are waterproof (or, at least, water resistant)? Jane specifically requested a pendant, so that’s what I’m showing in this particular post, but what else might you do with a little silver-covered book? Or what other designs might you come up with, that used a book-binding sort of approach, but didn’t end up being a book at all?

I’ll be working with Rose and Jane in the next few weeks to come up with a time and place to offer this workshop. We’d love to have a few other folks join us, so please let me know if you’re interested.

Posted in Teaching Metal Clay | Tagged: , , , , , , | Leave a Comment »

Fine Silver Butterflies!

Posted by C Scheftic on 2011/08/21

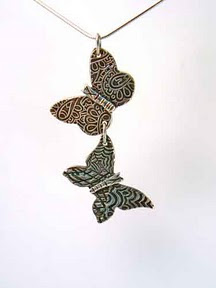
Since I’ve been writing about workshop inspirations, here’s another one: My annual “Fine Silver Butterflies!” workshop is coming up! So many folks signed up for it (this year, I’m offering it down at Zelda’s Bead Kit Company in Bridgeville, PA) that we had to add a second session! With two of them now (both afternoon and evening on Wednesday) I think there may still be a seat or two open, so check it out if you’re interested.

But where did that idea come from? Regular readers of this blog may have picked up the fact that, in addition to my passion for metal clay and related topics, another interest of mine is gardening. And not just my own garden either: I also volunteer with the Penn State Master Gardeners of Allegheny County, which means both helping out in their various Demonstration Gardens, and also helping to prepare materials, give talks, and teach workshops on a range of gardening topics throughout our area.

Before my latest move to PA and joining the PSMG program (as well as visits to Pittsburgh’s Phipps Conservatory with its lovely Butterfly Forest), I lived near a couple of different Monarch Butterfly sanctuaries. The first of those is in Pacific Grove, CA. Later, after a stint in MN, I lived near another such grove in Pismo Beach, CA. (Did you know that those monarchs and their descendants, since they wintered along the Pacific coast, then all summered west of the Rockies? Monarchs that summer all over east of the divide then winter in one specific place in Mexico!) And, although south Florida’s Butterfly World came into being only after I’d headed off in search of cooler climates, when I’d head back south to visit the folks down where I’d grown up, I felt a little bit of relief when I found that sort of development amidst all the seemingly relentless “expansion” there.

All of which made it sort of obvious, to me at least, that when I took up metal clay, I’d then try making some butterflies out of it and even add a Butterflies class to my offerings.

For the workshops, it took me a little while to collect a reasonable number of butterfly stamps and cutters and such so participants would have a nice set of choices, but I’ve been offering this workshop each summer for several years now. (I schedule them then, but am happy to offer this at other times of the year if people request it.) In addition to my usual metal clay handouts, I get some brochures from the Penn State extension office on butterflies and other pollinators, and I provide a few links to information that’s online. (I mention our pollinator-friendly program with respect to bees too, since they seem to be having such a hard time with their colony collapse disorder these past few years, and it seems increasingly important to mention those as well.) Workshop participants are welcome to take brochures home with them if they want, and to look at some of the butterfly (and insect) books I bring along. During the moments in the hands-on time when everyone is working but some chatter still goes on, I provide an introduction to the value, care, and feeding of pollinators.

I usually take with me a good number of lovely but fairly simple examples (such as the ones that accompany this post) plus a couple more advanced samples. I find it interesting to watch the choices participants make: do they stick with simpler designs and go for quantity; do they focus on one piece but add more intrigue and complexity to it (e.g., using shaped drying forms, adding movement mechanisms, constructing detailed little 3-part butterfly-bodies and antennae, etc.); do they make only butterflies or add one or more flowers to hold or accompany that piece?

Even if these fine silver butterflies do not themselves contribute to the important task of plant pollination, it’s my ongoing hope that the wearing of them—along with the relevant gardening information provided in the class—will help to both draw attention to, and spread the word about, the value of these wonderful little creatures in real life.

Posted in Teaching Metal Clay | Tagged: , , , , , , , | Leave a Comment »

Where do other workshop ideas come from?

Posted by C Scheftic on 2011/08/13

I sure do think that it’s loads of fun to wrap strips of clay into cylindrical shapes … and, then, fire them so they turn into sturdy but lovely metal tubes! Do you? Have you tried it? Would you like to come to a workshop and make a few?

One fairly easy thing—something even an absolute beginner can do—is to overlap the material as you twist it around. This gets you a shape I think of as a “lapped cylinder,” one that’s open at both ends. Depending on the texture / design you have chosen, the pattern can remain the same along the full length of the cylinder (upper tube in photo to the right), or it can vary noticeably as you turn it around (lower tube in upper photo at right).

You can hang one or more of these cylinders from some fancy ribbon and you’ll have your very own one-of-a-kind piece of art-jewelry! You can use ribbon just as it comes from its package, or you can use any of a range of braiding and/or beading techniques to make it fancier. It can be as quick and easy, or as elaborate, as you want it to be.

(Not shown in that photo is the way you can even use a matching tube as part of a toggle clasp! I’ll write about bracelets again in a little while, and show that then.)

Cylinders that Can Spin. Little CylindersAn interesting variation on the cylinder involves capping one end and putting a small hole in that, just large enough for a piece of wire to pass through. Then, you can use a headpin (I often make my own!) to either: make a wrapped loop so you can hang the whole thing from an earwire (first photo to the left) or even use a headpin that’s long enough so you can bend it directly into a hand-made earwire (second photo, to the left). Though I illustrate only the second approach with additional beads here (I used crystal and glass), it’s possible to include them (or not) with either style, as you desire.

All of the cylinders described so far are possible outcomes for the workshop I offer periodically called Simply Stupendous Cylinders. Where did that idea come from? I wanted to find a way to offer a shorter, simpler version of a couple of my other favorite projects.

(1) Silver Spools involves another great project. It’s also appropriate for beginners, while those with prior metal clay experience will often have the chance to learn some new techniques. But the strategy used to construct spools just takes a bit longer to complete than does that for simple cylinders. Spools also use up some more material. So I like to offer the simpler version sometimes too, for those who want to try making some tubes but at a slightly lower cost.

Spinner Twists(2) I also love making and teaching others to make “twistie” earrings (or pendants) like the ones shown to the left here. I like their twisted shape, and I especially like the way they can be made to spin on their handmade ear-wires. Surprisingly, however, they are much harder than they may look to make! The Do the Twist workshop where we make these is one of the few I teach involving silver metal clay that I do not recommend for absolute beginners….

Here’s why: The “open twist” shape of this construction is just incredibly fragile in the greenware shape. The end result is sturdy enough, but even the slightest “wrong” move as you do any finishing or cleaning prior to firing can cause a “twistie” to snap into pieces. Then you have to decide: stick them back together (and risk snapping it somewhere else in the process), smooth off the ends of the pieces and just end up with shorter twists (though that smoothing can also lead to more breakage), or rehydrate the clay and try again another day (since, though no clay is lost, it still takes time to get it workable again)? That’s just not a set of choices I want to foist on metal clay beginners! You need not be an expert to make these, but I do recommend waiting until you feel comfortable working with metal clay in both its moist (lump clay) and dried (greenware) states before you tackle this approach. And the cylinders-class is one great way to gain the relevant experience.


If you’re reading this note within about a month of when it was first posted, you can look over to the right sidebar to see when I’ll next be offering the relatively quick and easy Simply Stupendous Cylinders workshop in my studio (in “Regent Square” in western Pennsylvania, where Pittsburgh, Swissvale, Edgewood, and Wilkinsburg intersect…). If you’re interested, just let me know that you want to sign up for it.

If you’re reading this more than a month after it was first posted, you may not see it listed on my evolving workshop schedule. But, at any time, you are welcome to request any of my workshops (regular ones or something special), including the ones discussed here. I’m always happy to offer any of them (at my studio or even at your site) as long as I know there are folks interested in taking them!

Posted in Misc. Musings | Tagged: , , , , , , , | Leave a Comment »

Where do workshop ideas come from?

Posted by C Scheftic on 2011/08/07

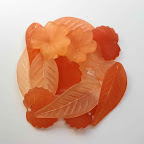
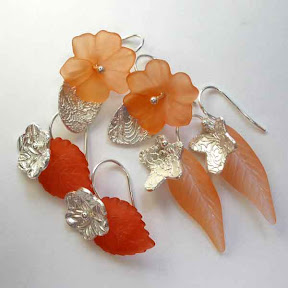
I was over at Zelda’s Bead Kit Company a week or so ago, and noticed a box with these cute and colorful little Lucite beads. I think they’re so adorable—with several different leaves and flowers and butterflies—and I just couldn’t decide which color or design to buy.

How could I justify getting a whole collection of them? Even a single strand of one color and design contained more than I’d be likely to use myself. Why? Well, while I may make “similar” pieces in a “series,” I don’t go around making lots of multiples of the same design. So I rarely use lots of the same kind of bead.

But … I got to thinking, in workshops, my participants are encouraged to take my ideas, demonstrations, and samples as inspiration and then make something that adds their own special twist to it.

So … could I justify buying a collection of these in different designs and colors, and offer a workshop where I’d make these available as materials? Clearly, given the presence of these photos, the answer was, “Of course!”

Garden Delight Earrings is now on the schedule as one of the workshops I’ll offer in my studio at the Wilkins School Community Center soon after the fall series opens. This one will be on the evening of September 21. Though returning students are certainly welcome, this is one of the classes I’ve designed as a super-easy one for beginners. And because the silver elements themselves are likely to be relatively small, the materials fee for this one should also be very affordable!

Posted in Misc. Musings | Tagged: , , , , , , | Leave a Comment »

A tiny bit of progress…

Posted by C Scheftic on 2011/07/25

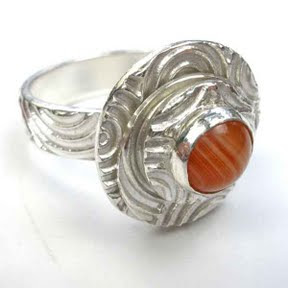
Spinner Ring with Red Lace Agate Cabochon.

OK, to be honest, I made this ring months ago. But the recent progress–finding a bit of time to do something, anything, with metal clay again–involved adding the red lace agate cabochon to it.

The original ring was one of my “experimental construction” trials. The silver part of the ring actually includes four stacked disks. The one on the very bottom (not visible in this photo) is there solely to hold onto the ring shank. The next one up (the largest one, visible in this shot) forms the base of the design. The third one (hanging sort of low in this photo) has a hole in the center (not visible here) that lets it spin around a hidden central post: some people might therefore call this a fidget-ring because there is something to fidget, or play, with. The fourth disk is solid, and serves to hold that third (spinner) disk in place.

The part of the construction that was experimental involved using the spinner disk at all: Figuring out how to stack everything so it would both hold together and allow just-enough movement. Now that I’m more sure about how that works, I have plans for additional pieces, ones where the spin-able disk is much larger and more elaborate.

In the meantime, I thought this first trial piece needed something … somewhere. Looking at a few 8 mm red lace agate cabs t’ohter day, it struck me that this one——with its ever so slightly curved banding——would go well with the texture on the silver here. [So I added a little dollop of very thick metal clay paste (laced with a bit of lavender oil) to the top, positioned a fine silver bezel cup on top of that, and fired it into place. (original sentence expanded to this on 7/28)] Then, of course, I had to re-polish everything. Finally, I was able to add the stone. I’m happy with the result and, even if it’s just a simple little change, it is something at last!

Posted in General Techniques | Tagged: , , | Leave a Comment »

Edible Flowers, once again!

Posted by C Scheftic on 2011/07/22

OK, I spoke too soon with my previous post: There was one other major event to consider!

Last night, once again, was the ever-wonderful, 11th annual, Edible Flowers Food Fest, sponsored by the Allegheny County (Pennsylvania) Parks Department and the Penn State Master Gardeners of Allegheny County.

The speaker’s topic this year was how to establish an Edible Flower Container Garden. While the plants discussed and demonstrated could be use in either large or small spaces, the use of a container garden is one way to encourage others to get started with growing flowers to use in meals themselves, not only as decorations on the table.

My own major edible-flower contribution was having spent several days last May collecting violet blossoms from my (somewhat disastrous but healthily organic) yard and freezing them into several flower-dense ice rings (for the serving bowls) plus hundreds upon hundreds of individual ice cubes (for the drink glasses). Luckily, my friend Susan agreed to take several bags of my ice cubes to store in her freezer until the day of the event, thus lessening the amount of space I had to devote to them in the interim.

I was also one of several dozen Master Gardeners who, in addition to contributing flowers and other edibles, helped to prepare the food on one or more of the four days in advance of the event, served the goodies, and helped to clean everything up afterwards. A long but rewarding week!

A special highlight of this year’s event was the release of Denise Scheiber’s lovely new book, Eat Your Roses … Pansies, Lavender, and 49 other Delicious Edible Flowers. (It’s published by St. Lynns Press in Pittsburgh, PA.)

Of course, we call it “Eat Your Roses” for short. Denise is a horticulturist and greenhouse manager with the Allegheny County Parks, and is the person who initiated and continues to organize “our” great Edible Flowers event into a delightful fund-raiser. If you know anything about the history of the Edible Flowers Food Fest (or, if you don’t but buy the book), you’ll know why Denise chose roses to lead her parade of edible flowers! In short, her Rose Petal Ice Cream (which led to the whole EFFF event) is superb!

Along with some basic information on which flowers are and are not edible, on gathering flowers and saving or preparing them for use, plus some basic sources and resources (including the central number for the Poison Control Center just in case someone doesn’t heed all the appropriate advice), the book has one basic page for each of the 52 edible flower types Denise has selected. She doesn’t provide detailed information on growing them (that information is available plenty of other places for any plants that interest you), but she does include a photo, some important aspects of each plant’s nature and general appeal, information on their sensory impact, and a number of suggested uses. All of those give great clues as to which ones are likely be of most interest to you. She also provides about 30 pages of detailed recipes, some with extra variations, to get you started with ways to incorporate edible flowers into your cooking. Once you’ve tried those, you can go on to experiment with adding them to your own favorite recipes. Bon appetit!

Posted in House & Home | Tagged: , | Leave a Comment »

Foil-Firing Base-Metal Clays

Posted by C Scheftic on 2011/07/06

One question that seems to keep recurring (everywhere from individual conversations to the big, international Yahoo group on Metal Clay) involves what people use for firing their various copper, bronze, and / or steel clays, so I decided to write a bit about what I’ve been doing.

At first (~2008) I used the stainless steel “steam table” pans that were the original suggestion for this. The clays fired OK (i.e., the metals sintered), but the pans flake black crud. (I’ve seen hints that the technical term is that they “spall,” though I know that word with a slightly different connotation, so I’m not sure…) Anyway, it’s not a crisis, but cleaning it up is just one more little thing to tend to, and I’m seeking to simplify this process as much as possible.

Later on, a number of ideas for other, alternative firing vessels started to circulate. Some people fire in used metal cans (i.e., reusing the kind food comes in, which would mean having the inner plastic linings burn off as you fire them; and, while cheaper than the steam table pans, they still flake). Others suggested building vessels out of fiber blanket. Neither of those held much appeal for me: I never tried either one.

Last winter and spring, Hadar Jacobson blogged about several other options, such as building a frame out of kiln posts, drilling an opening into firebrick, and building a box from ceramic cloth and T-pins. I tried the first and third of those. The posts are easier to find, the cloth is easier to use, but neither quite fit my “simplify” goal. Hadar also talks about working with several options in the instruction manual she provides. (Aside: Her manual is useful even if you’re using other copper or bronze clays! You may have to adjust specifics of the firing schedules to fit other products, but Hadar does a great job of explaining in a simple way what’s going on, what you want to have happen, and what might be going wrong if you encounter problems.) In the past year, also, several manufacturers came out with a range of fiber or ceramic firing boxes, but at least the ones I investigated appeared somewhat high-priced to me. (Or, perhaps a better way to say it is that the ones I checked seemed high for my budget for this, so I just stopped hunting. If you have found any well-priced ones, do let me know!)

Right after Hadar was here late last winter (when I gained motivation to do more with these non-precious metal clays) I decided to try something Hadar had not discussed, and to invest in some No-Flake Firing Foil. (I got mine from CoolTools.) That’s what I’ve been using quite happily now for the last few months. It does take a little fiddling-with before the first time you use it–you do have to fold it into the box shape–and then you should fire some test pieces to verify the temperatures to use–which you should do with any new firing vessel you try (or new kiln, or new carbon, etc.). But after that, this kind of box is both very easy and much more affordable than most of the other options.

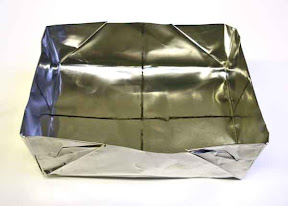
The first photo with this post shows a newly-contructed firing pan before its first use. The foil comes with instructions on how to fold this particular box, and there’s a video available on the product-page. From my (somewhat basic) knowledge of origami boxes, this does seem to be a pattern that yields a relatively large-volume basic box from a given amount of material, so I did not try to second-guess the instructions there. But I will note two things about the instructions….

(1) They provide finished dimensions for various sizes of foil one might start with, but there’s no reason to limit yourself to just those. Make a box of whatever size will fit the foil you have and the size of your kiln. (Be sure to leave room for air to circulate all around the box!) Try a few paper models first, if you don’t already have experience folding boxes, so you see how it works and get a sense for the size. But, here’s the trick: the instructions list only sizes for rectangular boxes because that’s what you want to build. Not a square!

Any rectangular box will have a sort of “flap” of material that gets folded over the short edges and part-way around the long ones. (You should be able to see it on the photos with this post.) A square one won’t have that flap. You want the flap for two reasons:

  • Those “flaps” seem to increase the stability of the box, and
  • You can fold up the corners of the flaps on one long side of the box to mark the “front”–something that’s useful when you’re putting a carbon-filled box into your kiln (and especially important with front-loaders, because you don’t want to position any pieces along the un(der)heated front edge).

(2) The instructions and video use the traditional origami trick of making two folds at the very start that you just open back up again. They simply mark the center of the sheet. If you can find and mark the center-lines yourself, you can start with that rather than those two folds. That’s why my “new” box (above) has black ink lines, rather than folds, down the center. Why does that matter?

Well, some people report that these boxes only hold up for a couple of firings. Mine have held up much longer. The one shown here has been through several dozen two-phase firings, has not been treated with any particular care, and seems to be holding up just fine.

When pressed for more information, those reporting early failures say that their boxes seem to fail along the folds. Not necessarily the center ones in particular, but along folds somewhere. Now my theory is that they are not failing after, say, two or three or four firings: I think they are beginning to fail with their very first use, but the problem only gets big enough to see after several more. If you put a hole in the foil while folding it, it will get bigger with each firing, through the heating (expansion) and cooling (contraction). So the trick is to not put holes in the foil to begin with!

Thus, I chose to not make those first two folds, which must then be reopened. You’ve got to mark the center line accurately or the box won’t come out with everything lined up right, and doing it via that fold is an easy way to mark it. So either be careful folding and unfolding those lines or, if you can find both centers another way, do that.

Then, proceed with the rest of the instructions. Crease smoothly, but not so harshly that you rip little holes in the edge. Unfold smoothly too, also with care.

And, then, enjoy the treasures that emerge after being fired in such a box…

Please leave a comment if you’ve found anything useful in this post! It’s great to hear from readers. (I can see from my “blog stats” that you are out there! But comments offer even more motivation to keep on writing these notes….)

UPDATE: This box lasted for seven more months of regular use! Since this topic keeps coming up, and I keep pointing folks to this post, I’ve decided to add a link to my follow-up post.

Posted in General Techniques, Technical Details | Tagged: , , , , , | 11 Comments »

2 half-days, 6 people, 52 pieces …

Posted by C Scheftic on 2011/06/26

… and I forgot to take photos!

On Thursday, it was great to have several folks came over just to use my studio as a workspace. Then, on Friday, I taught a small semi-private introductory workshop.

And everyone was very productive, as you may be able to guess from the subject-line of this post.

The thing is, I had my camera with me, but everyone (including me, myself) kept me so busy that I only thought to take one quick snapshot, after everyone was pretty much done on Thursday, then not even that on Friday, neither the people nor their any of their many, lovely, silver pieces (lentil beads, domed pendants, foldover pendants, earring components, charms, and more!). But, since I had my camera with me, I stuck it in a little black case I have for it, and put that into my pocket as I headed off to the Summer Music Festival sponsored by community radio station WYEP in a local park that is tucked into a curious little space (called Schenley Plaza) between Carnegie Mellon University, the Carnegie Museums of Art and Natural History, the Carnegie Library, and the University of Pittsburgh. (The city actually tore out a parking lot a few years ago to install a public park area!)

With a series of bands playing, an array of vendors, and lots of general socializing, etc., I just didn’t think to take photos there either. But I did manage to lose the camera! Somehow it fell out of my pocket. I didn’t even realize that until well after the first big rainstorm of the evening. (The band playing a few minutes before that started had commented on everyone just sitting around in lawn chairs or on blankets as storm clouds gathered; but they seemed stunned as the downpour began and most people just stayed right where they were, popping open the umbrellas they had brought!) Anyway, on top of that, I only noticed that the camera had gone missing after sunset, after most of the park had gotten pretty dark.

We spanned out in different directions and, amazingly, my friend Lyn (thank you!!!) still managed to find that little black case with the camera inside, spotting it (in the near-dark) somehow underneath a folding chair (and thus relatively dry) about 20 people away from where we had camped out. (It must have fallen out of my pocket when I got up to wander over for some browsing in the crafts market along the east side of the venue: that’s the only time I headed off in that direction, and I was not sure of the exact path I had taken to get there.) Miraculous as that was, the camera did not acquire any additional photos while lying there in the dark. So I still have only words (and a few numbers) to use to illustrate all those events. But they were lots of fun!

Posted in Events, Photographing Jewelry, Studio, Teaching Metal Clay | Tagged: , , , | Leave a Comment »

Follow-up re Late April Bracelet Workshop

Posted by C Scheftic on 2011/06/10

I said I’d try to get to it eventually, and it’s only taken about six weeks to get around to trying to organize some of my workshop snapshots. This shows a happy crew on the second evening of the custom bracelets session at Zelda’s Bead Kit Company at the end of April.

I tried to get some quick snapshots of the final results. If you were there and want copies of the ones I took of you, please let me know. I’m not sure if it was the wine, or the lighting, or what, but there were a lot of rather blurry shots from that batch. Which is a real shame, because the results were fabulous.

I was able to find a small section of one that did a decent job of showing Ellie’s creation: click on the small image at the left if you’d like to see a slightly larger version of that one.

To illustrate that all the fine silver components can be made to be fully reversible if you want, I’ll close with a shot of one of the pieces that I made during various demonstrations (taken later, once I was back in my studio with better lighting) with little inserts showing the reverse sides of those elements. (As always, click to enlarge the image.)

Posted in Teaching Metal Clay | Tagged: , , | Leave a Comment »

Another curious little surprise.

Posted by C Scheftic on 2011/05/25

I noticed something in my studio yesterday that, once I got over the surprise, did actually make sense in a way I hadn’t thought about before.

In several other posts, I’ve mentioned that I like making pieces where I weave together bits of metal clay that have been specially treated so that the resulting dried “greenware” remains flexible.

Well, I recently made several pieces using that technique applied to copper, bronze, and steel clays too. I’ll post about those pieces eventually, I’m sure, but it’s the leftover materials from those that are the focus of this post.

With silver metal clay, it’s fine to just leave lying about the dried greenware (whether it’s of the hard or the flexible variety). Dried pieces can just sit there waiting to be fired, and extra bits of dried but still flexible greenware can be left alone waiting to be used in some future project. (Leftover moist clay should be sealed up securely, so it remains moist for future use. Care should be taken with leftover moist clay to prevent it from becoming moldy, but that’s not my point here either….)

With copper and bronze clays, you can leave dried pieces around for a little while, waiting to be fired. Maybe not as long as with silver, since the outer layer will begin to oxidize (tarnish) eventually, but it’s not like you have to rush to get the stuff into the kiln. (Besides, since you can fire fewer of these pieces in a single load than you can with silver, it doesn’t take as long to accumulate a “full kiln load” as it does with silver … though sometimes it does take me a while to find the time to tend to the more complex firing schedules with these clays.) The same seems to be true of stuff that’s been treated to form flexible greenware. It will remain flexible and usable for some time, though not forever. Moist clay should be sealed up very tightly: in addition to preventing evaporation of the moisture in it, you also want to reduce any possible reactions from exposure to atmospheric oxygen and pollutants. Luckily, freezing of any of the moist or dried clays in this family seems to help reduce the oxidation that can form as a result of even limited exposure.

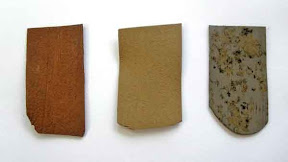
But steel, well, that’s a different beast. It doesn’t just tarnish, it can actually rust, so finished pieces require some extra treatments to help reduce that. But here’s the bit that surprised me when I first saw it, but not once I’d thought about it: specks of rust can form all over any pieces of flexible greenware that are left lying about! Even if it’s only been for a few days, the trick to flexible clay is that it never really dries out and, of course, damp steel will rust for sure….

Shown below are “left over” pieces of flexible greenware. In order, they are: copper, bronze, and now-rusty pearl gray steel. Sigh.

I guess I’ll have to try freezing any leftovers from the next batch I test out, to see how long that holds up.

Posted in General Techniques | Tagged: , , , | 2 Comments »

A different “front” versus “back” question.

Posted by C Scheftic on 2011/05/20

To me, this piece (“Bronze Drape #2”) is clearly fully reversible. On the “convex” side, you can see where the bronze clay was casually “draped” into an interesting form. On the other side, a texture covers any cavities. Either side could be worn towards the front.

The “drape” side was polished to a nice satin finish.

The “texture” side was left as it came from the kiln: the colors are just what this piece decided it wanted to have (as maker, I have no control over that) and, though they are not guaranteed to stay the same over time, they could well remain like this for quite a while.

So here’s the question for this one: Do I leave the texture-side alone, or do I polish it? If I leave it alone, I can’t guarantee how long that finish will last. If I polish it, it will lose all the colors and end up a monochrome just like the “drape” side: that decreases the variations, both now and over time, but does produce something that is more stable over the long run.

Now, if I were keeping this piece for myself, I know what I’d do: I’d keep the “rustic” look for now knowing that, if/when it did change in a way I didn’t like, I could always just polish it then. (Or put it back in the kiln to see if any nice colors might reappear on a subsequent firing: something that is totally unpredictable.)

But I don’t intend to keep it: it’s going up for sale in a couple weeks. (By which I mean, a gallery will be trying to sell it on my behalf, so I won’t be able to “explain” the finish myself.) I’m still tempted to leave it like this, but I could be talked into polishing it if you thought that would be a significantly better approach here.

Please leave a comment!

Posted in Learning Metal Clay | Tagged: , | Leave a Comment »

Time for a little R & R….

Posted by C Scheftic on 2011/05/13

I’ve just had “one of those” weeks. The sort of thing where there’s not really anything going on that I might call a crisis, just one where for various reasons, and with several looming deadlines, everything seems to be a lot more complicated and/or take much longer than I’d’ve ever expected. Thus, no time left for blogging. Sigh….

So it was great when Rachell and Ramona came over for some workshop time yesterday afternoon. ‘Twas a “vacation day” for them, and their relaxed holiday mood turned it into a wonderful little break for me too.

I did manage to capture a few images of the twelve (12!) pieces they finished (though OK, some of those will go together in pairs or threes, so we’re talking six final products. But five of those sets are fully reversible, so you could say that gets the count back up to eleven! That’s great for four hours, don’t you think? (And that doesn’t even include the three other pieces they got started and will finish the next time when, hopefully, yet another sister (Renee) will join in on the fun too).

The reason why I’m rattling on about numbers is that I know a number of those were made with the intention of being gifts, so I don’t want to give away any secrets by posting my snapshots of them. All I can say is, if you’re a friend or family member on their holiday gift list, you should hope that you’re one of the ones for whom these are intended…

Posted in Teaching Metal Clay | Tagged: | Leave a Comment »

If you’ve been reading this blog for a while…

Posted by C Scheftic on 2011/05/02

… you may notice that I just changed its visual “theme.”

I had been using a WordPress theme called Garland, but I just switched it to Andreas09. I’m not sure about this one: much as I like “silver” in jewelry, I’m not a big fan of “gray” as a decorative color in other settings. But this theme had enough other features that I did like, so I decided to give it a try.

Why? Though I liked many of Garland’s features, I recently realized the “full site” was not showing up well on small devices. (The special version for those was fine, but if you wanted to view the full website itself, there were some problems.)

Andreas09 appears fine in both mobile and full-website versions. The part I’m less certain about is that it lets me specify some color choices, but not everything. For example, I can change the color along the top (which I have done, to one that seems to go well with some of my studio colors) and that leaves the gray sides alone. But, if I change out the gray along the sides, then both the top and the sides seem to change to that same color. And that’s a problem: The title at the top appears in white (so you need a dark background to see that) while the text down the sides is dark (so you need a light background). So for now at least, I’m living with the blue-ish top bar (which I like) and the gray-sides (which I’m telling myself are silver and that’s good).

Comments on this change are welcome! (Or, if you blog on WordPress and know how to tweak the colors on this theme further, please speak up.)

Time to get back to making jewelry though. I have several pieces that must be finished asap; after I’ve met that challenge, I’ll post photos from Art All Night and, from back before that, Terry Kovalcik’s workshop.

(I sometimes wonder if I’d be in fine shape if there were 28 hours in a day, and 10 days in a week…. Do you?)

Posted in Misc. Musings | Tagged: | Leave a Comment »

This weekend: Art All Night

Posted by C Scheftic on 2011/04/26

As the end of April approaches, it’s once again time for Art All Night!!! Are you going? This year, it’s going to be held in the same location as it was last year, at the former Iron City Brewery on Liberty Avenue, basically between the Bloomfield and Lawrenceville neighborhoods of Pittsburgh.

I’ll end this post with images of my metal clay entries from 2009 and 2010. I won’t give any clues yet about this year’s entry: just come on over to Art All Night to see it. The show runs from 4 pm on Saturday, April 30, through 2 pm on Sunday, May 1.

In addition to entering a piece, I will also be participating in the On-Site Art activities. A few of us from our local chapter of the PMC Guild will be giving demos of working with metal clay. We’ll be there from 6 to 10 pm on Saturday night. Hope you can make it! (I’ll get photos from this year’s event up here at some point, but I’m way behind schedule so don’t hold your breath waiting….)

2009:
Moon ‘n At

MagicCarpet (woven frame side)

2010:
Magic Carpet

Posted in Events | Tagged: | 2 Comments »

Back to working with silver for a while….

Posted by C Scheftic on 2011/04/20

My head is still swirling with ideas for working with copper, bronze, and steel metal clays, but I need to get back to silver again for at least a little while. I’ve got several classes coming up, scheduled months ago but now looming, and I need to prepare some sample pieces, plus some components at various intermediate steps in the process to use as illustrations.

I really do enjoy teaching this stuff for its own sake, but I find a big side-benefit of teaching to be the way that forces me to make up more samples than I might otherwise be driven to try. I keep a few pieces on hand, but this leads me to make extra variations each time. I think it’s good for class participants to see a range of examples, which is just the “kick” I need to move beyond my own comfort zone, try different designs, think of new approaches, and thus make different pieces that I can sell to fund the next round of explorations.

Or, sometimes, to just give away. The fairly simple focal piece and matching clasp in the photo that accompanies this post were made in my last workshop on clasp-making: I just picked up some paper-crafting scissors and used those to cut some of the edges while I was talking about how you can adapt tools from almost any medium for work with this one. I then gave them to my friend, Trish, to use in a bracelet. Next week, on April 26 and 27, we’ll be teaching that one at her shop, Zelda’s Bead Kit Company.

If you can’t make it to that session, check out the bar down the right-side of this blog for some of the other workshops that I have in the works. If you’d like a class on another topic, or at another time, do let me know: one of the great things about now having my own studio to work in is that I can also schedule “semi-private” sessions at the last minute, as long as I know that enough people are interested. Or, if you prefer, I can travel to your site. Even when I don’t remember to stop and blog about all this, I’m always happy to create opportunities for sharing the delights of how to play with clay.

Posted in Teaching Metal Clay | Tagged: , , | Leave a Comment »

The little oblong piece that could….

Posted by C Scheftic on 2011/02/28

This piece faced a number of challenges coming into existence!

It started out well, but with one small twist. You see, one of the fun things about guild-chapter meetings is that members bring their own favorite tools and let others try them out. At a meeting of the Western PA Chapter of the PMC Guild well over a year ago, I made several pieces using textures that my guild-mates had brought. Most of those are gone to new owners by now, but the last one I made that day had been sitting in my “figure this out later on” drawer for way too long.

What I made at the meeting was an oblong piece. I trimmed one end straight, rolled that end over a straw and pressed the edge into place, thus forming a foldover bail. On one side was a texture molded by Donna, with alternating stripes of little raised and lowered dots. I don’t remember who brought the gently-striped texture I used on the other side that remains visible, now, only on the bail at the top.

This piece should have come out much the same as the others I made that day but, somehow, it ended up much thinner than the rest. And for some reason (maybe I was getting tired?) I didn’t even notice that until I had it all shaped and starting to dry. Having made it at the end of the day, I didn’t really have time to re-do it. I thought it was too nice to give up on, however, so I didn’t just roll the clay back into a ball for use at another time. I let it dry and put it aside for the time being. And it just took me a long time to get back to it. After finishing a number of the bar-shaped pieces I recently wrote about, I remembered this one.

I had already decided to make it a bit thicker by applying some “mosaic” elements to the “plainer” side. Now, I should have known better about positioning those elements because I’ve had this happen before: once I added the pieces, the “thin” part to which I’d attached them broke apart along a border between two of those.

Not a problem. I stuck the two parts back together then, as you can see above, I added a decorative “bar” along the other side to reinforce that section. I had planned to embellish that side a bit, and the break simply helped define where and how to do that.

Except that, while tidying up the edges of that bar, the thin bit broke again, this time along the (only) other border between mosaic elements (which, once again, I should have known to orient differently).

Not a problem. I stuck the next two parts back together then added a second decorative bar on the non-mosaic side for further reinforcement. Design-wise, I thought that complemented the other bar nicely anyway. And with all the reinforcements, I knew that the final piece (once sintered to “solid” silver) would be fine.

In the process of tidying all that up, however, I decided that the edge along the top of the mosaic-additions didn’t match the rest of it. I rolled out a little rod of clay and attached that. It did seem to finish off (visually) that edge nicely.

Except that, in finishing off (smoothing) the edge of it, a chunk of that addition broke off. That was a real surprise, something I can’t explain. Still not a problem: just more fiddling to get it back in place and hide that seam.

It went into the kiln at last on Friday night, along with pieces from a workshop I’d taught that afternoon. (Once again, of course, I forgot to take photos of those…. That’s understandable. Rachell’s sister Ramona was visiting from Ohio, I did a special little afternoon session for them, and I wanted to have their pieces fired and tumbled and back in time for Ramona to take hers home with her. But, I digress….)

I didn’t actually fire up the kiln until Saturday. Everything came out of there looking fine. I quenched most of the pieces, and even remembered to not quench the pieces to which Ramona had added CZs to avoid shocking those.

As I was doing the unloading a fellow artist from the community center (Amy, who’s a musician) stopped by to say hello, and I showed her the results. I noticed that a bit of kiln-shelf had stuck to my piece, so Amy and I went across the hall to the ladies room so I could wash that off. I then handed it back to Amy, who proceeded to drop it onto the hard concrete floor there.

She was, of course, very apologetic. I said, not to worry, this stuff is sturdy, let’s go back to my studio. I should have known better than to hand it over where I did, should have waited until we were back on carpet-covered hardwood, neither of which would have caused any sort of problem. Even with the concrete, there was no crisis, only a slight ding, and right in front of Amy I think I was able to rework the piece back to how it had been before. (And if you can’t see the repair, then I’m right about that.)

She then headed off to get something to eat, and I proceeded to call Rachell and Ramona to say their pieces were ready for pick-up. While waiting for them to come over and get those, I polished this one up, and headed back over to the ladies room to add the patina.

I finally managed to get photos today to include with this post that show the end result. After all that fiddling, it now weighs in at 8.9 grams of fine silver (i.e., 99.9% of it is pure silver, nothing more). I sure hope the life of this little piece from now on will be smoother than were its beginnings.

Posted in General Techniques | Tagged: , | Leave a Comment »

Another great hollow-bead workshop.

Posted by C Scheftic on 2011/02/26


I taught a “reversible hollow domed” (aka “lentil”) bead workshop earlier this week at my studio in the Wilkins School Community Center.

Of course, I didn’t think to stop and get good photos of finished student work (lovely as it was, I was overly eager to get it into student hands!) so I illustrate this post with the element I made to demonstrate a number of relevant techniques.

(Except, bezel-setting a stone was not a part of that particular workshop: after class, I added the 6 mm bezel cup, refired the whole thing to secure that, and set the jade cabochon.)

I love the end result, and hope you do too! I’m reasonably satisfied with the photo that shows the jade cab. In my ongoing attempt to learn how to take better photographs of small, shiny, silver objects, however, I will admit that I’m really not happy with the amount of reflection in the other image. (It is, however, the best of about 30 attempts.) Yes, I know ways to solve the problem, just not affordable ones! The month is almost over (Feb is a short one!) and I haven’t make quite enough to cover rent on my studio (and I really do love that space!) let alone the other expenses involved in doing all of this, so the cost of photos (whether by hiring a photographer or investing in additional equipment myself) is one big issue behind this problem.

Still, I love making reversible hollow beads. After my students left this week, I stayed behind and made a number of samples for the three box workshops I have set for early-March. Aside from the fact that I just enjoy making and teaching those (and the way their “reversible” aspect means you get two distinct adornments for the price of one!), I’m also hoping I’ll earn enough from those to cover that month’s rent and, maybe, even this month’s shortfall. (The latter isn’t huge, but it does need to be covered somehow!)

Posted in General Techniques | Tagged: , , , | 2 Comments »

Another bar-pendant.

Posted by C Scheftic on 2011/02/19

This long rectangular piece developed over several sessions.

It started out as a piece I made during a workshop demonstration. First, I made a “backing” piece (I wish I knew of another commonly-accepted word for this because, as I’ll show shortly, in my quest to design fully-reversible pieces, the striped backing can certainly be worn facing the front…)

To that were added three textured squares that were the same width as that piece. Each was just a bit under 1/3 of its length. They were attached so as to leave just enough room at the top to add a simple, smooth, fold-over bail.

That was as far as I went in the classroom. I fired the piece along with those of the workshop participants, polished it, added some patina, and used it for a while as a “sample” piece I’d leave in other locations where I’d also get a “silver mosaics” workshop on the schedule. But, while I was fine with using it like that, for some reason it just never felt “done” to me.

Rummaging through my little bin of cabochons the other day, looking for a bit of red lace agate for another piece I was working on, I found myself digging through a few others I’d used recently that were still on top of the pile. Looking at the green aventurine and the little blue lab-grown spinels, for some reason I just thought of this piece.

When I next had a bit of time, I added bezel cups to each side of the piece, fired those into place, re-polished and re-did the patina, then set the stones.

Now, I do think it’s done. And, unlike the pieces I mentioned in my last post, I’m pretty sure that anyone looking at this one should get that it’s meant to be fully reversible.

Posted in General Techniques | Tagged: , , , | 1 Comment »

Riding a few waves.

Posted by C Scheftic on 2011/02/13

Speaking of inspiration (as I was in my last post) here are a couple photos of three pendants.

I’ve made a number like this. No two alike, but generally long and narrow and curved with a tube along one concave section to serve as the bail (the part from which you hang the piece).

Where’d the original idea come from? A mix of sources. Having grown up near the ocean, having spent countless hours (as a teenager in particular) at the beach, watching the waves, seems to be one of the (many) reasons that I often think in wave-shapes. (See the toggle clasp at the bottom of my last post!) Having rolled out a number of long, narrow rectangles as I was playing with potential ring-shank designs, I thought to use some for other purposes. Wanting to practice making more tubes, this design is well-suited to using those. Having quickly sold the first few I made, there was incentive to continue. And so on….

But there’s something about those sales. I sell my pieces at a mix of venues: shops, shows, private sales on my own, etc. These wave-strips seem to sell very well at external sites. But I’ve never sold one of these myself!

So, while I see these pieces as fully reversible, I have no clue if my customers see them the same way. And, if they think there is a front and a back, which is which?

Your comments on such matters are welcome!

Posted in Misc. Musings | Tagged: , , , | Leave a Comment »

Charmed (by) the Love of Craft

Posted by C Scheftic on 2011/02/10

The Society for Contemporary Craft held a great little double-event this evening.

Both were sort of built on their current ongoing exhibit, DIY: A Revolution in Handicrafts, which runs from 10 September 2010 through 26 March 2011.

One was called For the Love of Craft and, in anticipation of Valentine’s Day, it was an opportunity to participate in a range of hands-on (DIY…), family-friendly, art-making activities, many of which involved heart images and other expressions of love (e.g., you could decorate your own large heart-shaped cookie to present to your loved one).

Tonight’s other event was the opening of the Charmed II display in the society’s Store. From their description: “Charms can be purchased individually for a charm bracelet, or can be worn alone as a pendant. Buy a pair of [the lighter] charms to wear as earrings, or give one to a friend, a sibling, or significant other. Charms are a great way to start your collection of artist-made jewelry, or to add to your existing collection.” [the note was mine, after really admiring some of the largest pieces…]

Now, I’ve got nothing against hearts, sweets, DIY, or Valentine’s Day, but I think the photo that accompanies this post might give a hint of which was the driving-factor behind why I went… I never was much of a charm-bracelet person until recently, but metal-clayers do tend to be charm-exchangers… (The photo shows the four charm bracelets I’ve filled with charms from various exchanges.) Of course, those are mostly quick production numbers, little mini-art pieces, but still intended simply for random exchange.

The charms in SCC’s Shop right now may be small (with some not so small) but they are still full-scale art… If you’re interested in having one, get it while you can!

Posted in Events | Tagged: , , , | Leave a Comment »

Who, Me?

Posted by C Scheftic on 2011/02/03

“Who, Me?” is the name of the Febrary, 2011, art exhibition hosted by Sweetwater Center for the Arts.

The call-for-artists said: Enter a piece that communicates something that is uniquely YOU. Consider what your art reveals about you as a person, or what kind of habits, struggles, joys, patterns, quirks or obsessions you have discovered in making art.

I thought immediately of the piece I call “Moon ‘n At.”

Now, if you’re not a Pittsburgher, you may not get the “joke” in the title. But locals will often end a sentence with the phrase, which I would think means “and all that” or, perhaps, “and everything that goes along with all that” simply said with the shorter one and a half syllable sound, “‘n ‘at.” (Yep, it’s definitely said in more than one but less than two full syllables ‘n ‘at!)

Note, that ‘n ‘at does not mean “et cetera.” It does not mean “and so on.” When I first became aware of it, I thought it was totally superfluous. As I heard it more often, I came to think that it’s more like, “imagine my train of thought continuing even though I’m stopping here.” As in, “Most days, I really enjoy writing this blog ‘n ‘at.” Or, “I had a great time last week at the Harry Manx concert ‘n ‘at.” Or, “I’m finding this hard to explain to readers who may not be from around here ‘n ‘at.”

And, for years, if people used the expression in written form, it might have been spelled ‘n ‘at as I’ve done above. Although some times it might be n ‘at, while at others, ‘n at. Until the era of text messaging, that is, when it became shortened yet further, to simply n@!

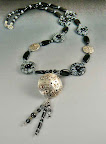
Which is how a necklace featuring three handmade, reversible, hollow, fine silver beads — with a sort of bubbly (moonscape) design on one side, and a pattern of spirals (@-signs) on the other — gained the title, “Moon ‘n At”!

Oh, but that’s not the end of it. Noooo. Sewickley, where this show takes place, is just across the Ohio River from Moon Township. (Both are just down-river from the Pittsburgh “Point” where the Allegheny and Monongahela Rivers join to form the Ohio.) And that’s the area where I lived for a few years as a child (when my family first moed here, before they headed off to Florida).

So here’s a version of the artist’s statement I wrote to accompany the piece:

Though I lived here briefly as a child (in the “Moon” area), we then moved to Florida. I later returned to SW PA, where I’ve just celebrated my “silver” anniversary of living here and embracing the winters (“snowflake” obsidian), industry (glass & steel), raw materials (represented, color-wise, by onyx, jet & hematite), three rivers (the dangles), and dialect quirks (‘n @). Assembling these components, I was amused to notice all the connections!

(The “silver” anniversary refers to a total number of years, but not consecutive ones! I’m currently on my fifth stretch of living in the Western PA area!)

The “Who, Me?” exhibit runs from Saturday, February 5, through Saturday, February 26. Admission is free. As I understand it, Moon ‘n At was the only jewelry-piece that was juried into the show. I feel very honored by that.

There will be an opening reception on the 5th, from 7 to 9 pm, and I definitely plan to head out for that. Will I see you there?

Posted in Events | Tagged: , | 1 Comment »

Show Me (Your) Love – I’d Appreciate Your Vote!

Posted by C Scheftic on 2011/01/23

[Update: The voting at Metal Clay Today ended at midnight on February 5; results should be posted at metalclaytoday.com on February 10. Thanks so much to everyone who voted for one of my pieces: Each and every one of you is a real treasure!]

~-~-~-~-~-~-~-~-~-~-~-~-~-~-~

As I mentioned in one or two recent posts, I entered the Show Me The Love Challenge at Metal Clay Today.

The challenge itself was stated simply: “Submit a piece that depicts love.”

OK, there was one other stipulation: at least 50% of it had to have been made using metal clay techniques (my wording, their percentage). But still: simple to describe, a challenge to produce.

With Valentine’s Day (markets…) approaching, of course, I just happened to be working on several pieces that I thought met the requirements. So I sent two of them in!

Here’s how one of them appears (if you don’t see the full description, try making your browser window wider; alternatively, clicking on the image should open it in its own window for you):

That fully-reversible piece is constructed of fine silver (from PMC3). After firing it was lightly tumbled, then work hardened with hammers, polished with a variety of tools, given a liver of sulphur patina, and polished one more time by hand. It is 24 mm in diameter, just a hair under 5 mm deep, and weighs 8.5 grams. The photograph shows it strung on a soft satin cord.

It’s another one of my little basic box construction pieces. From the technical side (i.e., as a class sample), it’s meant to show that all boxes need not be cubes. The curved piece between the two disks was made from a single strip of clay that was dried in a curved shape to match the size of the disks it would support. It was then cut into two pieces, so there’d be room to insert the cord from which it would hang (as well as to allow the space for the “love note”). A square box, for example, would in most cases require four “side” pieces.

Note: The challenge editor omitted the actual title I had given it, and used a small part of a “quotation” from the text I had submitted. At first, I was fine with those changes. If you want to cast your vote for it, however, you need to know that, while the ballot entries appear to be in alphabetical order, it seems that the computer system they used for the ballot resorted them, putting all the entries that started with a quotation mark first. To vote for the piece above, you just have to look for “Show … the Love”! up near the top of the ballot…. It does have my name with it (C Scheftic, the same form as I use on this blog). A link to the ballot is at the end of this post.

And here is my other entry:

I debated about entering this second piece. It’s far more basic than what I expected most others would enter, but, in the end, I couldn’t resist, for the reason given in its description (above). It was made quickly, to illustrate a series of different points during demonstrations in a brief beginners worksop I taught recently. Although it is very simple in design and construction, I think it illustrates a richness of meaning and variety of form that are possible from just about anyone the very first time they try these new and innovative techniques!

As is the case with most of my work, it is reversible. The “beacon” side was made from PMC+ while PMC3 was used on the “heart/love” side. It is 27 by 22 mm, and weighs 5.5 grams. After construction and firing it was lightly tumbled, then work hardened with hammers, polished with a variety of tools, given a liver of sulphur patina, and polished one more time by hand. It hangs from an Argentium silver jump ring on a simple rubber cord.

If you would like to vote for this piece, it’s listed in its correct alphabetical spot, as Love’s Beacon.

~-~-~-~-~-~-~-~-~-~-~

I did debate whether to submit both, or limit myself to just one. In the end, I decided it mattered more to me to get them both out there, on public display, than to fuss over whether I was lessening my chance of winning by possibly splitting “my” votes between them. I figured that each one could stand on its own merits, or not, compared to all the other “love”ly pieces that would also be entered in the competition.

If you want to be fully informed before you cast your vote, you can download a file with all 49 entries in the challenge (it’s over 5 Mb in size) from the source, at:

http://www.metalclaytoday.com/ChallengesPDFs/ShowMetheLoveChallengers.pdf

If, on the other hand, you are one of my dear friends who wants to shortcut that process and just go vote for one of mine, the ballot itself is at:

https://metalclaytoday.justsurvey.me/53682d136179

One vote per person / computer will be tallied. You need not be a subscriber to Metal Clay Today to vote — balloting is open to everyone!

And, as I said in the title, should you cast your ballot for one of my pieces: Thank you — I really do appreciate your support!!!

Posted in Challenges, Events | Tagged: , | Leave a Comment »

On taking a little break (ha!)

Posted by C Scheftic on 2011/01/20

For a whole lot of reasons, not worth going into, I have been going “at full tilt” since the start of the year.

I mean, I was busy back last year as well. In addition to all the usual “holiday season” and “year end” activities, there were the extra “sales opportunities” that took up time both in and of themselves, as well as all the extra time preparing pieces to enter in them. And, as regular readers of this blog will already know, it’s not that I simply procrastinated. I decided to enter a few extra shows only after I’d taken on the rental of the new studio, and then I was hustling to work on both the studio set-up and making more pieces to sell to help cover the rent… Whew! I still run out of breath just remembering that push.

So I pushed a number of other things off until the New Year. And just kept going. And I mean going. Most days started at 8 am and ran until 2 am. It was a hectic pace. But I knew that, within about three weeks, I had a four-day stretch with almost nothing planned, and the very few things for those days were fun and easy.

So, what happened to my four-day stretch? I spent it in bed. Not, however, a four-day vacation spent taking things easy. No, four days lost being sick. Sicker than I have felt in I-forget-how-many years! Saying it was a cold and cough and fever and sinus and splotchy tonsils and chills and itchy eyes and … simply does not do it justice.

Finally feeling a bit on the mend (not over it all yet, but at last feeling like this siege really will end), I insert this note (back) in the space for when I first got knocked out, and will follow it with a few other posts I would have made had I been able at the time….

Posted in Health & Medicine | Tagged: | 2 Comments »

In the news!

Posted by C Scheftic on 2011/01/14

OK, so I have a few Valentine’s Special pieces fired, polished, patina’d, and re-polished. They still need to be assembled, strung, inventoried, and tagged. I hope to have a photo or two taken and put up this weekend.

By Saturday, hopefully, because on Sunday afternoon (and, again, this next Tuesday night) I’ll be holding an “Open House” with free demos and discussion in my studio. This metal clay stuff is still new enough, if people want to come over, see it, see a few examples of what can be done with it, and ask some questions before plunking down money for registration and materials in an actual workshop where they can make their own pieces, I figure I can offer that.

The photo that accompanies this post (of me, reacting to having my hair fall in my face just as I was demonstrating how you work with metal clay) was taken by the delightful Stephanie Rex, who interviewed me this past Tuesday about these upcoming Open Houses (and kept asking me to say more about the math references I thought I just made in passing a few times). Her article appeared today, on the Forest Hills – Regent Square section of the Patch.com website.

Posted in Events, Studio | Tagged: , | Leave a Comment »

At least it’s cosy _inside_ my studio.

Posted by C Scheftic on 2011/01/11

The streets outside my studio were clear when I arrived at noon. I planned to meet a couple different people over there today. The first one was set to arrive at 1 pm, which is right when the snow started falling. The photo was taken around 4, while I thought there was still enough light to show the hill. It’s one of the lovely old brick streets in this neighborhood: great most of the time but slippery in situations like this. The snow was still falling when I left at 6:30, though just lightly by then. Hmmm, will I go over tomorrow?

I hope so! I’ll have to see what the weather brings. I have a number of pieces started and I’d like to make progress on them. I rarely start one piece and stick with it until it’s done. I’m far more likely to start several, and swap around among them. This isn’t a lack of focus on my part. (Yeah, sometimes I do have that problem, but it exhibits in other ways….) It’s more that I’ll start one and, while I’m waiting for that clay to dry some, I’ll start another, and perhaps yet another. Then I’ll move to a later step in the process for the first one. And so on. Sometimes, while working on one I’ll get an idea about something I’d rather do differently, on it or one of the others that are in the works. Nonetheless, that back-and-forth process seems to be more efficient than one-at-a-time. To me at least — what about you?

Posted in Misc. Musings | Tagged: , | Leave a Comment »