Convergent Series

learning, using & teaching metal clay, and other aspects of life

Archive for the ‘General Techniques’ Category

Kilns and Kiln Maintenance

Posted by C Scheftic on 2023/02/07

Well that was a fun event last weekend! I went to an electric Kiln Maintenance workshop at The Union Project.

The kiln we used for the hands-on exercises was apparently a Skutt KM1231-PK. (My kilns are not by Skutt. I got that model-name from the diagram on the page that came with the new elements we installed and then went online to confirm that!)

It is a big, electric, ceramic-studio kiln (almost 10 cu ft inside: Skutt calls it “Our Tallest Kiln”!). Such big kilns (any brand) heat up and hold the temperature reasonably evenly throughout their entire interior: good enough for most ceramics but not always close enough for the tiny safe range between sintered and melted that we have with metal clays! We tend to use much smaller kilns (often on the order of 0.20 to 0.25 cubic feet, so smaller by a factor of 40 to 50!) to help resolve that issue. Skutt does have a few great little ones, but they still require 240V circuits. Paragon makes ones that run on regular household 120V, so I went with those.

I got my Caldera first, in the winter of 2008-09 (before starting this blog) and set it up at home. I moved my workspace into a studio in 2010; that’s also around the time I got the SC-2 that I now use there. Both are great for firing metal clays! Because the Caldera can go up to 2350°F, I can also use it for mid-fire ceramics; the 2000°F limit on the SC-2 pretty much restricts me to low-fire ceramics in that one. But the front-loading door on the SC-2 makes it much easier to load and unload hot things like metals with enamels or pottery to then be raku-fired.

The little SC-2 did have some issues right at the start, resulting in my learning how to install replacement digital controllers provided under warranty (which turned out, in the end, to not have been the source of the problem!). It has continued to work great ever since that got sorted out. And the Caldera has been great too, despite having been pushed a bit harder by some of the more complex (for metal clay) firings I’ve set it to do.

Which one is better? I’m happy with both! It depends on what you want to do. I feel so lucky that I am able to have two and that they are different! I can pick the right one for certain tasks, when that matters. And when it doesn’t, I can just fire whichever one is located in the most convenient place. If I’m done making pieces in my studio and want to go home, I can take them home and fire there. If I have a lot that have been sitting around for a while, I can fire them in my studio kiln while I start making my next batch.

But while they’ve worked well for ages already, I know that eventually some part(s) or other(s) are going to need to be tended to. So when I saw this being offered I figured it was worth a shot.

The class was interesting: it was aimed at potters, and it began with some discussion of basic firing processes before going on to how various ramp speeds and hold temperatures affect particular glazes. I do some pottery, mostly mid- and high-fire at places where they do all the firing for me. But I’ve always done a bit of low- and mid-fire on my own and (since covid) have been exploring and making more small pieces, so hearing all that was a delightful bonus.

Then we went to work on one of the studio kilns! We basically dismantled the whole thing! We replaced elements. And a thermocouple. And saw how to replace relays (though that didn’t actually need to be done, so it just involved loosening and retightening a few screws). We didn’t have time to replace a couple firebricks along the top, in part because of one small technical glitch (a mis-placed tool), so that topic ended up being another presentation. But by that time I at least was getting kind of tired, felt I’d already learned a lot, so I appreciated getting that information simply as discussion. And there were lots of good handouts too. While I don’t know when I may have to apply all the knowledge I gained, I’m glad to feel prepared when the time comes!

Here are a few fun thoughts resulting from the day:

Question: How many people (students in addition to the instructor) does it take to remove the lid of a big Skutt ceramics kiln tucked into a rather tight corner?! (At this point in my life, I was just glad that half of the class, all much younger, stepped up to help!)

Answer: A lot more than the one person it takes for a little Caldera! Its lid is not connected, so you just pick the little thing up by its handles. Easy! (Removing and replacing that Skutt lid would have been far and away the hardest task of that whole day, and I’m very happy I won’t have to deal with that on mine.)

I usually run this firebrick-construction Caldera kiln on my covered & enclosed back porch. I usually plug it straight into the GFCI outlet right there. I took this photo when I was documenting the need to use an electric-company-supplied surge protector power strip during several weeks when we were urged to use them anywhere we could while they were making repairs. (I should take a better photo, but when not in use that kiln lives just inside the house, by the door you don’t see to the left there and, mid-winter, I’m not hauling it back out just for this post.)

The uppermost three “layers” are the kiln. Counting from the top here, the first and third are the two interchangeable and reversible base and cover layers. The second one down, between those two, is the “functional” middle section with three complete rounds of elements inside and the blue control section you can see towards the back. In this configuration, it can reach 2350°F. (I believe that is the maximum that any firebrick kiln can reach on 120V current. (I’ve seen some quoted as 2400, but I think that’s just a rounding-error / marketing-promotion for what is really more like 2350…) If you are aware of real exceptions, please let me know!)

The lowermost (hollow inside) layer shown here is simply serving as a sort of stand to let air circulate under the kiln. In reality, it is a “bead shelf” that can be moved up one level (so the base is really at the bottom and the “middle” level with the elements is just above this one). Doing that adds another 0.15 cu ft to the firing chamber (for a total of 0.40 cu ft) but drops the maximum temperature to just under 2000°F.

The reason to move the bead shelf up, besides getting room for a third metal clay shelf or a tall (but now low-fire) ceramic piece, is because it has a little hinged opening (on the back as I have it set up here, so not visible in this photo) that you can open to insert and remove glasswork and some other media (certain kinds of enameling, miniature ceramics you want to treat as raku, etc.).

My mind did wander a few times in this weekend’s class as I thought: how many of my entire little metal clay kilns would fit (unusably, but just thinking for fun) inside the Skutt? Well more than I own! I could stack two SC-2s over to one side, and then tuck various arrangements of components from two Calderas in around them. (I confirmed that by looking up the specs…) I could continue to fit more, perhaps even all the pieces that make up a third Caldera, but only if I took it all apart, which is clearly going way too far with that silly but fun thought exercise.

So I’ll just end with a couple photos peeking into my (original blue color) SC-2. The SC part means it was designed specifically for use with Silver Clays. The 2 means it’s the kiln in Paragon’s SC line that is sized to hold up to two shelves with silver clay (though these photos both show it with just one).

The SC kilns are a “muffle” style, not firebrick. (I believe that 2000°F is the maximum temperature for any muffle kiln, regardless of voltage: if you can document that I’m wrong, please let me know!) The elements are stashed behind that inner white material (the muffle), and when those finally fail, you end up having to replace the entire muffle…

The first SC-2 photo shows it at the end of a silver firing cycle. Many pieces are on the shelf; a few others are supported by vermiculite in a small crucible.

(I often leave my annealing pan just sitting on that same cabinet top; it’s not serving any purpose here since I let everything cool before opening the kiln door.)

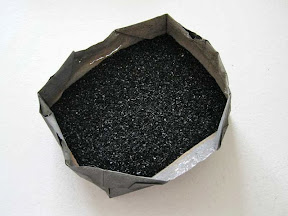
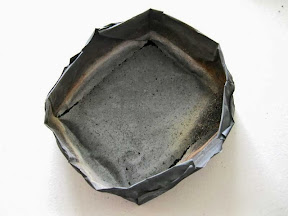
This last photo shows my SC-2 at the beginning of a “base metal” firing. Those metals (e.g., copper, bronze, steel) need to be fired in a reduction atmosphere. With metal clays, we can easily achieve that even in an electric kiln by completely burying the pieces to be fired in a box or bowl of activated carbon. (I love some reduction glazes, so I sure wish I could do that for them…)

Enough about kilns for today. I hope you found something useful in these ramblings!

Posted in Ceramics, General Techniques | Tagged: , , , , , , , , , | Leave a Comment »

I knew it would work!

Posted by C Scheftic on 2018/09/16

There is absolutely nothing special about the enamel work on this piece but it is a proof-of-concept for an idea I’ve had for ages:

Proof of Concept
  • save a bit of left-over (negative space!) bronze metal clay from a piece cut with one of my Silhouette machines;
  • fire that onto a piece of copper to sinter it; then
  • enamel onto the copper around the bronze!

I figured it should work, and I’m happy to finally confirm for myself that it does.

So the big question now is: when can I find time to make another batch of bronze pieces so I’ll have more “scraps” to play with!

And I ask myself, what was I waiting for?!!  I’ve wanted to do this with bronze and copper since I first started using bronze clays! When did Hadar release her first “Quick Fire” bronze?  2010?  If that’s right, since then!  But I waited what seems forever before taking even the next step (though, to be fair, I was playing around with a lot of other ideas in the meantime).

I remember how it felt the obvious thing to do when cutting clays with one of my Silhouette cutters (in this case, my Portrait).  Though I’d had that thought for a while, I remember firing that particular “drop” of cut-out clay onto a copper oval during my initial trials of “one fire brilliant bronze.” (That was the last of Hadar’s “one fire” clays that I tried, and I struggled with it a bit through several rounds of testing … but it is now a favorite when I want to work in bronze!)  I came across the “blank” last week as I was firing a few steel pieces with enamel: it was the last piece I fired before cleaning everything up so I could use that work-table for an Open House this weekend.

Looking back for when I’d made this piece to test with, I realized that it had been sitting in a corner of my studio waiting for me to stop and enamel it for over 3 years!  At the time, I did make three more such “blanks” to play with, but now I know I’ll spend even more time designing pieces for additional possibilities from both their positive and negative space components…

O, yes, that’s why I waited! On top of that, even the test-piece shown here has a simple “separation enamel” flower on its other side!  Simple in case this side should have failed for some reason, but there because …. that’s just what I try to do!

And now I ask myself: why couldn’t I have just been satisfied with making pieces that are reversible?f  But I know the answer: while there’s a big part of me that really likes, and strives for relatively “simple” designs, there is another part that just has to add some little “twist” while I’m at it…

Are you drawn more to minimalist or complex designs? (Not just mine: anyone’s!?)  Leave a comment!

Posted in General Techniques, Learning Metal Clay | Tagged: , , , , | 3 Comments »

Doorways!

Posted by C Scheftic on 2018/09/08

Several years ago, I made a small series of “doorway” pendants.  I have no clue why I don’t seem to have stopped to photograph and write about them:  I must have been busy with something else at the same time and devoted my social media time to that instead.

Digging back through photos now, the only one I can find is a rather blurry snapshot of the last one from that series.  But the funny thing is how that piece, Ancient Doorway, is the basis for this post!

Ancient Doorway had been bought by one of my regular customers.  She comes by at least once a year, usually with her mother and/or occasionally with a sister, often with children and/or spouses in tow too, and they entertain me for a while as they explore my offerings, provide interesting critiques, and debate which to buy for themselves or each other.  They are very enthusiastic, and thus a lot fun to have as  customers.  And I remember the time she bought that piece because, as she walked in the door her eyes landed on that one first and sparkled!  She headed straight to it, picked it up, turned it over, checked the price, set it back down, looked at several other pendants, came back to it and made a few comments, looked around some more, returned to it again and held it up in front of a mirror, looked at some earrings, and finally declared something to the effect that it was definitely her favorite of all the new pieces I had that day.

The funny thing about that is this: I knew from the moment she first headed for it that it was the last piece left from that older series, adapted from a project in one of Hadar Jacobson’s great books (and being the last one is probably why I got at least a quick shot of it). And she had to have been shopping at least two previous times when it was there.  So I stood there trying to remember if she’d expressed interest in it earlier, and didn’t think she had.  But she was definitely intrigued that day.  I was happy to have the sale, but I was also very happy that it made her happy even if that had taken a while.

Except when she came in earlier this summer, she was sad.  I could have a few of the details wrong here, but I remember her saying that she usually doesn’t take jewelry with her when she goes on vacation with her family, but she liked that one so much she wanted to have it with her when they took the kids to DisneyWorld.  She clearly remembered seeing it on the bathroom counter the last morning when she went to take a shower, but realized on the trip home that she wasn’t wearing it, and didn’t remember putting it back on as they rushed to get everyone out the door that morning.  As soon as possible, they called the hotel to ask if it had been found, and were told no.  She was disappointed in herself for having lost it: could I make another one?

Of course I said, “Of course.  Yes!”  I did add that I’d never be able to recreate it exactly, but was it OK if I  made something similar.  Sure.  I said that I was in the middle of some other projects, so it wouldn’t be right away.  Was that OK, or did she want it asap?  She said that as long as she knew it’d be coming, that was fine.  I said that what I’d do would be to make several, give her first choice, and then just put the rest up for sale to others.  She liked that idea.

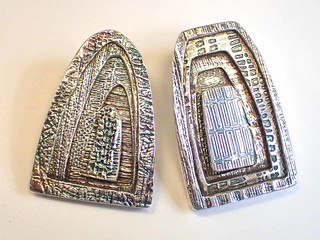
Through the Arches / Into the Vault

Through the Arches || Into the Vault

So I started out by making two more, shown above.  With the old series I remember trying to make them two different ways, and I couldn’t remember which way I’d ended up preferring  So, for those first two, I made one each way:

  • starting from the back and working towards the front, and
  • starting at the front and working backwards.

The techniques to make it work are a bit different and, in some ways, I now think that “easiness” may be a toss-up.  It is far easier to control the design with the approach I used with the former (Through the Arches), but far easier to get great, smooth side-edges using the techniques I applied to the latter (Into the Vault).  So I guess I’ll just have to make a couple more!

Just as I finished those two, I looked at my calendar and realized that I needed several entries for two upcoming art shows, so each of the new doorways went to one of those!

  • Through the Arches (left) will be on display (and available for purchase) at the North Hills Art Center in Ross Twp, PA, from September 8 through October 5, (along with a second piece, a quilt-design piece with a cubic zirconia).
  • Into the Vault (right) will be on display (and available for purchase) at the Arts on the Riverwalk art competition, sponsored by the Hoyt Art Center at the Confluence Cafe in New Castle, PA, from September 8 through November 1 (along with a second piece, a shamrock design that incorporates dichroic glass).

    And I’m delighted to report that I just learned this great news:Into the Vault
    has earned a Merit Award … and was the only 3-D piece to win an award!

You may notice that both of those shows open on September 8. In order to get to both of them (and accept the award in New Castle), I’m moving my usually-Second and usually-Saturday Studio Session & Open House one week later, to September 15. I hope I’ll see some familiar faces at the shows this weekend, and in my studio next weekend … though of course I also look forward to meeting new folks too!

Posted in Events, General Techniques, Technical Details | Tagged: , , , , , , , , | Leave a Comment »

3.14: Happy Pi Day 2018

Posted by C Scheftic on 2018/03/14

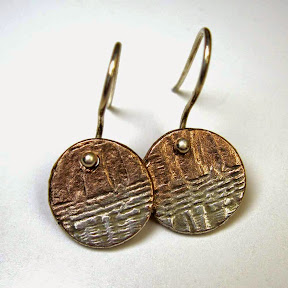
Two Small Pendants that shrank to different sizesI was trying to think about what photo to post today in honor of “Pi Day” 2018 and this one came to mind. It shows something vaguely along the lines of circles and radii, so that does fit.
The real reason I chose it is because it shows similar circles with two different areas, and Pi is all about the ratio between a circle’s radius and its area. I created these two pieces a little over four years ago, shortly after Hadar came out with her “friendly,” “one fire” clays. And I wrote about how, even though they’d started out the same size, they ended up being so different. You can check my post from early February of 2014 if you missed it then (or forgot!) and are curious now.

Or you can just use this as an inspiration for making something yourself, whether that is jewelry, or pies, or something else. If you do, please leave a comment about your creation!

Posted in General Techniques, Technical Details | Tagged: , , , , , , , , , | Leave a Comment »

A few final pieces from 2017…

Posted by C Scheftic on 2017/12/21

Whenever I walked into my studio last week, I passed lots of red and green Christmas decorations throughout the building.

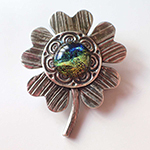
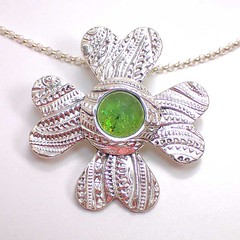
Urban Flower: Lucky Shamrock (Four-leaf Clover)As I sat down with some silver clay and a small box of dichroic glass cabs, I think that decor is what lead me to be drawn to several green pieces.

With over half of my studio turned into a show-room, and only one “holiday” show left after I’d have time to fire and finish anything I made between visitors, I had to work simple.

But then my maker’s-sales brain kicked in and I picked up those green cabs and used them in … shamrocks! Three fine silver pendants for spring.

And the “lucky” four-leaf one, with a “spring green” piece of glass, has already been purchased! Knowing that it will age slowly over time, the customer wanted it like this, without any patina. I managed to grab this quick photograph while the buyer selected a chain to go with it. The photo shows a sterling rolo chain though it went out the door on (what I do agree was a better choice for this particular texture) a foxtail style chain.

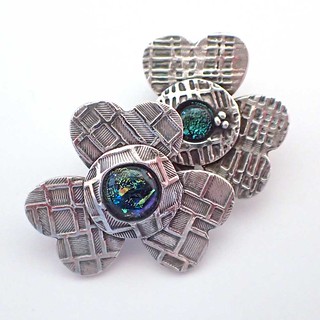
Urban Flowers: Two ShamrocksFor those interested in technical details, all three of these were made with PMC Plus and PMC Flex. Why those clays? I’d taught a lentil-bead class last week in which we used Plus, and I had a lot left from a big packet I’d opened there, so I used that for the backing pieces, the leaves, and the bails. To be sure those were fully sintered, that much was fired at full time & temperature: nominally, that’s 1650°F for two hours. (I say nominally because, since my kiln fires about 50° hot, I set it to 1600 … which means it should have fired at about 1650… And I did hold it for two hours.) That gives all the “structural” elements the maximum strength possible for that particular silver formula, even though it would have been way too hot for the glass.

The next day I made the “bezel” elements to surround each glass piece and hold those in place from the top. I used PMC Flex for that. I could’ve used PMC3 or Art Clay 650 or any of the “low-fire” fine silver formulas but, again, the Flex is what I had handy, so that’s what I used. The point here is that I needed a clay that would reliably sinter at a low-enough temperature that I could fire the glass in place! Clay fired down at “glass” temperatures might not be quite strong enough for the leaves (that hang off to the side) or the bail in back (from which the piece is hung when worn), but with a good, strong backing, the use of a lower sintering temperature should be fine for just holding the glass onto strong backing pieces. I used a four-segment program that experience has shown to provide good strength to the silver bezel while keeping the glass happy.
I did choose to add a patina as I finished polishing these two after their second firing. And, if you’re interested in a few notes I wrote about using a mix of sterling and fine silvers in this sort of design, feel free to check out my post from October of last year.

Even though these designs reflect the shape of shamrock (young clover) leaves, because of the textures I used and the glass centers, I’m calling them part of my Urban Flowers series. I never claimed that my urban flowers were going to be biologically correct representations of particular species, more that the plants would serve as “inspiration” for those pieces.

In some ways that concept also fits with the colored glass ornaments I make during the summer (when I can work outdoors). Those are designed with a double-loop on the top of the ornament and a flat bottom to the glass bases: they can hang on your Christmas tree if you want and then, for the rest of the year, you can set them on a table or desk and use them ho hold whatever kind of note or photograph or other reminder that you want!
2015_11_FiveCardHolders_OneGearBusinessCard_PB241207
Similarly, I hope that these shamrock pendants fit both with the green fir / pine / spruce decorations during winter holidays, and can continue being worn to reflect the natural world as spring returns! Or maybe the heart-shaped leaves will even warm someone’s heart in time for Valentine’s Day?! Regardless of the “connection” made, I do hope the rest of these will soon find good, new homes!

Posted in General Techniques, Learning Metal Clay, Studio, Teaching Metal Clay | Tagged: , , , , , , | Leave a Comment »

Exploring my “Urban Flowers” Series

Posted by C Scheftic on 2016/10/17

This post is going to jump into the middle of a story about several different things I’ve been working on: adding a little bit of color to my creations by incorporating some glass (especially dichroic glass) and working with sterling silver metal clays.

Why start in the middle? Well, I really do miss writing about all the explorations I do in my studio. I haven’t been saying much about them lately because we still don’t have reliable internet access in the building … and I used to compose posts as I worked. You can probably imagine that, after a long day of working on explorations (and more), the last thing I want to do is go home and stay up for hours more writing from there. But it’s a gorgeous fall day and I suddenly decided to enjoy it by staying home this morning, sitting out on my back porch with a cup of tea, and writing about a piece I just finished on Friday.

I will provide a bit of background:

The second, or maybe it was the third, piece I ever made using metal clay incorporated a lovely, long, oval, pink glass bead, set with loops of syringe-clay to hold it in place. It was fun to do, but it took me a few more years before I got into adding glass on any sort of regular basis. About six or seven years ago, I went through a phase of using glass fairly often. Then I moved off in other directions, with what remained of my collection of glass pieces sitting in a corner of one of my stash-drawers. I’d acquire another bit of glass every now and then until, a few years later, I made a few more pieces using some of those, and taught it as the final project in a couple of private lessons and multi-session intensive workshops.

ProjectSample_Glass_SwirlGlassInFineSilverProbably the main reason I didn’t keep pushing with glass is because I’d felt limited to using PMC3 or Art Clay 650: those were the only metal clays that could reliably be fired with glass. Now, those are both fine metal clays: I have been quite happy using either one of them. But glass just isn’t happy at the 1650°F (900°C) for two hours that all fine silver clays require for the strongest sintering, even with those formulas. Although they will technically sinter at lower temperatures and shorter times, they still don’t get as dense, and thus won’t get as strong, as they could do at 1650°F for two hours. They do come out perfectly acceptable, and I hope people will treat any piece with glass somewhat gently … but I just like going for the strongest pieces possible.

Still, I do love glass. So this summer I made some more fine silver pieces with dichroic glass cabochons, called them class samples, and included that process in another four-day session I was scheduled to teach at The Artsmiths of Pittsburgh. The first photo with this post shows one of the sample pieces I made for that class. While a couple of my samples used the same PMC3 and Art Clay 650 that I’d used in the past (mostly to refresh my memory of how I’d done it) this one and several others used PMC Flex. Flex is similar to PMC3 but it has a slightly longer working time (good for workshop students not yet comfortable enough with metal clays to work really fast) and it remains a bit flexible when dried (which makes it very useful for anyone fashioning the parts that capture and hold the glass). And, though there’s still the problem of not sintering to the maximum density possible, it does sinter reasonably well at temperatures where glass remains happy. So, for fine silver with glass, it seemed a good choice.

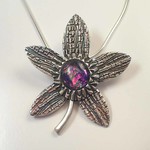
Urban Flower #7 (Blue Lagoon)Now, at last, on to the Urban Flowers explorations:

After I’d made those samples, on some of the hottest days this summer when I just didn’t feel like going out to work in my garden, I got to thinking about a possible new series of pieces, ones I’ve taken to calling my Urban Flowers. They are flower-like designs, but from my imagination. While they may be based on some actual flower varieties (and may or may not be named for their inspiration), I am not attempting to make biologically-accurate representations. They’re just a city-girl’s dreams. The textures come from urban life: wallpapers, flooring, construction debris, household objects, etc., and they feature glass (or, occasionally, something else that is commonly found in urban environments).

Urban Flower #5 (Purple Haze)I’d been happily exploring these designs, mostly using PMC Flex, while working on some other styles completely and, for those, using diy-960 clays (i.e., mixing PMC+, PMC3, PMC Flex, and/or Art Clay 650 with PMC Sterling clay).

And then CoolTools released EZ960. OK, I didn’t really need it, as I’d been doing fine with my various diy-960 combos, but why not give it a try? Soon after, both PMC and Art Clay released their own silver-rich sterlings (PMC One-Fire Sterling, a .960 formula, and Art Clay 950, where the number designation has switched from a minimum Celsius firing temperature to a Fine Silver percentage). I got some of each of those and started testing them too. At some point, I hope to find a chance to write about all that testing. For now, though, let’s stick to the Urban Flowers story.

While I do love the color of plain fine silver, I can also appreciate the gain in strength that it gets when a bit of copper is added to produce sterling silver. And, as noted above, I much prefer to produce pieces that are strong. The 950-960 formulas will be stronger than a 999 fine silver; they get you to almost as much strength as you can get in the great 900-925 alloys. Plus, they have the benefit that they are as easy to fire as the 999 clays (i.e., much easier than the 900-925 ones, where having more copper complicates the firing). So, yes, any 960 (diy or commercial product) will be a compromise, but still an excellent choice.

With one exception: the 950-960 clays need temps and times higher than glass can take without just melting.

But, d’oh, why didn’t I think of this before (even with the .999 fine silver clays!)? I work with base metal clays, and I do some pottery, and we’re talking about multiple firings to get many of those to work. So here’s the inspiration I had, and the first (simple) piece I made to test it out….

I made an Urban Flower base out of EZ960: the petals, the stem (if included), the bail on the back … everything but the glass and the bit that holds the glass in place. I fired all of that according to the schedule for 960, to achieve maximum strength. Afterwards, I positioned a glass cab, surrounded that with a .999 fine silver washer shape to contain it, made sure that was well-attached to the already-fired petals, and fired the whole thing again at a schedule that worked for just the “bezel” and the glass. After a bit of tumbling, polishing, and patina, voila! It may not be perfect, but I am really happy with this result! (Though both the silver and the glass are brighter in person than they look in this photo….)

Urban Flower No. 8 (Gold Cinquefoil)

What do you think?

I do still need to figure out a reasonable pricing schedule to accommodate the fact that I’m doing two firings, and that attaching the unfired clay to the fired metal can be a little trickier than attaching two unfired elements. Though that will add a small amount, in the grand scheme of things, it won’t be much. Once I’ve found time to make more to extend the series, and refined the process of doing it this way, I can see how the time works out and apply that even to my initial-trial pieces too. The only real problem with this approach is the way the two firings will affect trying to do this in a class … but it’s just another reason to offer multi-session workshops, rather than the quick one-shot ones, when including easy but still advanced topics.

Posted in General Techniques, Learning Metal Clay, Teaching Metal Clay | Tagged: , , , , , , | Leave a Comment »

The evolution of two “old favorite” classes!

Posted by C Scheftic on 2016/07/21

It’s time to follow up on an earlier statement, and write a little bit about some upcoming classes. But since this is (what is often called in social media circles) Throwback Thursday, I thought I’d include a few notes on how the ideas and directions for two popular sessions have evolved over time, since I’m repeating them on a couple of Saturday afternoons this month (soon!) and next.

Reversible Draped Silver
Saturday, July 23, 2016 from 1:00 PM to 4:00 PM (EDT)

I must admit that the idea for this came from Hadar Jacobson. I’ve made pieces, and then been asked to teach classes, using both precious metals (silver) and base metals (bronze, copper, steel).

We texture the clay and then roll it thin in order to get it to drape nicely. With .999 fine silver, that produces pieces that seem to me to be a bit too fragile, risking bending or breaking at the thinnest points. We can solve that problem by adding a backing layer, or at least a frame, to provide additional stability.

When we use base metals (like these in bronze and copper), we get pieces that are a bit harder. Thus, most of our pieces can just be folded and embellished. They rarely seem to require extra layers for sturdiness, though of course those can always be added if desired from a design standpoint.

I will admit that I never tried making these with .925 sterling silver: I don’t particularly like fussing with the firing schedule for that clay, and have only used it for a handful of different designs. But last winter I started making these with .960 sterling which is much easier to fire than is the .925 form, and they turned out great. So that’s what we used the last time I offered this as a class, and it’s what we’ll be using again this week.

At this point, we’ll still be using “homemade” .960, that will come from mixing .999 and .925 clays. There is a commercial version now available, EZ960, that’s recently been released. We won’t be using that here simply because I haven’t yet had enough time to experiment with that to feel as comfortable as I’d like using it in a class. I want to learn any and all potential pitfalls with it myself before foisting it on a room full of students! Stay tuned for news in that arena.

Reversible Woven Silver
Saturday, August 27, 2016 from 1:00 PM to 5:30 PM (EDT)

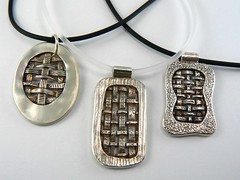
Three Woven Silver Pendants (Class Samples)The way I began to make these pieces, and lead students in making them, has had a number of inspirations. Hadar, again, was one of them, but so were CeCe Wire, a project in the RioRewards certification program, plus a whole range of others (such as some of Mary Hettmansperger’s metal-weaving projects).

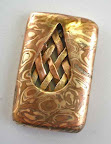
Sometimes, as in the silver pieces above, the weaving would be the main element in the design. Other times, as in the mixed-metals piece shown next, the woven portion is more of an accent to another important part of the design. Because of the thin nature of the strips used in the weaves, however, I always made sure that their ends were securely tucked into a frame.

Ahh, but do you remember the .960 silver I just mentioned above? Yes! While I’ll still guide students through some dos and don’ts in letting small ends hang out, we can now be far more adventurous in allowing that. We no longer need to be completely constrained by framing. Again, we can use solid frames if we want that in our designs, but it’s now an option, not a requirement. This class is going to be another one that’s lots of fun!

If you’re in the western PA area, or can get here for one or both of those dates, I hope you’ll join us!

Please note: The links in the title of each session above take you to the site from which you can reserve a seat at that particular class. In each case, the materials provided will be enough to make an interesting pendant. If you want to divide it in half and make earrings instead, that’s fine with me. If you want to buy a bit more material and make something big or even (if you find yourself so comfortable with this material that you are able to work quickly enough to…) make both a pendant and a pair of earrings, that’s yet another option.

Also: I’ve got two other workshops coming up this summer, both of which are multi-day events. I’m hoping to write about those soon too, but the ‘net access in my studio is getting increasingly less reliable (we’re hoping for a fix next month…), so I’m struggling to keep up with online announcements. But you should know that all my workshops at The Artsmiths of Pittsburgh are announced on the Eventbrite system. If you are interested in a specific class but for some reason can’t make it on the given date(s), please let me know. I’m happy to repeat any of my sessions on another date, whether it’s back at Artsmiths again, in my studio, or at another site.

Posted in General Techniques, Teaching Metal Clay, Technical Details | Tagged: , , , | Leave a Comment »

Well, that was a surprise!

Posted by C Scheftic on 2016/06/30

As promised in my last post, here’s the story behind the earrings whose photo I posted there….

1. In my fairly early days working with metal clays—as soon as I’d moved on from just using a creme brulee torch and bought my first kiln but when I was still working on tray-tables in my family room, years before I started this blog or opened my studio—I found much inspiration in the work of CeCe Wire (one of the pioneers in metal clay techniques), and one of the things I had fun doing was making pieces that played with shrinkage. I learned about the concept in her first book, from 2003, Creative Metal Clay Jewelry: techniques, projects, inspiration, and had that reinforced when I earned my PMC Certification in a course with her, in Baltimore in 2007.

At that point, I’d make a small piece (earrings or small pendants) out of the original PMC Silver formula (no longer available), that had a shrinkage rate of 28% (and had to be fired in a kiln for a full two hours). I’d embellish it with Art Clay Silver, that had a shrinkage rate of 10%. Why those two? Because their shrinkage rates were the farthest apart of all the clays at that time on the market.

Because it was constrained by the low-shrinkage clay, the high-shrinkage clay would curve and distort in interesting ways: the fun part was trying different locations for connecting the clays to discover what results I could produce. (This was also back in the day when the nominal price of silver was a mere fraction of what it is today…. I am so glad I started that early! Even then, I did feel limited in how much sheer experimenting I could do, but nothing like it would be today….) I did some other clay combos too, but that particular pairing consistently yielded the most interesting results. The relatively high shrinkage of “original” was the key, no matter what other clay was combined with it.

I stopped doing any of that when Mitsubishi discontinued their original formula. Like many others, I was sad to see it go, but I created enough designs in other ways that the loss didn’t feel as devastating to me as it did to some folks. Since then, a few other silver clays have come on the market with shrinkage rates in the range of 20 to 25%, and at times I’d think about reviving that old technique with them, but then would get caught up in other project ideas and that would slide way down on the priority list.

2. I have written here before about how I try to not store “leftover” clay. I just keep making things until I’ve used a packet all up. Some of my earrings are made with leftover bits. Little embellishments can be cut out or coiled up, dried, and used in later creations. The last few dregs can be shaped into little balls, dried, and stored for later use too. If I don’t have time at the end of a work session to use everything up, I will store the last bits for a brief time, but I do try to form those into something useful as soon as I can.

3. Last month, for various reasons (e.g., different projects, classes, demonstrations), I used a number of different clays, including these (as well as several others, but these are the ones relevant to the rest of this post):

Clay Formula Shrinkage Rate
PMC 3 12%
PMC Flex 15%
PMC Sterling 15% – 20%
.960 made with PMC3 Question #1
.960 made with PMC Flex Question #2, this post’s inspiration…

Re Question #1: In a comment on the post where Celie Fago introduced the idea of home-made .960, Holly Gage estimated the shrinkage of PMC3 and Sterling to be about 13%. In a post that further disseminates the idea of using .960, Emma Gordon writes that “You can use PMC3 syringe with it, no problem.”

Now, maybe I’m missing something obvious, but if folks are combining PMC 3 syringe clay with .960 made from mixing PMC3 and PMC Sterling, it seemed as though I should be able to combine PMC Flex lump clay with .960 made from it and sterling: their nominal shrinkage rates are even closer! I had a bit of Flex.960 left from one activity, so I used up those dregs making a couple little pairs of earring bases. Flat ones. Definitely flat. I had a bit of regular Flex left, so I twisted a little spiral-pair for one set of earrings, and made a little twisted rope to embellish the other pair. (With the last few bits, I made a number of little balls which I then accidentally knocked all over my studio floor. I’ll hunt for those eventually!)

And when I fired those two pairs of earrings … the photo below shows what I got! Can you see how far they’ve curved?!! I’m not disappointed in the results. In fact, I’m happily reminded of those early CeCe-inspired domed pieces that were so much fun. It’s just that this is not what I was expecting! The shrinkage rates on these clays are nowhere near as far apart as what I was using in all domed pieces I was making a decade ago — I would have expected this with those. Just not now.

I guess this is telling me I need to find some time (where?!!) to do some more experiments! If you’ve experienced anything like this, intentionally or not, please let me know.

Posted in General Techniques, Misc. Musings | Tagged: , , , | Leave a Comment »

And now, my original reason for taking the photos with my last post….

Posted by C Scheftic on 2016/01/17

I may to have to try to do this again in the summer, when the natural lighting situation is better, because I don’t think these photos tell the tale as distinctly as I’d hoped. But this is one thing I’ve been experimenting with over the past week…. The point is to look at the difference in the color (and size) of the silver pieces at different points in their process. (Next time, instead of trying to capture so many, I think I’ll try to focus specifically on just one or two, with close-ups.)

But here is a shelf-load of pieces, ready to go into the kiln. They don’t look silver-colored at all, do they, even though they are at least 90% silver! Next time, I’ll try to burnish one in the clay-state, to try to show that the silver really is there, but for now:

And here we have that same shelf-load of pieces, after being fired, when the shelf had cooled just enough to safely remove it from the kiln. Note the “white” color of these pieces: this is normal for just-fired metal constructed from silver clay. Comparing this to the previous photo, you can also get a sense of the shrinkage that took place.

And here is that same shelf-load of pieces, after having been run through either a rotary tumbler (with mixed-size and -shape stainless steel shot) or a magnetic finisher (with tiny stainless steel pins). I need to work on the lighting for each of the different versions (and I really struggled with the meager equipment I have to get all of the shined-up ones together without too many shadows or too much glare!), but I hope you can see that they are, at last, starting to look like silver!

Posted in General Techniques, Teaching Metal Clay, Technical Details | Tagged: , , , | Leave a Comment »

Take a deep breath and “Don’t Panic!”….

Posted by C Scheftic on 2016/01/16

On the day I’m going to write about, I was already thinking about The Hitchhiker’s Guide to the Galaxy when this thing occurred. (I’ll get to the thing in a moment….)

Why THHGTTG? Well, my favorite version remains the original radio plays; and within months I was volunteering with a radio theatre group that was forming at community-radio station WYEP-FM! (Over the decade or so that the group existed, I served as sound man (technical term for that role!), technical director, director, and producer.) When I saw the TV series, there were a few scenes that definitely impressed me, but mostly I thought that my imagination had produced a much richer galaxy than they’d been able to capture on screen (which is a huge part of what I love about audio productions). I went to the movie when it came out (much later, 2005) and I probably would have loved it if I hadn’t already been so spoiled by the earlier versions, but I remember two specific thoughts about that movie:

  • Though it seemed odd to have Simon Jones, who’d played Arthur Dent in both the radio and TV versions, replaced by Martin Freeman, that was still the moment when I realized that MF was an actor I hoped I’d be able to continue watching, and
  • Though it seemed odd to have Stephen Moore, who’d been the voice of Marvin the Paranoid Android in the earlier versions, replaced by another actor, I just melted into my seat when I realized it was Alan Rickman‘s voice I was going to have the opportunity to listen to that evening.

So I was thinking about THHGTTG because I’d been thinking about the various times I’d seen / heard / watched Alan Rickman because this was on the day his death was reported. And when I thought I’d lost a student’s piece, I was already primed to quote from THHGTTG, “Don’t Panic (in friendly orange letters)”!

Lost a piece?! A student’s piece?!! Let me back up from the start. Late last week I got an email from some folks who’d “found me” online, checked my website and saw I wasn’t promoting any classes in the short term, but wrote me anyway. With a friend coming in for the weekend, they’d been hoping to find an introductory metal clay class. I responded that, though I didn’t have an “official” class scheduled, I could free up a couple hours on Sunday afternoon for a “semi-private / custom” lesson on basic techniques. My schedule was tight enough for the day that we wouldn’t have time to make anything elaborate, but there’d definitely be time for a few basic pendant and/or earring pieces: textured on both sides, cut into interesting shapes, embellished a little bit, domed for drying if they wanted, and finished nicely all over. They’d get a feel for working with the clay and, if they wanted, we could cover something more involved later on.

I’m very glad I made the offer: they came on Sunday and were lots of fun to work with! I showed some sample pieces where I’d embellished them with metal clay decorations, but also others where I’d kept the clay-design simple and embellished with beads and wire and such afterwards. It’s always interesting to see different techniques resonating with different people, and that afternoon was no different.

Having fit this into my schedule at the last minute, I said I’d fire and tumble the pieces over the next few days, would have them ready at some point, by the next weekend at the latest, and would send a note as soon as they were ready. So far, so good.

Now, most of the pieces were domed, so my plan was to fire them in a small crucible and provide some support for their shape by nestling them into fine vermiculite. Between all their pieces plus a few I’d made during demonstrations, the bowl was feeling pretty crowded. I wasn’t worried about pieces being so close they’d fuse. But I was a tiny bit concerned that, because having a lot of metal in a close space can help hold heat in that one area, I might have to drop the temperature and/or speed a bit. I could have just poured vermiculite on the shelf to spread things out, but I had a few scraps of fiber blanket, so I took a couple items out of the crucible and placed them on the kiln shelf with a bit of that for support, and it all seemed better.

What I did next is something I learned to do a long time ago: I take a photo of everything on a kiln shelf before I put the shelf into the kiln. I don’t necessarily keep those photos for very long. It’s just that, if I notice anything “odd” when the pieces come out of the kiln, sometimes it’s just useful to be able to go back to the pre-firing photo and double-check what a piece had looked like then.

So I fired them one afternoon, did a quick check once the kiln had cooled a little bit, saw that everything looked fine, and headed off to an evening meeting on another of my activities. I came back the next day, prepared to work on something while the pieces tumbled. In the workshop, I’d talked a bit about the different results I could get if I tossed them with mixed steel shot in my rotary tumbler for a couple of hours versus if I ran them for 20 minutes or so in my magnetic pin finisher. So I was sitting there, lining up the pieces according to which they’d asked to have treated each way, when I realized that one of the smallest hearts was missing.

No panic: I must have just missed taking it out of the bowl. I poured the vermiculite from the crucible into another bowl. No sign of it. Don’t panic! I started looking around my studio. No sign of it. Don’t panic! Because I hadn’t felt like taking time to set up the exhaust system (works fine in the summer; doesn’t have quite a good enough seal for use in cold, wintry weather … another project to finish), I’d just put the kiln on a cart and wheeled it into an unused room to fire the day before. Don’t panic! And I’d moved the pieces around, placing a few with support on the shelf in order that the crucible would have fewer pieces crowded in there, so could I have set it down and just missed putting it back in the kiln? No sign of it in the other room either. Don’t panic! I just kept repeating that to myself. I poured the little bits of vermiculite back and forth yet another time, still no sign of it. Don’t panic!

The missing piece was a tiny domed heart. Had it been something I’d made, I would have not had to repeat that mantra as many times: I would just have made another one and found something else to do with the first one if it ever turned up again. But this was not my piece; it had been made by a student. I could offer her some more clay and a chance to remake it. But the missing piece was one by the out-of-town visitor, and apparently she had been the person who’d been most enthusiastic to learn about metal clay and had encouraged a friend in Pittsburgh to find a class they could take together when she’d be here … and this was one of her very first ever pieces. I do remember how attached I felt to my first piece. I had to find this one.

Take it easy, Carol. Don’t panic! Just sit there and think. You took a photo before putting anything in the kiln. See if it’s in that photo (the one shown above). Yes! It was there. So … where did it go?!!

Hold on a minute. Don’t panic! You did something else, not your usual routine, when you checked the pieces last night. You’d been thinking it would be nice to have a good set of before-and-after photos, to show what “dried clay” looks like going into the kiln and how “just-fired silver” looks more white than silver. You took a photo last night so there really is no reason to panic: just check whether the piece was still there afterwards too.

Do my blog readers ever do those “Identify all the differences between these two images” puzzles? (1) One photo of these pieces was taken in the daytime; the other, after dark; so there is a slight change in the overall color tone besides just what is there in the dried- versus just-fired-clay. (2) In the pre-fire case, the shelf is sitting on my metal-top cart; in the post-fire one, I’d put a double layer of black “welder’s cloth” and “kiln posts” on the cart before setting down the then-still-hot kiln shelf. (3) The shrinkage that goes on with the binder-burnout and sintering=phase is visible, which I think is great! (4) But have you, my readers, found the missing piece yet? Is it there, after firing, or not? If it’s not, where could it have gone?

I’ll let you think about that for a moment. I’ll answer, and continue the story, in the comments section of this post. I’d love to see some of your comments there, too.

Posted in General Techniques, Misc. Musings, Teaching Metal Clay | 1 Comment »

One more thought on using my tumbler…

Posted by C Scheftic on 2016/01/15

Well, it’s about time! Last night, I finally took two minutes to figure out how to “publicize” a blog post on Facebook. (That time was split between finding where the settings were and choosing among the options available.) And I used that feature for the first time with my last post. This morning, I found the following exchange over there:

Now, Alice is correct. So I could have just “liked” her comment but, well, I admit I don’t know how to be terse, and I thought it was worth trying to be clear about what was going on, for anyone else who might stumble across the discussion here. So I decided that another blog post was in order. Once I’ve got it ready, then I’ll go “like” her comment and share this post too.

This is what my rotary tumbler looks like when I’m ready to use it:

There’s a brown paper bag folded in thirds and stuck under one end. Why?

Well, I don’t think it’s specific to this style of tumbler, though it may be a bit more common with these than with some others. But I discovered this trick with the very first tumbler I ever used: a little, all-plastic, undersized for its intent, rock tumbler for kids. The key is that the barrel has to be in good contact with both rollers, both of which have to be able to turn smoothly.

In an ideal setting, the base would be flat on a table. The motor would turn and the belt attached to it would turn the roller in the middle of the base. That would turn the barrel. Because the barrel is also supported by the other roller–the one at the end–that one would turn too. Thus, the motor, belt, both rollers, and the tumbler would all roll around together.

But, with this particular unit, if I simply put the base flat on the table and set the filled barrel on it, then the roller in the middle–the one that’s driven by the motor–that one turns just fine. That’s my clue that the “belt” connecting it to the motor is adjusted correctly. (If that roller slips, or seems to stick, that’s a sign that the belt needs to be adjusted which, for the record, is a routine maintenance task.)

In my case, however, this barrel would just turn in fits and starts. The “other” roller turns only when the barrel turns, so it’s not helping either. It seems to me that there are two possible solutions (though I do welcome other informed suggestions…):

  1. Slightly raise the end with the motor on it. This pushes the barrel onto the roller at the “end,” which forces that one to move along with the barrel.
  2. Slightly aise the end opposite the motor. This pushes the barrel onto the roller in the “middle,” which reduces the role of the one at the outside end.

I’ve tried it both ways and, in fact, both seem to work. But, as shown in my photo, above, I tend to set things up the first way, so the end with the motor is just slightly higher than the other end. In my logic, the second way seems like it’s putting extra pressure on the motor to do all the work. The first way seems to force both rollers to contribute to the effort, and that’s why I prefer to set it up that way.

If you have any other suggestions, or a better way to explain what’s going on here, please contribute to the discussion via the comments below!

Posted in General Techniques, Misc. Musings, Technical Details | Tagged: , , , | Leave a Comment »

I love my clear plastic hexagonal tumbler barrels!

Posted by C Scheftic on 2016/01/13

An art-jewelry-friend of mine, Zoe Nelson, posted this in a metal clay group on Facebook last week. But I check Facebook only sporadically, so I didn’t see it until a day and a half later, by which time she’d already received dozens of suggestions and found a neighbor whose car-repair tool (an oil filter wrench) actually helped to solve the problem.

Until then though, none … none! … of the suggestions were how I would have responded: a few were halfway-decent alternatives, a few were complaints rather than solutions, some were simply sympathetic notes, and the rest were ideas that were far more complicated than I’d’ve thought necessary, a few even likely to damage the barrel. Thus, this blog post, at last, that Zoe knows I’m writing for her (and any others in a similar predicament!) to have for future reference.

I did make a range comments about my tumbler that uses these barrels, and more, a few years ago. (Looking for the link — gosh, that was way back in 2012!) So I have over three more years experience with it since then.

Yeah, the clear plastic lid can be a bit tricky. But (just as Zoe said in her Facebook exchanges with her readers) I’ve had as much trouble, in different ways, with the lid on the kind of barrel that’s made out of black rubber. While your experience may differ, I will take the clear plastic ones any day!

You can follow the link above to read the pros and cons I wrote back in 2012 (and see a few more photos, plus other alternatives, if you landed here without a lot of knowledge of tumblers), but here are the things I want to say now that relate specifically to Zoe’s problem and anyone else who may encounter a similar one.

First of all, let’s try to prevent the problem from the start:

  • After you’ve filled your barrel with shot, water with either a bit of dish soap or burnishing compound, and the pieces you want to tumble, do this: Dip your fingertip in the liquid and run it around the rubber ring that seals between the barrel and the top. You don’t need to soak it, just get it slightly damp. This seems to help it form a good seal.
  • Then put the lid on and turn it backwards until it feels like it is seated correctly and fits smoothly. (I don’t do this all the time, but if it seems to stick at all at the next step, then I always back up and do this!)
  • Turn the lid forward to tighten it. It should turn smoothly and freely: if it doesn’t, stop! If you have trouble getting it on, you will have more trouble getting it off! It should tighten easily. If it’s catching, it’s not seated correctly. Back up a step, and repeat that one and this until you get it to close up easily.
  • Then, tighten it a bit more so that it seals. The lid does need to be tight, but not super-tight. Tip the barrel sideways and turn it around a couple of times (like it will turn on the base), and see if it leaks.

    • If it doesn’t leak, proceed to start tumbling.
    • If it does leak, try to tighten it a little bit more and repeat the test. (If there is some liquid in the little “gaps” in the big part of the barrel, where the straight edges connect to the rim, that might be all that’s leaking. So test it for a bit longer and see if it stops dripping once that has emptied out.)
    • If it continues to fail, don’t over-tighten it! Spin the lid backwards and, if it moves smoothly, go ahead and try to re-tighten it. If it doesn’t move smoothly or still continues to fail, just take it off and start from the first, seal-lubricating step above (checking to see if it may be time to replace that rubber ring).
  • When you’re done tumbling, the lid should come off…. It may take a bit of effort (you did have it sealed up well, you know, so it wouldn’t leak!), but set it down flat on a table, hold the barrel, and figure out how to push down (to press against that great seal you managed to make) and turn the top, let up and turn if you can, push a bit more if necessary and keep trying to turn, until it starts to move.

Now, if that last step doesn’t work, ignore all the suggestions about things like cooling the bottom while heating the top, or hitting the edge of the lid with a knife, or trying to pry the lid off, or any of the other tricks that people have tried in their kitchen, and use the method that I always use in mine and which has always worked on my clear plastic tumbler barrels too. I will quote it directly from the funny but still useful book by John and Marina Bear that is illustrated to the right (just so you get an idea of what the whole book is like, in addition to the tip on what to do…):

Problems with Utensils
Stuck bottle or jar tops

H. Allen Smith revealed to the world the technique for opening all screw-top containers. Now there are untold millions of us who face Mount Kisco or wherever it is he lives and say thank you every time we are faced with an obstinate top.

The technique: Bang the top flatly on a hard surface, like the floor. Not the edge, but the flat surface of the top. Just once. Hard. That’s all. And to think of all those jars we used to hold under hot water.


(Not that I want to date myself here, but I found that book in what must have been just a few months after this version was published. I have the 1973 UK edition: that’s the year I moved there — my second real full-time job after college — and I suddenly found myself cooking in a somewhat different kitchen using a number of unfamiliar local ingredients, and in London at that time there was a waiting list of over a year and a half to get a phone installed! (I was there for only two years, to the day! So I never even applied to the waiting list. We had postal service twice a day, and lots of people I knew didn’t have a phone either: we could simply write letters back and forth to make plans for the evening! But I digress…) Transcontinental phone calls back then would have been way too expensive anyway… so I had no way to call my family or old friends for help and there were times when I just wasn’t ready to admit to my new English friends some things that tripped me up. The book was a hoot — written by former New Yorkers living in the UK — so although it did use the British terminology I was just beginning to learn, the attitude sometimes felt familiar. And it was helpful too! People seem to either love or hate that book, and I’m one of the former….)

Anyway, there may be a few “bad” clear plastic tumbler barrels out there (and others that have been damaged by mis-use) that are harder to tighten, and those will also be harder to open. But I have two myself: one marked A for the Latin Argentium aka silver (or other precious metal) pieces, and the other, marked B, for pieces containing any form of Base metal. I’ve used a few others at meetings or workshops. I’ve seen people struggle to get them to seal and I’ll admit I struggled with mine the first few times I tried to use them, until I got a feel for it. Like riding a bike (or rolling out metal clay) once you "get" it, it seems easy!

And, every time I’ve had a problem closing any of those barrels, I’ve just loosened the lid, spinning it backwards until I’m sure I’ve got it seated right, and closed it back up with little difficulty. If I tighten it just enough to get a seal (and even that does take a bit of practice to get the feel, but it will come if one remains calm and pays attention), it may take a bit of oomph to get it to start to open, but it will come loose again. Or, if it does resist, just use the tip above: lid down, flat, once, hard.

Because we do need to be able to retrieve our beauties once they’ve completed their tumble-burnishing, don’t we?!!

Posted in General Techniques, Misc. Musings, Technical Details | Tagged: , , , | Leave a Comment »

Holiday Season Special Earrings!

Posted by C Scheftic on 2015/11/22

While I was going crazy coloring ornaments, I also colored a few little copper stampings that I then made into earrings. (Done quickly, most have been colored on one side only: unusual for me, but it makes sense since this is an entirely different process.)

Because of the raw copper underneath, these are bound to come out a bit darker than many of the ornaments, but I still think they make cute little casual holiday treats. I don’t normally like to coat my metal pieces, but I did put a waterproof acrylic coating over the colored side of each piece. I still wouldn’t recommend wearing them while you swim or otherwise expose them to any chemicals but they should hold up under normal use beyond that.

I could make more of those, or just make singles and hang them as pendants … if there seems to be interest. Time will tell!

And then, while I had the stampings out, I made a few red-green-glitter ovals too, and priced those the same as the other decorated stampings. Making those reminded me of a number of the reasons why I am not, personally, a big fan of glitter. (Maybe if I did more with it I’d learn more tricks; I do have some dear glitter-crazy friends and I’m sure they’d be happy to help me. But I do know the basics and my issue is that I think it’s too much mess and and what feels like sheer work to justify in my own mind the end result: it can be nice but I just find other techniques so much more fun!)

Still, I’m happy to fulfill custom order requests: I do have all the stuff to make more and would be happy to keep going until I’ve used that up, should anyone want more once these are gone!

Oh, and both kinds of earrings are offered on hypoallergenic niobium earwires that have been anodized to the nice dark-copper-brown color shown here.

Posted in General Techniques | Tagged: , , , , | 2 Comments »

2015’s Crazy-busy Season Is Here!

Posted by C Scheftic on 2015/11/20

You’d think I’d know better by now … taking on a whole new project right before crazy-busy-sales season! But why not make something new and fun to help celebrate the season?

Though I have made some new jewelry items in recent weeks, I really have been trying to plan ahead more often (you’ll see there’s a joke here in a moment…) and I had a decent amount of “inventory” on hand from summer and early-fall production sessions. The first photo here, for example, shows a handful of simple sterling silver (.960) and bronze pendants I cut using an electronic cutter by Silhouette America. (For those familiar with them, I have both a Cameo, at home, and a Portrait, in my studio. When I add this to my teaching repertoire, I might get their curio too…)

Then I happened to go to a local (regional) crafts store (Pat Catan’s) just to get a roll of vinyl for a little home decor project I wanted to make as a gift for a friend. Worst part of the story is that they didn’t even have the one I wanted in stock just then. Now, I could well have ordered it from somewhere else online: but I only thought of doing this at the last minute (ha! ha!) and I wanted the vinyl in order to make the gift that day….

So I strolled around a bit looking for something else I could make that afternoon (I needed to deliver it at lunch-time the next day, you see), and there they were: clear glass ornaments just calling out to be decorated! Of course, I bought one box (just one!). Again, of course, I picked up a few other little supplies, added those to some I had on hand already, and had a great time decorating. The next day I gave several to the friend and, on my way home, stopped at a different Pat Catan’s to look over the entire selection, walking out with several boxes each of seven (7!) different size / finish / shape combinations and a months-long project ahead of me.

Though five of the shape-size combos are fairly traditional for ornaments, two have flat bottoms so that, while you can hang them on a Christmas tree, you could instead just set them on a flat surface. The round ones even came with a double-loop around the top so that, if you did set them on a table, you could insert some sort of card in between the loops: a photo, a note, a place-card at the dining table (that your guests could then take home as gifts, perhaps!), etc. I looked at how those were made, and ended up making my own double-loop tops to use on the square ornaments in place of the standard (single-loop) ones they came with.

Then I had a grand time coloring them, most of them both inside and out. I made that style just because I like them the most that way … so if they don’t all sell I can still be happy about using the rest of them myself!

As is usual for me, they’re finished on all sides! And, of course, no two are alike, not even when I tried to make a pair to match, just to see if I could. (Those do look related, but they still have noticeable differences. So, in the end, I went for variety. I’m happy with variety!)

To be sure, I will still have lots of jewelry available too! I’ll talk about where everything will be available in an upcoming post!

Mostly, this will be pendants and earrings in silver and bronze. I’ll have a few pieces in other styles and / or metals, but those are my favorites to work in (at different times, somewhat just depending on my mood because they are different in subtle but important ways).

With daylight hours getting shorter and shorter this time of year, I’m glad to have all these various bits of brightness around me, made of glass and metal and love. I hope they’ll soon find new homes and help brighten up the lives of others too.

Posted in General Techniques | Tagged: , , , | Leave a Comment »

Sili, Sillier, Silliest

Posted by C Scheftic on 2015/07/30

Lately it seems that all I’ve managed to post about are shows, not the creative process. I do love shows, parties, festivals, and more. I want people to see my creations, those are great ways to enable that, and talking about those is generally considered to be a way to help in finding an audience for my works.

But I also enjoy sharing information about the processes involved in my artwork so I’m going to try to slip in one of those posts today. I’ll discuss a technique I use at times that I only just realized I haven’t written about here: using a little electronic die-cutting machine on my metal clays.

As far as I know, Wanaree Tanner is the one who got the ball rolling on using these with metal clays, traveling around doing workshops and promoting the use of the Silhouette Cameo several years ago. It seemed to me that the thing she promoted most was using them to create your own elaborate bezels for setting stones. She doesn’t seem to be making such a big deal about the Silhouettes any more (though anyone who follows her work can see where she’s still using hers).

I can appreciate the way she simplifies the making of such bezels with that tool; it’s just not a style I want to emulate all that much myself. Cindy Pope seems to be the person now leading the charge with Silhouettes and metal clays, making layered designs, etching words and patterns along various shapes, and doing all sort of things I find much more up my alley, design-wise. (Cindy was also a great house-mate in CA and then host in OR the last time I went out to the west coast!) The photos with this post will illustrate one of the very simplest applications of these cutters.

Several years ago, I bought a Silhouette Cameo. I used it a few times with metal clays, enjoyed the results, but still found my own designs mostly going in other directions. But I do use that device at home for all sorts of useful little paper-crafting tasks which is really what that machine was designed for.

Of course, not long after I bought my Cameo, Silhouette America came out with a new machine, called a Portrait (more compact than the Cameo), and then a newer version of the Cameo (with a touch screen instead of the buttons that both the Portrait and my older Cameo have)! I guess those are why the one I got was available at a really good price at that moment in time! But that’s fine, because they all use the same software, and attachments, and so on.

The biggest difference is that the Cameo will cut up to a 12″ width, while the Portrait only goes to 8″ across. Your big scrapbooking papers, wide vinyl, etc., are going to be 12″ across, so the Cameo is best if that’s the sort of thing you’re ever going to do. Metal clay folks work with small bits of clay, however, ones that are typically just one or at most just a few inches across, so the Portrait is more than enough if you’re never going to work on big projects. At one point (after several months of really good sales at my end … and another really good-price offer at Silhouette’s), I bought a Portrait. I figured that having two could be useful: it would allow me to have one each at home and in studio and, even better, it’d give me more options when I finally get around to trying to teach a workshop on using the tools. (Whatever I’m doing, I’m still always thinking about teaching it to others!)

My Portrait now sits on the table next to the computer in my studio. I’m still not into making Sili-cuts as my primary design tool but, now and then, such as times when I’m feeling a bit of a creative block with other methods, I’ll sit down at computer, sketch out a few simple designs, and use those to cut out a few pieces. Just making something, getting a feel of accomplishment, will usually get me out of feeling stuck again. (And that’s probably why I don’t post much about those creations — they feel more like little “interim activities” to me and, once I’m over whatever stuck-ness I was feeling, I’m not particularly inclined to write about them … much as I do enjoy the process (in limited amounts) and appreciate the opportunities they provide.)

So there I was one day a few weeks ago, with a brand new tube of “One Fire Brilliant Bronze” clay powder. This was the only one of Hadar’s basic “One Fire” clays I’d not yet tried. I wasn’t feeling stuck or anything, I was just looking for something simple to make to try out this new-to-me clay. I had fought a bit with the older Quick Fire Brilliant Bronze: I did like the bright golden color; my problem was that I kept facing challenges with the “bottom side” of textured, reversible pieces I’d made with it. (And regular readers of this blog will know that textured, reversible pieces make up the majority of my creations!) The thing is, with pieces cut on the Silhouettes, you really want one side of the piece to be flat: that helps it to stick better to the cutting mat! So, I thought, if I’m ever going to try this One Fire Brilliant Bronze, using it for plain-backed Sili-cut pieces seems to be the way to go.

So, I mixed up a batch, took a part of that and added a bit of glycerin (which gives the dried clay a tiny bit of flexibility, which is extremely useful as you’re separating your just-cut pieces from the cutting mat!). Then I rolled out a few small pieces with light- to moderate-depth textures on one side only, and set those aside to dry while I sketched a few sample designs. Not imagining I’d have any reason to write about it, I didn’t stop to take any photos. I loaded the clay pieces onto the cutting mat of my Portrait, and cut away. The cutting was the easy part!

As always with a new-to-me clay, I did NOT fill up the kiln for my first firing. I started small, taking just one pendant and two smaller, matching pieces (an earring-pair) and fired those. Massive fail: bubbles and cracks: overfired by a lot! I took another earring pair, dropped the temperature, and tried again. Overfired again but, OK, not quite as much. Another pair, dropped the temp a good bit more, tried yet again. Still a bit bubbly, meaning they were still overfired. To drop any lower, though, I’d be going well below the recommended temperature for that clay, so I went online and asked Hadar herself for some advice. She said the firing range for that clay was actually rather large, she often fired at a temperature close to where I had ended up. Since I know my kiln does actually fire a bit hotter than where I’ve set it, it only took me two more tries before I got things to work out the way I wanted!

But, while waiting for Hadar to reply, I fell into one of those pits where I couldn’t think of anything else to create. So …. I mixed up some .960 clay, and rolled out a number of small, thin sheets of that with textures on just one side.

Aside: My .960 was made by mixing .999 PMC Flex, which serves the same purpose as the glycerin, and .925 PMC Sterling, which gives more strength to the thin pieces that are at the limit in terms of thickness hat the Silhouette Cameo and Portrait machines can cut. I used .960 instead of straight .925 because its firing is as reliable as the super-easy .999 fine silvers…

To keep things simple (since I was just trying to perk myself up during a brief lull!), I used the same sketches as I had for the bronze, cut out nine (9) silver pendants and six (6) pairs of earrings (shown in the first photo in this post), cleaned them up a little bit as needed, and fired them right away.

When I finally got a Brilliant Bronze piece to fire successfully, I took a photo of it.

I then fired all the remaining Brilliant Bronze pieces I had waiting and, when those came out fine too, I polished everything up and took a photo. Well, this isn’t quite everything: it’s just pendants (not any of the earrings) and only the ones for which I had enough chain! I’ll have to get some more for that, and finish off the rest. But I am feeling a great sense of accomplishment!

A few final notes:

  • Hadar also now has a number of “One Fire Flex” clays (not every color in her range, but many of them). The were designed specifically to be used with electronic die-cutters, like the Silhouettes and other machines on the market. I have purchased a bit of that, but have yet to try any. Since the winter of 2007-08, I’ve been adding glycerin to clays (in varying amounts, and to different clay formulas, depending on the amount of “flex” I want in my dried clay, anywhere from just enough to peel away a cutting mat without breaking to wiggly-enough to tie a knot!) and, while it can be nice to get a little flex without having to do that, it’s now so second-nature to me the need to switch is just not urgent…
  • Silhouette America had at least one model before the Cameo, which I think was called an SD (for Silhouette Design, I would think), and they’re about to come out with yet another newer one, the curio (yes, they use lower case for it). The bed of curio will be even smaller than the Portrait, but it will be able to cut thicker materials, meaning thicker layers (less fragile after firing) of metal clay! (Though the Silhouettes are all at the low end of cutting-force compared to other electronic die-cutters, so the curio will still be limited by that with regard to some other materials.) Still, though I’d love to have that option, I need to sell a lot more pieces before I spring for yet another machine… I don’t see the curio replacing my Cameo but, if I were just starting out now, I’d get it instead of the Portrait. Still, having all three could be useful for workshops next year…?!
  • I’ve fired a few more loads in the two weeks since the adventures reported above and, at the same temperature (even just a tad lower with the last, very-full load); all have turned out fine! I’ve heard / read about some people who say they don’t like Hadar’s clays because they seem so fussy. My personal experience is that each new one does seem to have its own personality, what it’s like to work with and to fire, but once you find its sweet spot, it’s then at least as reliable as any of the others on the market. Regardless of whose clay I’m using, the scientist / engineer in me is fine with starting off slow, observing what happens, building my understanding, and then taking off! The next time I go on a real Sili-binge, with much more elaborate constructions, I’ll try to remember to illustrate those here too, eventually. It really is a fun little tool!

Posted in General Techniques | Tagged: , , , , , , , , , , | Leave a Comment »

Combining Inspirations

Posted by C Scheftic on 2015/04/15

Two of my favorite art jewelry makers and teachers are Hadar Jacobson and Mary Hettmansperger. I love many of their designs, though I’m rarely if ever inclined to copy any of them (including those in their project books) exactly as shown. What I like is the way they create designs using techniques that inspire me to tweak a little here and a little there, and somehow end up making something that’s much more my own.

Towards the end of last year, I was browsing through one of “Mary Hetts'” older books, Wrap, Stitch, Fold, and Rivet (© 2008), looking for some tip I thought I’d read in it a while ago, when I was stopped dead in my tracks by a project I’d seen before but had never given much thought to, one she calls a “Bead Shelf Pendant.” In it, she talks about cutting, punching, and heat-coloring copper, but at that moment I suddenly saw a variation on it as a great metal clay project as well. The first photos here show one of several fine silver pieces I made as soon after realizing that as I could find the time.

I wore a couple of them throughout the holiday season at the end of 2014, and I probably got more comment and compliments on those than on any other piece I’ve ever made and worn. I’m not just talking about friends and family comments, I’m including store cashiers, physical therapists (yeah, one of the reasons I’ve been off-line a good bit lately), random people sitting near me at concerts, and so on.

Since I had so much fun both making and wearing those pieces, at the start of the year I tried a few others. The second photo here shows one of the first bronze pieces I made in this style. Bronze is a less expensive metal to purchase than silver, so I felt I could afford to go bigger (wider or longer) with the ones I made that way. Mind you, working with bronze (or any other base metal clay, such as copper or steel) takes more time which I feel, in the end, pretty much balances out most of the savings on the materials. The final retail price for a base metal piece ends up similar to that of a silver one of a similar design, because of the extra time one has to spend on it. The thing bronze does allow me, however, is the opportunity to go a bit bigger without having the price of a piece go out of reach. The one shown here (reversible, with a “fiddlehead fern” texture) is about as long as the silver one, but easily thrice as wide.

But, as I was playing around with my first bronze bead shelves, I had another “gotcha!” moment: Foldies! These are also known as Drapings. There’s a great description of the basics of this technique in Hadar Jacobson’s third book (© 2009), Mixed Metal Jewelry from Metal Clay, on pages 104-105. I’ve made a number of such pieces over the years (and posted a number of photos on this blog) but, while I’ve been happy-enough with the ones I have made so far, I have never been totally satisfied with any of the bail designs I’ve used. But, as I was making those bronze bead shelves, it suddenly came to me: make a bead-shelf-foldie…. You’ve already seen on this blog a photo of the first one of those I ever tried (which, for the time being at least, I’m keeping in my own little stash of personal NFS (not for sale) pieces): it’s one of the pieces I submitted with the application that got me admitted to the Pittsburgh Society of Artists.

The bead-shelf-foldie is fun to make out of clay (thanks, Hadar!) and fun to finish and hang (thanks, Mary!), and I find an extra-bonus in having found a way to adapt ideas from two of my favorite jewelry artists. I look forward to stretching this idea even more in the future.

Posted in General Techniques, Teaching Metal Clay | Tagged: , , , , , , , | Leave a Comment »

One Little Bit of March Curiosity

Posted by C Scheftic on 2015/03/18

Well, actually, the photo does show two curious bits … if you’re counting both pieces that make up one pair of earrings. But it was just one quick little experiment. For some time now, I’d been curious about the “Magical Silver Plating Paste” that, I forget when, I had noticed on Val Lewis’ website. So, after I’d earned a little bit of extra money earlier this month (Thanks, Deb!), I ordered myself a little jar of it to try out.

Now, I will admit to being surprised when I read, in various online forums, about someone having bought some new product who spent hours if not days trying to create some masterpiece with it straight off, and then feels devastated when something goes wrong. Often, something that any experienced person would have known from the start would have gone wrong… Now, I will admit that I’ve had a few big-time failures with things I really thought should have worked, but not many. I tend to start small, first time out, and then work up to bigger stuff, even if something big is the reason I want to head down that path.

So, when the paste arrived, I did not immediately go off trying to plate something big and intricate. Instead, I dug around in the nooks and crannies of the cabinet in my studio where I stash leftover bits and pieces. I found two little disks I’d made months ago out of Champagne Bronze. They were made during a push to produce a lot of earring in a short bit of time. I’d used up all the anodized niobium earwires I had on hand that day, and just stashed a few remaining “elements” in the cabinet to use in the future, once I’d made or obtained more of the wires.

And, even though I’ve not yet gotten around to replenishing the stash of dark earwires (that I tend to use with bronze), I thought, “Hey, if I plated these, I could use a couple of the sterling earwires I still have in the drawer.” A little later on I came to realize that this design had an interesting mix of two different textures on it: I could try plating just one part and leaving the other in its natural color, so I could then compare how things looked from the start and how the different parts held up over time.

The instructions for the paste say to just apply it with your fingertip, but that the product can stain your skin so it’s best to wear rubber gloves. First time out, I do tend to follow instructions, so that’s what I did. And there I was, holding each of these little (barely 10 mm) disks in the rubber-gloved fingers of one hand while trying to apply the paste with a rubber-gloved index finger of the other one. Oh, and not to the whole piece, just to the bottom half of one side, a decision I made only after I’d begun applying the stuff to the first piece! So, please understand: any “imperfections” in the coverage are entirely due to operator-error first time out. In the future, if I decide I want to plate part of a piece, up to a very specific point, I’ll spend a bit of time before I start thinking how best to achieve that. For a brief, initial trial, however, I am pleased with this result, with a sort of gradual shift from dark yellow bronze to a sort of silvery bronze to a deeper silver.

As to the process, the application was easy! I scooped just one tiny “drop” of the stuff out of the jar, and achieved this coverage on both pieces. It did take about three passes to get what looked like good coverage. I wasn’t at first sure what I was getting, because the stuff looks a dull gray as it goes on. Since my fingertip was a tad moist (per instructions) as I applied it, I waited briefly for some drying to occur. Then I buffed it a bit, decided to add a few grains more to one edge, buffed again, and decided that was fine for now. Again, as instructed, I then gave it a good wash, dry, and polish, before taking this photo.

I have some ideas for more complex copper and/or bronze pieces that I’ve been wanting to make, but have not tried yet because I wasn’t sure that they could bring in enough revenue to justify the time involved in making them. That’s the thing about working in base metals: the materials cost less so customers (understandably!) think they should be priced significantly lower than precious metals, while artists (also understandably…) know it typically takes as much, and sometimes more, time to make a piece out of those materials. My thought in buying this stuff was that being able to promote them as having at least select portions silver-plated might help justify in customers’ minds a more appropriate price, while not adding too much additonal time at my end.

I’ll do a few more experiments on simple, little elements like these and, if I continue to see success with this approach, then I’ll move on to the more complex designs. Whatever the final outcome, I’m sure I’ll have fun experimenting!

Posted in General Techniques | Tagged: , , , | 1 Comment »

Some Bronze Buttons.

Posted by C Scheftic on 2015/03/12

While I was making the little domed disks I used for the charms I mentioned in my last post, I had another small project going, an item I’d made ages ago and had for some time been wanting to make more of: Buttons!

And then, my colleagues in the Western PA Metal Clay guild decided that our project / activity for our January 2015 meeting would be to make bracelets in the style popularized by Chan Luu, where the closing on her signature pieces involves a hand-made button. So now I had the push I needed to return to button-making.

Except our January meeting was cancelled due to weather issues, and the project was pushed forward into the February meeting. I didn’t want to show button pictures until we’d done the guild-project, so I put off posting about it. And then I got bogged down in snow-shoveling, ice-chipping, pothole-damage to the car, etc., until tonight, at last, I found a few minutes to take a few photos to share here.

First (above) is a photo of eight different buttons: three were made from Hadar’s Quick Fire Bronze and five, from her Rose Bronze.

Second (left) is a photo of the bracelet I made during the guild meeting … for which all in attendance offer thanks to our leader-for-the-day, Sharon Shepard! That one includes yet another of my Quick Fire Bronze buttons.

Third, not shown yet, are the backs of any of the buttons. Regular readers of this blog will know that I usually show both sides of the pieces I make. In large part, that’s because I tend to make pieces that are fully reversible. But buttons may or may not be used in ways that are readily reversible. So I made some shank-style buttons (all the ones shown here feature shank-backs) and some other two-hole ones. I hope to write more about all of them eventually.

But I’m not doing that yet: (A) Part of the button-making involved trying out a handful of different techniques for actually making shanks. While I do know enough to be successful at that, in general, my exploration-goals were to (1) examine how easy/difficult the different ways might be and (2) to be able to test whether any particular approaches held up more/less well after longer-term use. And (B) I’m testing them by further by producing samples of ways to use them well beyond just the Chan Luu bracelets, which also takes time to work out.

Why am I going to all that “trouble” when all I needed was one button for one bracelet at one guild meeting? Because the reason I’ve been wanting to spend a few weeks making buttons, and then several months (or more!) testing them out, is because for a long time I’ve been thinking I should put together a button-making workshop!

There are just soooo many great ways to use buttons and button-shaped elements. I’m looking forward to creating a variety of pieces to incorporate those, myself, and to the further inspiration I’ll get from students when I offer the class. I’ll post places, dates, and times here (and elsewhere) once I am satisfied that I’ve done enough testing. After I’ve taught it (once or a few times) then I’ll be more inclined to come back write more about it here. Please stay tuned…!

Posted in General Techniques, Guild, Teaching Metal Clay | Tagged: , , , | Leave a Comment »

A Simple Weaving Project with PMC Flex

Posted by C Scheftic on 2014/11/25

Let me be clear from the start: I think that “weaving” metal clay is loads of fun, and it produces interesting results. Great combo, eh?

Some Background

I don’t have any decent pictures from when I first started trying to weave metal clay. I don’t even have any of the earrings I made by weaving strings of PMC+ (on my own) or strips of PMC+ sheet (when I took a RioRewards certification class with CeCe Wire, down in Baltimore). Both ways, I had fun doming the results by backing that with the now-discontinued, sigh, high-shrinkage PMC Standard clay. But here’s a pair of the latter that I made in 2010 (yeah, well, I redid the Rio Rewards when Tim McCreight taught it a few miles from my house); this photo is from when I used them as one of my entries in Vickie Hallmark’s Month of Earrings Challenge that year.

Woven Rectangles

While I enjoyed doing this, and I did play around with other weave-spacings, I found that the sheet product had two drawbacks. First of all, you have to be very careful attaching sheet to a backing or frame: not enough water and it doesn’t stick, but too much and you’ve ruined it. Second, another thing I love about metal clay includes the design possibilities with textures, and sheet does not take textures the same way. Early in 2008, not long after Hadar Jacobson’s first book (The Handbook of Metal Clay: Textures & Forms) had come out, I was thrilled to read about how to doctor-up my own clay so that I could texture it but it would still remain flexible, like the sheet product, in the greenware state. Here are several of the first pieces I made with that clay, photographed together to use in promoting the first workshop I taught using this approach.

Three Woven Silver Pendants (Class Samples)

Though my workshops for beginners emphasized making woven pieces that were still essentially flat, on my own I went on to explore a number of other designs. Magic Carpet (or, to those with some knowledge of non-Euclidean geometry, Weaving through Hyperbolic Space), shown below, is one of my favorites from that period.

Magic Carpet (striped frame side)

After Hadar came out with her own base metal clays, and introduced us to various ways of combining those, I again launched right in to combining those with multi-metal weaves. Here is a piece I called Mixed Metaphors. Hadar was kind enough to include a photo of this in her fourth book, Patterns of Color in Metal Clay, which came out in 2011. (This piece later went to live with my cousin Debby; by then it was also sporting a lovely coiled-copper wire bail.)

PMC Flex

So when I first got my hands on PMC Flex, one of the things I thought to try with it was another woven piece. Yes, I knew I could also explore other styles entirely, and that’s coming. But, first time with a new clay, my inclination is to do something that is already deeply seated in my “finger memory”! Something that I know I can make successfully some other way, such that the question is how this particular clay performs in that approach. So, at last, here’s something of a step-by-step on weaving PMC Flex.

I began by rolling out a few strings (aka rods, snakes, etc.) of PMC Flex. I also textured a few small sheets of clay; after neatly trimming two edges, I returned the extra clay to the package.

Once the sheets were dry, I cut them with a pair of plain scissors. For what it’s worth, I’ve been known to cut moist regular clay the same way, with plain scissors and with fancy-edge crafting scissors. By waiting until your clay has dried to cut it, you remove the risk that you’ll smush the piece, leave unwanted finger- or tool-marks, or stretch the pattern. And, yes, I’ve been known to cut dry regular clay, but there is some risk of breakage doing that. Dried flex clay just cuts beautifully, with ease.

While my flex sheets were drying, I also made two narrow washer shapes. To keep this test simple, they are the same size in both inner and outer dimensions, plain on one side and textured on the other. They were dried over matching light bulbs. One had the texture facing up; the other, facing down. The one on the left (textured on the convex side) was made out of PMC Flex; the one on the right (textured on the concave side) was made from PMC 3. There is no technical reason to use two different clays. I just didn’t want to use the relatively small amount of PMC Flex that I had on components that didn’t require the flex feature, so I used PMC 3 for one of them. Still, I was curious how the PMC Flex would work in this design, so I did use it for the other. (I’ll discuss this more in a moment…)

Next, I started loosely weaving together my strips of dried PMC Flex. My intention all along had been to make a somewhat open weave. I did not plan to push the pieces tightly together (as shown in the PMC+ earrings, above); neither did I intend to leave extremely large openings. What I found was that the PMC Flex could be pushed together as much as is shown in the following photo, but only that much. Had I used PMC+ to make my own diy-flex, I would have been able to snug the strips up even closer. These strips made from PMC Flex felt rather similar to the diy-flex I’ve made from PMC3. (No surprise there, just confirmation: the product is, in fact, marketed as being most-comparable to PMC3!)

My last question for the evening was how well this little woven sample would fit my cut-out washers. There’s no reason one has to get it to fit as well as shown below, though that is a pretty good fit if I do say so myself! The point is that the strips need to be long enough; later on, you can always trim off any pieces that are too long.

The one and only problem I noticed (as you can see, above) was that the inside edges of each the washers were a bit rough. I’m one of those people who tries to minimize the amount of sanding that I do: when I cut moist clay, I just take care to smooth the edges immediately. With narrow-edge washers, however, it can be a bit of a challenge to smooth the inner edges without risk of distorting the shape of the piece. So that is one area that I will “refine” by sanding once the piece has dried. Here’s what I was able to do the next morning. (Note the color change in the photos in the daylight!)

And here’s the thing about that sanding. With diy-flex, I would almost always make the washer / frame shape out of regular (non-flex) clay. Why? Because the diy-flex clay (especially the extra-bendy stuff I could make from PMC+) was challenging to sand. It was so flexible, it just bent away from my sandpaper. I’ve read about heating this new PMC Flex clay to harden it up so that you could sand it. Had that really been necessary, in this instance, it would have made sense to just make the frames out of non-flex clay. But, given the success I’d had with smoothing the sharp-ish edges on the Möbius-strip earrings I’d tried first, I decided to make one frame out of flex clay to see whether or not I could sand smooth its inner edge. As you can see from the images above (especially if you click to enlarge them), I was able to smooth both pieces out nicely. I did hold them both carefully as I did so: the PMC 3 so I would not risk cracking it, and the PMC Flex so it would remain straight-up under my sandpaper. But I did not have to heat the Flex to accomplish this, which really did please me.

Next, I put the rigid PMC3 frame back onto the light bulb on which I’d dried it. (That’s why I’d made that one out of the non-flex clay: there is no reason at this point to have it move at all.) I carefully placed my woven swatch over that, shifting it around a bit until I was happy with its position.

Then I took a dab of water, and attached each strip-end to the frame.

And then, well, I really thought I’d taken photos of the next few steps too, but now I can’t find them. I put a few little end-trimmings in the bigger gaps around the frame to serve as supports. Then I moistened the strip-ends and the other frame element, and squidged all that together. Finally, I took a little bit of moist PMC3 and filled in all the gaps around the outer edges. (I could have used the Flex for that but, again, I was conserving my first batch of it.) Once that was all neat and smooth, I waited until I was sure it was dry. Then I fired it, sitting on top of a little pile of vermiculite to offer a bit of support. After firing, I polished it a bit, and added a liver of sulphur patina, before adding a jump ring from which to hang it.

My last comment here is that using the frame-ring made out of PMC Flex for the second side was a bit of an experiment. I wasn’t sure if the flex-aspect would help, or cause problems, in that step. In the end, I think it’s a bit of six-of-one, half-dozen-of-the-other. Its flexibility let me wiggle it around a bit to line everything up nicely; its flexibility also let one little segment end up a tad out of alignment. My current thinking about future pieces is that, with simple frames like this, I’ll probably go back to making both sides out of non-flex clay. For less-precise shapes, making it possible for the second side to be “flexed” to match the first (but out of a clay that can still be sanded as needed for clean edges) could be a real advantage.

Here’s the final result: one photo that shows both sides:

Your comments on this are welcome!

Posted in General Techniques | Tagged: , , , , | Leave a Comment »

A second second-report on the new “PMC Flex” clay.

Posted by C Scheftic on 2014/10/18

In other words, this is merely a follow-up to my earlier “second report” on PMC Flex (which I thought I’d posted earlier but just noticed I had not…) I’ll use subsequent “numbers” on later projects.

I really am working on some other designs using PMC Flex, but must-do-now tasks keep interrupting my explorations, and then I get inspired to try something else, and I end up having lots in-the-works but not yet finished and ready for reporting. As usual! But my earlier post had stopped before I’d gotten through the entire process with even my first little pair of earring elements. They are now finished, so I’ll at least take the time to finish their documentation too.

Since I last wrote, somewhere I viewed a series of pages (annotated images, but I forget where, and even whether it was a slide show or a .pdf file or…) that contained another “introduction” to the PMC Flex product. But I’d started playing with the stuff even before that was available, so I’d been just sort of guessing as I went along … based on my prior experiences with diy-flex (where you add glycerin to various regular metal clays). That “intro” also talked about heating the clay at 300°F for some amount of time, not so you could sand it (as I’d mentioned in my last post) but in order to help it hold its shape during firing. OK, now, the do-it-for-sanding idea makes a little bit of sense to me (even though I long ago learned how to work with clay in a way that will greatly minimize (though not always eliminate) sanding) but that one baffles me even more. If it’s going to distort, I’d think it would do so at the binder-burnout and/or early-sintering stages; either way, if it’s going to need support to get through that part of the firing process, I just don’t see how having “hardened” it for room-temperature handling is going to make much if any difference. (Hmmm, maybe that file was taken down and that’s why I can’t find it again now when I want to reference it? Or, if you truly understand what I’m missing about all this “baking” please contact me to discuss it! Yes, there are a few instances where I can imagine it would help, and I’m trying to explore that a bit too. But I simply don’t see why it should, in general, be required….)

Anyway, long before I saw that, I’d already fired my first two little pieces by just placing the still-flexible greenware flat and unsupported on my kiln shelf.

Now, to be honest, I had thought I might place them on some vermiculite in a little silica crucible I have. Except, I’d just taught a morning-only workshop where students made at total of 19 pieces (using PMC3 and PMC Plus that had been ordered well before the Flex was released). I had to get those pieces fired and returned to the participants. With this particular group I was not going to have a follow-up finishing session, where I could show them how to re-shape any that had “shifted” during firing. Though many were ones I could place flat on my kiln shelf, there were enough that had gentle curves I wanted to support, so I squeezed all of those into the vermiculite. Since I didn’t want to wait to fire my two little earring pieces, flat on the shelf they went too (as shown in the second photo with this post).

And I think they came out fine! I added a small glass bead to each for a touch of color, and hung them on ball-end sterling earwires. I’m calling the “Almost Möbius #1” (the number because, though I’m sure I’ll never make another pair exactly like this, I can imagine myself playing around some more with the Möbius-band idea).

Posted in General Techniques | Tagged: , , , , , | Leave a Comment »

A second little report on the new “PMC Flex” clay.

Posted by C Scheftic on 2014/09/22

I’ve got several other high-priority things going on right now, but I just can’t resist sneaking a few moments here and there to play with this new toy!

(Sorry that the photo-colors are all over the place because I’m just shooting on my work-table as I go, not stopping to move everything over to my photo-table. And the light at my work-table varies by time of day and by which of the overhead lights are or are not on at the moment. I work in a building that’s over 100 years old, and much of the wiring is very old too.)

Fresh from the pack, when I try to break off a piece of it, it gives way in the same (what to call it? stringy? gummy?) way that diy-flex (regular silver clay with some glycerin mixed in) does:

There’s nothing wrong with clay that does that! I just note it here, in case you’re wondering why this happened to your clay. It’s normal!

Right away, I decided to use a little “cherry blossom” texture (that I got ages ago at Cool Tools, but seems to have been discontinued…) and a butterfly-shaped pastry-cutter:

You can see (especially if you click on the image to enlarge it) that the edge of the cut is rather rough. Normally, I would smooth that out as much as possible while my clay was still wet; but I know that a lot of metal-clayers just leave it and sand the rough bits off later. I am just not into sanding clay if it can be avoided, so even when I find I’ve missed and left a rough edge behind, I still use a bit of water and various other tools to smooth out my clay. For this little test, then, I just left the edges as they were, to see how much I could smooth it once it had “dried” using my usual tools:

Pretty good!

My plan had been to cut a matching shape out of the interior of this butterfly, using a paper-punch I have. Except, it seems I had not marked that punch (for my own short-memory benefit) before I made this piece, and only at this stage did I realize it was one of my “thinner” ones … meaning this piece was one-card too thick to fit into the punch. Oh well, I’ll deal with cutting it, a different way, later on. For now, let’s just look at another little play-thing.

I had rolled out another little sheet, trimmed it down to a rectangle, and cut that in half. I left the pieces to air-dry overnight, and returned to find they were curving apart. I’ve seen a couple other early-testers mention curving, and having to press their clay down, but I’ve not seem that. The only curving I’ve seen has been like this, left to right:

Still, this is “flex” clay, so I never worry if it curves much in any direction. It’s simple enough to ease it back into shape:

The problem I ran into was with my next step which, of course, I did not stop to photograph. I had wanted to try something with this clay ever since seeing the little video that Mitsubishi had put out on YouTube about the product:

In it, they talk about how easy it is to let the clay “dry” and, since it remains flexible, you can still form it into a ring. Now, the one thing I’d always had trouble with, using the diy-flex clay, was when I wanted to join ends of “dried” flex-clay together. I found that to be far more difficult than with “wet’ clay. But I really didn’t want to invest the time in a ring first-time out. So I thought I’d just try making a couple little “Möbius bands” … where you take a strip, flip one end, and join them together. (With paper there’s tape to show the join. With clay, you get a true “Möbius” shape, where you can take a pencil, draw a line down the middle of the band, turning and drawing as you go, the whole way around, and end up where you start: there is no front or back, top or bottom of the strip. It’s all on the “same” side! If you’ve been following this blog for a while, you already know that I love to make reversible pieces. Continuous ones are even better!!!)

If you watch the video, you’ll see them make it look so easy! And I’m here to tell you their secrets: First of all, you can see the “cut” in the video stream where they left out a bit of the fussing needed to make it work (it IS possible, even with diy-flex clay) but, even more important, their band is perfectly smooth. That makes it much easier to get the join to work, because you can fuss and fill and sand it all smooth again. But I like textures, and I don’t like sanding. It’s not like it wasn’t going to work at all, but I soon realized (soon … after a twist, some water, some squidging together, some tape to hold it for a while, etc.) that it was not going to be quick and simple. I’ll work on that idea a bit more but, in the meantime, I moved on to test-plan-b for these strips.

I let the newly-damp parts dry again. I trimmed off a tiny bit at the ends that had gotten smushed; I also trimmed the second piece to match. I then gave each piece a twist, folded the ends up so the tips aligned, added a drop of water, and clipped them together:

Now, I could have gotten that shape with non-flex clay. But I would have had to do everything while the clay was wet. Or, more accurately, while it was starting to dry out, which can sometimes be a problem for me (especially when trying to make two matching pieces) and is far more often an issue with students when it all starts to crack. So, in that sense, the PMC Flex does make this project now far easier to do in a beginner class.

And, doing it this way, I could still try using a paper punch!

Not one of the fancy crafting punches, as I’d planned with the butterfly, but with a plain, small hole punch. Yeah, I could have drilled a little hole with a drill bit, but this turned out to be way more fun, once I’d gotten over the surprise!

With non-flex clay, I’d never have tried that. (I’d’ve just used a drill bit.) But, with flex, even though the piece slipped down into the punch-opening (gasp!), it was really easy to pry out–carefully–with no harm done! (I took the little “holes” I’d punched out and wrapped then with a bit of moist clay. I wrapped that in a piece of plastic, and put it back into the foil pouch. And by the next day, it had all rehydrated to the point that I could not find the little bits any more.)

The thing is, if you look at the piece lying along the bottom of the photo above, you’ll see that both it and its mate (though harder to see in the punch) have a very straight, sharp edge along what will be the top end when hung. I didn’t want that sharp edge with the rest of these curves. Had I planned to do this from the start, I would have smoothed all those corners while it was still wet. But now I had dried, attached, and punched clay, and I needed to soften its edge.

With non-flex clay, I’d either wet and smooth it (as I discussed earlier in this post) or I’d take out a bit of sandpaper and smooth it down (I may try to avoid sanding when I can; but I have no qualms about doing it in situations where it really is most appropriate…). With diy-flex clay, however, I always found that sanding was pretty difficult. Actually, the fact that I really enjoyed working with diy-flex is what first led me to figure out all sorts of sanding-alternatives! Once I started using them, I just let them spread over into my non-flexible greenware too, thus replacing much of the sanding I’d earlier been taught.

But the video and the package insert talk about how you can “dry the object by heating it to 300°F for 20 minutes.” Hmmm, I’d never even though to try that with diy-flex clay with glycerin in it. And, as of my writing this, I still haven’t … with neither diy-flex nor PMC Flex! I think those two references may have caused a little confusion via some “social media” posts, where people talk about “baking” their clay. Personally, I never saw any reason to “bake” it until you want to make it hard enough to sand. (Or, if you want to harden it in the process of building some complex 3-D structure, but I’ll get to that in some other post … much later on.)

For now, I just want to go on record as saying that you can sand PMC Flex gently in its flex state, without any “baking.” which is what I did here:

I didn’t change it a lot, but I did round out the corners as I’d wanted, while it is all still flexible.

That’s all I have time for tonight. I’ve also started on a woven-silver piece that I hope to report on next.

I’m teaching a fine-silver workshop this week (non-flex: had to have that clay on hand before the PMC Flex was actually shipping, but I’ll show of the Flex a bit since I have that first trial batch), and I will report on firing this clay once all the student pieces have been fired.

Posted in General Techniques | Tagged: , , , , , | Leave a Comment »

Softly Draping Hard Metals

Posted by C Scheftic on 2014/05/25

I have to admit something: I love “draping” metal clay! The clay is so soft and pliable, and the end results are so satisfying!

I am impressed with many of the effects that can be obtained via various “metalsmithing” techniques, but this draping is just sooo different from working with “solid” metal (sheet, wire, etc.). Yes, there are a lot of little “tricks” involved in successfully draping a mix of powdered metal, binders, and water, but it still is a relatively easy process for achieving a look that is much more difficult to achieve via any methods used with, say, sheet metal.

All the photos in this particular post were made with Hadar’s new-ish Friendly Bronze metal clay powder. At one point or another, I’ve draped every clay I’ve ever tried: every brand, every metal, etc. (OK, no, I haven’t done this with gold. It should work, but I don’t feel I can afford to use gold for anything this big. Of course, if you can afford it, I’d be absolutely thrilled to “drape” a gold piece for you on commission!) But all the different brands of silvers, coppers, bronzes, steels: yes! I’ve draped those.

In fact, there’s one very-special thing I do with draping that I teach in my metal clay workshops. Yes, while I do share a lot here on the blog, there’s even more that happens in person! You see, this little post is not only about draping metal clay. It’s also a little bit about workshops. (My plan is to mention workshops a few times, in this and several other posts over the next few months, then tie that together with one specifically about classes and workshops, both ones I offer myself and those offered by others.)

Anyway, the two draped oblong shapes are ones that I made in advance of a recent workshop. They were fun to make. I fired them both before the class; they ended up being about 37 mm long (excluding bail) and 25 mm wide. The idea was for me to have finished polishing one completely, and use the other one in my demonstration illustrating some techniques (and potential issues) in polishing such drapings. They also served to illustrate two of the many different bail-mechanisms that can be used for hanging the piece.

The long and narrow piece was begun during the in-class demo. It illustrates a different kind of draping, and a different kind of bail structure, both of which are harder to describe (but still easy to show) compared to the first two (oblong) pieces. It’s 66 mm long by 24 mm wide, and contains a little over 24 grams of metal.

The last photo shows two sides of a fourth piece. Also constructed mostly during in-class demos, it’s the biggest of this lot: 45 mm high by 56 mm wide. It weighs a little over 33 grams (including a CZ on each side, but excluding all the chain on which it’s hung). While I was manipulating it in class, we talked about things like overall size and weight versus maneuverability and polishing constraints. (You may notice this piece has a separate backing, while the two oblong ones do not, and the longer-narrower piece folds over on itself.)

Have you tried draping metal clay yet? If so, please leave a note about it in the comments!

Posted in General Techniques, Teaching Metal Clay | Tagged: , , , , , , , , | 1 Comment »

Trying Hadar’s White Satin

Posted by C Scheftic on 2014/02/19

Another new clay means another trial making rings!

Though I love rings–both wearing them myself and admiring those on others, in shops, at galleries–and I love making small adornments using metal clays, in general rings are not my favorite things to make. I’ll leave the reasons for that for another post specifically about rings. Why? Because today I want to talk about rings made from another “new” clay! Now that I’m familiar with a number of different types of metal clay, one of the things I often do to try to get myself comfortable with a new one is to make myself some rings out of it–to test what it’s like to work with–and then wear them everywhere–to test how they hold up. And my first question about an iron-bronze formula in particular was whether it would hold up as well as I might expect under all the stresses I put on rings.

So one of the first things I made when I got my hands on a (pre-release!) tube of Hadar’s new White Satin was to try making a couple of rings. I wasn’t going to be able to make them my favorite way (with iron in it, I was not going to count on being able to fire the shank first and then form it around a mandrel–a method that pretty much guarantees it will come out a perfect fit–and I was too eager to try it to first make a little test strip to see if/how I could manipulate it, though if will try that eventually…). And I didn’t want to make a ring using the “common” metal clay way, shaping a band in the clay-state (with lots of potential shrinkage-issues during firing). So my first White Satin rings were a pair of seamless stackers with each one textured on one side (using the “eastern paisley” design from Cool Tools) and plain on the other side.

My plan was to make them two different shapes, and wear them with the “plain” sides together. And, no, they didn’t warp during firing: I made the openings oval on purpose!

I usually make my rings either oval (as shown here) or square-ish (a rounded-corners trapezoid). The latter is easy with metal I can whack around something like the finger-shape mandrel from Rio Grande. Since I wasn’t yet ready to try that with White Satin, I just cut the clay itself with an oval opening. Hadar said rings would shrink about 3 sizes, so I used that for my beginning estimate.

Though, since I was making my rings oval, I did cut the opening a tad smaller than that. What I really did was to fit a narrow strip of metal inside a ring sizer at the +3 size, but then trim it a tad smaller. I then shaped that into an oval, and used that to cut my clay. The reason for down-sizing a tad is that, to put on an oval ring, I turn it sideways until it’s passed over my knuckles, but then turn it back up to wear. The “twist” allows the larger-direction opening (still at the +3 size) to fit over the larger-dimension part of my finger. But when it gets twisted back again, the straighter side (now smaller and narrower) holds each ring upright better, so I don’t have to keep straightening them.

The rings shown here were fired and then polished. And they did come out fitting the finger for which I was trying to make them! Since they contain iron, which will rust, they were sprayed with an acrylic protectant. Since they are rings, I have no clue how long that protection may or may not last. That’s what I’m now trying to test! I’ve been wearing them off and on for almost two weeks (more on than off, but nowhere near constantly) before taking these snapshots. They seem to be holding up fine in the short term. It’ll just take more time to see how they do over a longer stretch.

In the meantime, I am very happy with the results so far, and I hope you appreciate this early-report.

~~~~~

Update: This post originally referred to White Satin as a form of steel. I have since decided that it is more appropriately described as a form of iron-bronze, and have edited the post to reflect that. (Bronze is an alloy of copper and tin. Different proportions yield metals of a different color. Rose bronze, for example, has more copper than does the typical yellow-bronze. White bronze has more tin. which produces a nice color when used as an accent, but results in a metal that is too “fragile” to be used as a major structural component. Hadar’s White Satin is a bronze formula that contains some iron too, which produces a black-metal that can be polished to a white-metal color but has the strength more like that of a typical bronze….)

Posted in General Techniques, Learning Metal Clay, Technical Details | Tagged: , , , , | 6 Comments »

Update on the Lifespan of a No-Flake Foil Firing Box

Posted by C Scheftic on 2014/02/10

A few days ago, I was talking with another metal clay artist about how I fire bronze, copper,and steel in vessels I “fold” myself from sheets of steel “no-flake” foil, when I realized it had been two years since the last time I’d mentioned them here.

Which I find interesting: in three years, I’ve used three boxes! Counting them up, I figure I put a box through a firing somewhere between 1 and 2 times a week, on average. But few things in my life are average…! No, really, it’s more like 6 or 7 times a month, but even that tends to happen in maybe two “bursts” of several firings in quick succession, then it’s several weeks before I do that again.

Something I learned from my first no-flake foil box, plus discussions with others after I wrote about that, is that the foil tends to crack open along the top edge of however much carbon is typically used. So, with my second box, I started out by piling the carbon a a little bit higher than I’d been doing. Then, when some cracking started to appear, I could just lower the level a bit, and get a number of additional uses out of it (because the holes–eventually stretching into a longer tear–were then above carbon, it didn’t leak out)! With the extra firings, it also began to crack along the top-most folds: what that meant is that I tried to be a bit more careful as I handled it, especially when moving it in and out of the kiln. Eventually, though, I decided I was carrying conservation perhaps a bit too far: after at least 75 firings over the course of a year, I took its picture and retired it!

Box #3 has lasted even longer! It has handled 80-some firings over almost 14 months. I did not keep fully-detailed records but, between the notes I do have and my general memory of the past year, I’d say that for its first year, I did a higher proportion of firings in the mid-fire range, and a smaller share in the high-fire range, than I had done with the first two boxes. That seems to have reduced the number of little holes it developed, so there were fewer to spread into wide-open cracks.

That is, until the start of this calendar year. That’s when I started playing with Hadar’s One-Fire High-Fire Trio. The single firing needed to both de-binder the clay and sinter the metals is a real treat, but when I started firing batch after batch in the high range, I noticed that the sides started warping out. So, even though Box #3 does not have any big holes, it is now being retired because I can barely fit it in he kiln any more: it is in danger of hitting the kiln’s thermocouple!

But. I still think that these boxes are well-worth their cost! Do you?

Posted in General Techniques, Technical Details | Tagged: , , , , | Leave a Comment »

Another Quick Peek—Another New Ring

Posted by C Scheftic on 2014/02/08

Here’s another Champagne Bronze ring, this one topped by (hey, I just couldn’t resist it) a Champagne CZ. This one took a little while to tell me what it wanted to be….

It incorporates several of the other bits I said I’d try to write about another time in an earlier mention of shrinkage. The strip that I bent into this band didn’t shrink anywhere near as much as I’d expected, which caused me to re-think how I’d assemble it. The oval pieces on the top shrank about as much as I was expecting in length by width but, as far as I can tell, they shrank not at all in height. And that height matters in the re-design of this ring too: I’d thought I might make it so that they could spin (like the petals in my fine silver flower ring with ruby), but their thickness made that difficult. Yeah, I know ways around that, but this was just a supposedly-quick little trial piece, so I tried something else, to confirm how well they’d fuse in place. That did work out well and, again, I like the color (even though it still looks a bit more like sparking rose´ than champagne to me, though not quite as much as the first one I tried).

I can of course make a bronze spinner later, when I can find time to do more accurate calculations on the shrinkage and actually plan it out. For now, I’ll just wear this one as-is, and quite happily, as a test of how rings made this way with this new product will hold up. Which is probably all for the good anyway, as I’d’ve treated a spinner as a special-occasion ring, when having another nice Champagne Bronze ring for everyday wear is far more practical.

Posted in General Techniques, Learning Metal Clay | Tagged: , , , , | 2 Comments »

Quick Comparison of Two Bronzes

Posted by C Scheftic on 2014/02/05

Have you been wondering why, so far, all my posts about Hadar’s new One Fire Trio have mentioned shrinkage? Every single metal clay piece of any sort will shrink during processing: as you let it dry (i.e., as the water evaporates), burn off the binder and, finally, sinter it. During each of those steps, things contract a bit. Exactly how much varies by product and technique, but it still happens. For many items, this either isn’t an issue (so what if a lentil bead comes out a tad smaller) or it can even be an advantage (for sculptural pieces, being able to work a bit bigger and have details end up magically smaller can be a real treat).

But, for rings, where the band-size really does matter, then shrinkage matters. A lot. Which is why several of my recent posts have noted shrinkage among the various One Fire Trio products in particular.

Even though I’m still puzzling over that, I have to tell you that there is one feature of Hadar’s new Champagne Bronze powdered metal clay product that I just love: with Champagne Bronze, I can bend ring shanks around a mandrel!

Years ago, working with fine silver, I figured out a way to make rings that I love (and that I later found out that some, but apparently not a high proportion of, others use and love too), a way that removes most of the shrinkage concerns. I make the strip that will become the band first. And fire it as a strip, so it shrinks. Then, I bend the fired-strip into the ring shape that I want, fiddle and adjust and tweak it so that it’s exactly what I want. I add any top-decoration to that, and refire the whole thing. The bit on top will shrink a bit, but if my estimate of that is off a fraction of a millimeter, it’s rarely noticeable. But the already-fired band should (if it was fired properly the first time) come out the same size it went in. To be sure, that approach does not work for every possible ring design but, for the ones where it does— Voila!—there are simply NO sizing issues.

That was a real advantage when I made the spinning-flower ring with ruby, shown first above. When I ventured into Hadar’s Smart Bronze (another one-fire clay), I was advised against trying to bend that, so I had to use the “traditional metal clay” methods with it. Though I like the two rings (second photo) that I made with it, neither ended up sized quite the way I’d wanted. They’re for me, so I just wear them on different fingers than I’d planned; the only problem with that shift is that I can’t wear them in combination with some other rings the way I’d wanted. (I don’t wear rings when I work, but I love wearing lots of them when I’m out and about.)

What I’m reporting today, however, is that my first Champagne Bronze ring fits beautifully. I include a photo of it, below, paired with one from my first attempts with Smart Bronze. The difference in the size and shape of the decorative top was intentional (i.e., I’m not trying to illustrate shrinkage this time); the image does, however, give you a good hint as to the difference in the color of the two products. (Next to Smart Bronze, this does look a bit pink. Next to Copper, or even Rose Bronze, this looks to be much more of a yellow-bronze tint. I’ll try to post a few more comparisons, using some other pieces, but it may take me a while. There’s lots to do right now, too much to justify all the time I’ve spent with Champagne Bronze and Friendly Copper. But, me, I just felt I had to try to complete at least one such ring! So … more when I get caught up elsewhere.)

Posted in General Techniques, Learning Metal Clay | Tagged: , , , , | 2 Comments »

One Thing Just Leads to Another

Posted by C Scheftic on 2014/02/01

If you’ve stumbled across this blog / post without a lot of previous metal clay experience, you may want to just click on the photos to enlarge them and read the brief notes there. For the rest of you, I’ll start by asking if you remember the earrings I wrote about last week?

For today’s post, I’ll start by saying a little about the steps I went through in making the bronze-parts of the two-metal earring pair I described earlier.

  • Grab a good-size chunk of Champagne Bronze clay.
  • Roll it out to a thickness of four cards.
  • Position cards around it, two cards high.
  • Use a thin, straight edge to cut two distinct sets of five intersecting lines. (This was done freehand, so their positions are similar but not identical.)
  • Use a circle cutter to make two “large” circles.
  • Use another circle cutter to make a “small” circle inside each of the “large” ones. (Again, done freehand, so their positions are similar but intentionally not identical.)
  • Do all the usual clean-up and drying of the various bits of clay.

When the circles had dried, I used the small, matching “inner” circles (where each set of lines all intersect) over some Low Shrinkage Steel XT to make the earrings I mentioned before. So far, so good.

Looking at the dry “outer” circles (washers, actually: the larger circles with their centers removed), I had another idea. Using a texture sheet with some concentric circles, I rolled out two more sheets of clay, one each from Friendly Copper and Low Shrinkage Steel XT. Then I centered one of the bronze “washers” over each of those, and cut a matching circle out of each clay. Finally, I rolled out another pair of those two clays, this time using two different “flowered” textures, and cut out a third circle of the same size from each of those. Both the circles- and the flower-design were rolled to four cards at first and then, with the textures, down to two cards. (I didn’t roll the clay with textures on both sides because: (a) I hadn’t yet decided for sure how I would use them, and (b) I wanted to center the designs on both sides the way I wanted, and doing that separately for each side was easier.) I set all those aside to dry (as well as a few other bits I’ll try to write about another time), figuring I’d use them for something….

A few days later still, I got to wondering about the “high fire” temperature of these new “one fire” clays. In general, even with this new trio, it’s the bronze that’s going to limit how hot the product can get during the sintering process. Would the “bronze embeddable” bails survive that heat? (I use them myself, on occasion, and I often offer them to students, especially in introductory workshops, because they can save a bit of time when compared to having to make one’s own bail.) So I took one of the bronze washers, attached the copper disk with circles and let that dry, then positioned the embeddable bail and attached the copper flower-design disk. Once all that had dried, I filled in a few little gaps, dried it all some more, and finally fired the piece.

The results were interesting, as shown in the first photo, above. It all sintered just fine. The bail did blister a little bit: not enough to ruin it, but enough that any metal artist “in the know” should be able to spot what happened. But I still think it’s interesting.

There was one small blister on the sintered bronze section. My first thought was that I’d overfired the batch a bit, but then I realized it was exactly over the post on the embeddable bail. Silly me, I didn’t think to capture a photo of that: What I did was to immediately see if I could polish it out. Easy! I’m not done polishing this piece (it was just a spur of the moment creation, not a planned project), but I think the photo I include here (click on it for a bigger version) gives you a hint as to the blistering on the bail (in case you’re someone who uses them too), and to the way it does look like the disk itself will polish up nicely with a little more work.

There’s one other item worth noting: how the bronze in the bail alloyed a bit with the copper on the other side! Look at the side shown to the right in the first photo, up near the bail, and notice the golden-colored patch. Alloying! Again, artistically, I’m OK with its looking like that. But it’s good to know it will happen.

A few days later, I got to wondering, would the bronze wire I sometimes use with such pieces show the same blistering? [Later clarification: I’ve used that wire in the past with pieces made using Hadar’s Quick Fire bronze. That’s a clay that takes a two-phase firing and only mid-fire temperatures and it’s always held up beautifully in pieces fired that way. Here, I’m otherwise reporting on the newer one-phase high-fire clays.]

So I made a simple wire-loop bail out of phosphor bronze (melting temp listed as 1800°F), then took the other (matching) bronze washer and the Low Shrinkage Steel XT disks, and assembled it the same way as I’d done before. I fired that using the same schedule too.

And, again, I noticed a bit of blistering on the bail and, with this wire-design, a bit of fusing across the loops. Again, I think that slightly grainy look is OK. Other than a quick clean-up, I have not yet stopped to polish this one at all. But I decided to post about it quickly because, this time, the main piece shrank much further away from the bail. In its clay state, the loops were pressed lightly down into the piece, but the post-firing separation is visible in the photo. No alloying with the steel though, which is also good to know.

But you have to see the two together to catch what surprised me the most: the difference in shrinkage! They started out exactly the same size, and look how different they are now. The current (as I write this) Hadar’s Cheat Sheet (.pdf) says that, on their own, Champagne Bronze shrinks about 30%, Low Shrinkage Steel XT about 28%, and Friendly Copper about 25%. Combos will be limited, to some extent, by the least-shinkage clay in the mix. But there’s only a 3% difference between LSStXT and FrCu, and it sure looks to me like there’s more than a 3% difference in the results here. What I can feel, but can’t really show here, is that there is maybe a 3% difference in height but it’s in the wrong direction. The one made from copper is a teensy bit thinner (i.e., more shrinkage, not less).

I really do like the results I’m getting with these clays, and the 3-hour firing time is a huge help compared to some of the others. But, with the others (and any of the “older” clays, both precious and non-precious), I think I have a pretty good feel for the shrinkage. With this new One Fire Trio, I’m still exploring….

What are you finding with them? Do leave a comment!

Posted in General Techniques, Learning Metal Clay | Tagged: , , , , , , , , | Leave a Comment »

A very quick shrinkage comparison of Hadar’s “One Fire Trio”

Posted by C Scheftic on 2014/01/25

Here’s a photo showing a few more little bits from my first trial firing of Hadar’s One-Fire Trio. Though I didn’t start out by making them as perfectly-similar as would be required for a scientific comparison, I did roll and cut them to the same size. So, in order, from the most shrinkage to the least are: Champagne Bronze (C), Low Shrinkage Steel XT (L), and Friendly Copper (F).

I’ll have to see if the apparent ratios continue to hold with other cubes. (That is, some differences could just be due to my having mixed more or less water into the different products. And I just stamped the letters in by hand, which could have changed the shapes a bit too.) But, with the other pieces I fired at the same time, the ratios do seem to vary depending on the shape of the piece being fired. I don’t have enough data yet to be sure, and these cubes are the only items where I made three matching pieces to start with.

But I will say that, while the Champagne Bronze cube did shrink somewhere around the proposed 30% rate all around (per the Cheat Sheet for Hadar’s Quick-fire Clays on her blog), a ring shank made from the same batch shrank barely 15% in length and a bit less than that in width. (Its height/thickness is just too small for me to accurately measure whether all the remaining shrinkage went into that, or not.)

Still, I figured I’d share the preliminary results. Please add a comment if you try these clays and find results that are either similar or different!

Posted in General Techniques, Learning Metal Clay | Tagged: , , , | Leave a Comment »

Trying Hadar’s New “One Fire Trio”

Posted by C Scheftic on 2014/01/24

It’s taken me a while to post again as the state of mini-crises has continued, but I won’t bore you with those details. Instead, I’m delighted to report an exciting new development: At the start of the year, Hadar announced a new One Fire Trio that includes two new metal clay powders that, along with one of her older ones, can be de-bindered and sintered in just one firing (rather than the two separate ones that many others require). Their total firing time is just under 3 hours. Wow! Compared to the usual 8 hours (if you fuss in between) or 12 (if you don’t fuss but do sacrifice more carbon), that’s a huge difference!

The older member of the trio is Low Shrinkage Steel XT. On its own, it could be fired in a single kiln-run, but that limited the combinations in which it could be used. Also, it’s a high-fire clay, so it could only be used in small amounts with some of her other clays, the ones fired at lower temperatures. But, with the introduction of two new clays—Champagne Bronze and Friendly Copper, both of which also use high-fire and single-phase processes—it is now possible to produce more combinations.

Each of Hadar’s metal clay powders have their own advantages and disadvantages compared to the others. No one product (or small set of products) from her or (or any other producer) is yet able to achieve everything an artist might want. But each new combination offers new opportunities, which is what makes them so exciting! I am sure that some people got these clays and proceeded to develop complex creations. But me, I prefer to get to know the clays in simpler ways first, to discover their advantages and limitations. I have a few more-complex pieces in the works, and I’ll get around to completing their construction and firing them eventually. This post will show a few of the simpler pieces I tried first.

The earring pair to the left was made with Friendly Copper. The pair to the right used Low Shrinkage Steel XT in back, with the embellishment in Champagne Bronze. After firing, the copper and bronze were very lightly polished (just a quick pass with one set of (3M yellow) radial bristle disks); the steel is as it came out of the kiln; the earwires are anodized niobium (that I just happened to have handy). If / when I can find the time, I may fiddle with finishing them a bit more but, for now, I just could not resist offering this quick sneak peek!

The second (smaller) photo shows the other side of the steel pair, after each piece has been quickly polished in the same way as the copper and bronze on the fronts. I did that because I wanted to show the polished-steel color on its own, even though I liked the black+gold contrast in the combination on the other side of these. (Although ensuring that the black will stay black—neither shining up to gray nor rusting out—will require some of that additional finishing I just mentioned….)

One note on firing: Hadar says that firing any of the clays in this trio takes her 2:45 (2 hours and 45 minutes). For these, I used a brick kiln, outdoors on a covered patio, when the air temperature was around 25°F (-4°C). I also know that this particular kiln tends to overshoot the goal temperature early on in the firing process, regardless of the temperature of the air surrounding it, though it holds the temperature fine once it’s had the chance to swing up and down a few times. My work-around for that is to set a two-step program, where I first get it near the goal temperature and tell it to hold there for a couple of minutes (allowing it to spike higher there), then ramp it slowly to the real goal where it can hold for the required firing time. With those two differences between my set-up and hers, firing these pieces still took only 2:58. As I said above, that’s a real treat!

Another note on my kiln: I don’t leave it outside all the time. I keep it inside and just haul it out when I need to fire it. (If I fire it indoors in winter, when I don’t have any good way to vent it and I’m using carbon to provide an oxygen-reduced atmosphere inside the kiln, my CO detectors signal a problem!) Hauling it in and out takes only a few minutes each way, so it’s not a major problem, even when the temperatures are in the 20s. But, they’re currently hovering around 0°F, and that puts enough of a strain on my furnace, me, and more. I’m not leaving doors open to move kiln, kiln “furniture,” the stand, various tools, power strip, gloves, safety glasses, and more both out and then back in again.

In other words, even though I have more pieces underway, it may be a while before I get around to firing them and posting the results. It’s just winter … and I don’t mind at all living at winter’s pace … for a while.

Posted in General Techniques, Learning Metal Clay | Tagged: , , , , , | 1 Comment »

Wrapping Up One Year and Opening the Next…

Posted by C Scheftic on 2014/01/01

Happy New Year! I can’t believe it’s time to write my fifth New Year’s Day post.

A while ago, I wrote a piece where I said that sometimes I compare beading to framing. That is, some 2-d artists offer a mix, where some pieces are “basic” ones and others have been “framed.” So the buyer has a choice: they can take the piece home and hang it plainly, or they can add their own framing. Or they can buy an already-framed piece. And I tend to offer pendants, for example, where most of them are on a plain cord so you can wear them but let the unique, hand-crafted piece itself be the focus, or you can take it home and add your own fancier chain or even string it with some beads you have. Or I have a few that I do hang in other ways, so that is an option for people who prefer that.

I got to thinking about that again, in a slightly different way, the past few weeks. ‘Tis the season for wrapping and unwrapping gifts, and for wrapping up one year and unwrapping the next. With this post are photos of a small sample of pieces I made in the process of wrapping up 2013, as I prepare to offer them in opening up 2014 … as objects of art themselves at first and, until they find new homes, as samples for a new workshop series that’s under development. For some reason, these three told me they didn’t want to be hung simply but, instead, preferred to be wrapped up with ribbons or other forms of decoration.

The “sometimes I compare beading to wrapping” analogy hit me as I hung the first piece illustrating this post (above) a hollow bronze “box” accented with copper, rose bronze, and yellow bronze. I just felt it needed to go on the collection of ribbons shown in the photo. (And the inset confirms that, yes, I’m still making reversible pieces.) With all the gift-wrapping that goes on this time of year, I felt that those ribbons wrapped up the “box” in a way that still kept the focus on the special bronze element. You could choose to take it home and hang it some other way, if you wanted, but it’s nicely wrapped just as it is.

With the second piece (left) as I made the hollow “draped” pendant, I just knew it was one of the pieces that I’d want to hang some other way, so I made a toggle clasp to match it. Then I hung the main bead on a piece of bronze wire, with some tiger eye beads that seemed to go with its coloring, plus a few spacer beads (mostly to protect the tiger eyes from the ends of the wire wraps), and then used some brass chain between all that and the clasp.

With the third piece, a hollow bead then “wrapped” in several different textured layers, I went even further. This time I added jasper, petrified wood, and garnet beads, linked together with bronze wire, plus a bit of brass chain (not shown here) near the lobster clasp I used as a closure.

Three different ways of “wrapping” a piece up in a somewhat decorative fashion. I hope those who wear these pieces (or even just view their photos) will appreciate the original bronze “focal” beads as well as the way each one has been wrapped up for them to wear. As to the workshops, I hope to have that schedule posted (at least in draft form) within a week.

In the meantime though, I still have a bit more New Year celebrating to do. Here’s wishing you a happy and productive 2014!

Posted in General Techniques, Misc. Musings | Tagged: , , , , | Leave a Comment »