Convergent Series

learning, using & teaching metal clay, and other aspects of life

Posts Tagged ‘domes’

I found it!

Posted by C Scheftic on 2016/07/16

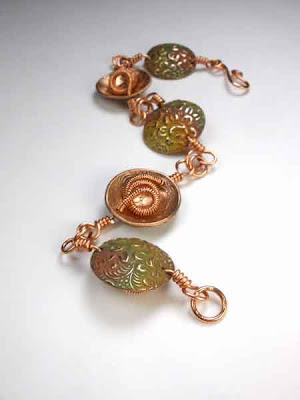
I found the missing Friends & Lovers bracelet!!! I’ve written about this one before.

I first wrote about it in 2014, when I created it for a Valentine’s Day Romantic-theme challenge. It contained domed hearts that were the first trial pieces I made in my own studio with what Hadar was then calling Friendly Bronze (and now calls One Fire Bronze).

The next time I wrote about it was in 2015, when I thought I must have “put it somewhere safe” before an Open House in my studio … because my cousin, Debby, wanted to buy it to wear at her son’s wedding. But then as the big day approached, I couldn’t find it. So at pretty much the last possible minute, I made her another one, Love & Commitment.

Well, I’m here to tell you now that I hadn’t put it away for safekeeping. I had put away a couple other pieces that were already promised to customers, and I found them as expected after the show. I wasn’t sure that’s what I’d done with that bradelet, but I couldn’t imagine where else it could be. Even after making a replacement for Debby, I’d periodically look for it. My studio has many, many little cubbyholes and boxes and drawers full of bins and yet more boxes, so any time I’d decide some section needed to be cleaned up a bit, I’d check all the nooks & crannies to see if the missing bracelet was there. No luck.

But, this week, I was shuffling around some shadow boxes I use when I display pieces in gallery shows and, as I pushed one back into one of the sections in the bottom of an old china closet I use in my studio (for art & jewelry displays on the top, and supply storage below), for some reason that big one didn’t want to go in the whole way. So I got down on my knees and pulled out a couple other frames in the back to see what was wrong. And there the bracelet was, in the very farthest back corner. I have NO IDEA how it got there. None. None at all!

Funny thing is, I discovered it just about a year to the day from when I first realized it had gone missing. I remember when that was because another cousin, Marie, is here now on her annual visit east from Calinfornia, and it was during her visit here last year when I first discovered that I’d misplaced it (though I didn’t admit that to any of my cousins until a couple months later, shortly before the September wedding).

Regardless of timing, I am glad to have recovered it!

Posted in Misc. Musings, Studio | Tagged: , , , , | Leave a Comment »

May 12, 18, and 21: More Workshops at Artsmiths!

Posted by C Scheftic on 2016/05/07

Happy Mothers Day weekend, everyone!

As I said in my last post in April, I sure had a great time teaching at The Artsmiths of Pittsburgh last month, and I’m thrilled to have been invited back to offer more courses there this May! Here are the three that are on the calendar for this month. Clicking on each course title should take you to a page where you can read a bit more about the projects and, if you want, actually register for the various sessions.

  • Earring Extravaganza: An Introduction to Fine Silver Metal Clay! on Thursday, May 12, from 6 to 9 pm

    This will be the simplest, most fun, yet easy-going introduction to metal clay that’s possible! In three hours, each participant will create lovely, unique, art jewelry: fine silver (.999) earrings!

    There will be lots of options for texture, shape, and small embellishments, so everyone will come out with their own unique pieces. And, we’ll texture both sides, so each pair will be reversible!

    There will definitely be enough time and materials for each participant to make (at least!) two pairs of earrings … but, remember, since they’ll be reversible, it’ll almost be like getting four pairs from just this one class!

  • Reversible Hollow Silver Art Jewelry Pendant, on Wednesday, May 18, from 1 to 5:30 pm

    The very first piece I ever made using metal clay was one of these “lentil shape” beads, and it can be the first one you make too, if you want.

    Then again, even if you’ve been working with the stuff for a while, this project involves a few special techniques that are also applicable for a range of more “advanced” projects … which makes this a special (and easy) project on which to learn and begin practicing them.

    I find that lentil-beads always seem to be such fun to make: join us, if you can, and see for yourself!

  • Reversible Woven-Silver Art Jewelry Pendant (or Earrings), on Saturday, May 21, from 1 to 5:30 pm

    There’s a long story here, not worth going into but, although I’d hoped to offer this class last month, several situations conspired to prevent that. So we simply rescheduled this one for May! I hope that those who had signed up for April will be able to come to this one; plus, there were a few seats still open in that session so there should still be room for some new-comers!

    There are lots of things I love about this woven-silver project. The one I’ll mention here is that this is a great session for people who like to make and / or wear silver pieces that are big! At times, the sheer cost of the materials can seem somewhat intimidating but, because these designs have so much open space, they require far less material. Relative to many other designs or approaches, you can stay small, and keep your material costs down, or go big, and not have those costs skyrocket. Your choice!

As I said last month, there’s no significance to the specifics of dates and times. That is, if you want to take a workshop and those date/time combos don’t work for you right now, please let me (or Artsmiths) know! All of us are trying out different combinations to figure out what will work for folks who are interested in the classes. As long as we know there’s interest, we can work out other day/time combos for future months, either repeating these topics or adding new projects to the offerings. And I’m willing to offer any of them as small (private or semi-private lessons) or group sessions (if enough people express interest) in my Regent Square studio as well as at The Artsmiths of Pittsburgh.

Personally, I think that all of these are lots of fun to make!

Posted in Events, Teaching Metal Clay | Tagged: , , , , , , , , , | 2 Comments »

April Recap: First Classes at Artsmiths

Posted by C Scheftic on 2016/04/30

Some days I think to take photos, other days I don’t. I can find no pattern at all to which is which!

But, whether or not I remembered at any point to stop and take photos, I want to say how much I enjoyed my first month of teaching at The Artsmiths of Pittsburgh!

Our very first class, on April 14, was an easy introductory session, where we covered learning how to texture metal clay, give it some shape (e.g., by drying it over a dome), and embellish it for a bit of extra oompth (e.g., with balls or coils of clay). In all, in three hours, six students completed twenty-one different pieces!

Now, if you’ve worked with metal clays, one thing you know is that you usually should start out with a little more clay than you actually need to make a piece. You’ll roll it out, but then cut it down to the size and shape you want, and trim away the excess. And the question is, always, what to do with the excess? I’ve already written here about this, but the basic options seem to be: make something else (small) with what you have left; get some more clay and add your leftovers to that to make another piece (bigger); or, go to the bother of saving it to do one of the above later on. (Clearly, I lean towards either of the first two!)

And I have to give this group credit for finding ways to use all their clay. First-timer Linda, in particular, kept making smaller and smaller pieces, using the bits she cut out of one piece as elements on their own, and using the final dregs to make tiny ball embellishments.

Everyone’s pieces fired beautifully, but I didn’t think to get a photo of that. No, what I did capture was when, after I’d fished Linda’s last three teensy pieces out of the shot, someone surprised me by pounding on my studio door, and I dropped them back onto the shot. At least, they landed on top, so I didn’t have to search through the whole barrel-full again. Still, can you spot all three pieces in this photo?!! (I think two are pretty obvious, but not the third, which was the center she’d cut out of the little gear/sun-shape.)


Then, on February 21, I taught a “Draped Silver” class. Didn’t take a photo of that group at work…. Don’t have a good photo of all my samples either, but I include here two older pics of two pieces each, one pair in .999 fine silver, and one pair in bronze and copper (because that’s my best one of little “ball nest” embellishments).

In this class, we worked in .960 silver. That allowed us to roll the pieces nice and thin, which is the key to making draped metal clay pieces. It also let us make them fairly thin without having to add a backing or frame for protection.

Several of the folks in this session had taken one of my earlier classes (at Artsmiths or my studio) and had seen a wide range of my textures; for this workshop, however, I took only shallow-texture choices.

The last photo with this post shows the fired and tumbled pieces from this class (though, for some reason I don’t understand, it is not a good representation of any of the colors, nor the textures; though you can see the range of interesting shapes that folks made). The one with wire, beads, and chain (middle of top row) is the one I made as an in-class demonstration. It’s a slightly different color from the other pieces because, before I added the beads and chain, I gave it a very light Liver of Sulphur (LOS) patina and then polished off most of it. But I returned the students’ pieces all shiny-silver, and will let them decide if they want to leave them like that, or if they want to add a patina. I do love patinas but, sometimes, and especially with broad, shallow textures like many of these, I think that pure silver shine is wonderful!

I did have a third class scheduled for April, Woven Silver on April 26 but, as I mentioned before, April was a killer month. (I mean that literally: suddenly, randomly, several friends and parents of friends all died.) It got to the point that I just couldn’t swing that class. I didn’t get a clay order in on time (to get it without express shipping charges) and, even if I had made it to class with clay, it’s not clear where my head would have been. I want workshop participants to know that I am there with them, ready to present, encourage and help! So we rescheduled that one, for May 21.

I’ve got two other classes scheduled for May too. I’m really looking forward to those! More on all that shortly!!

Posted in Teaching Metal Clay | Tagged: , , , , , , | Leave a Comment »

April 14, 21, and 26: Workshops at Artsmiths!

Posted by C Scheftic on 2016/04/07

As I mentioned earlier this week, I’m on the schedule to teach three workshops at The Artsmiths of Pittsburgh as they launch their Underground classrooms this month. I feel very honored to be one of the first four instructors invited to teach there, especially knowing the caliber of the other artists in that group!

All of my classes this month are suitable for beginners. Those who already have some experience with metal clays are also welcome to participate and learn new techniques. I’m listing three separate classes here, and you’re invited to take one or two or even all three of them! (Just click on the link for each one, of course, to see more details.)

We’ll make a pendant in each session; if there’s time and interest, participants may want to try making a second pendant or a pair of earrings too. I sure hope that some of my readers here will be able to join us there!

Also, there’s no significance to the specifics of dates and times. That is, if you want to take a workshop and those date/time combos don’t work for you right now, please let me (or Artsmiths) know! All of us are trying out different combinations to figure out what will work. For April, select Tuesday, Thursday, and Saturday slots were the only ones being tried, and there were other events besides classes on some of those days (e.g., the SOS_Underground opening I mentioned in my last post). But, as long as we know there’s interest, we can work out other day/time combos too.

Or, for that matter, you can just come out to my studio for a class too so, if there’s something you really want to try out, please let me know and we can find a time that’ll work for us.

Posted in Events, Teaching Metal Clay | Tagged: , , , , , , , | Leave a Comment »

Love & Commitment

Posted by C Scheftic on 2015/09/05

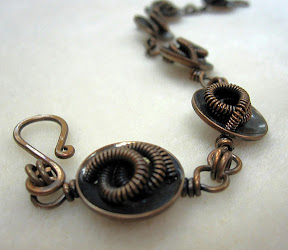
Back in 2012, I wrote about how much I enjoyed making my first bracelet in the Domes & Coils series. I really liked that bracelet: never even considered putting it up for sale, wore it regularly, but somehow (?!) lost it at the last-ever conference sponsored by the now-defunct PMC Guild. Sigh.

Then in 2014, I wrote about another bracelet in that series, one I called Friends & Lovers, that I made to fit the theme of a bracelet-making challenge with a “Romantic” theme. My cousin Debby liked it, dealt with all sorts of technical issues (some hers, some the site where the contest was being hosted) in order to vote for it (didn’t win; I think it came in second but there was just one award) and when, a year later, she found out I had not sold it, said she wanted to buy it to wear later in the year when her son Adam would be marrying Megan. Great! I was glad for her to have it! (And, assuming the marriage lasts, to have it eventually pass on to Megan.)

I knew it would need some minor adjustments to fit her wrist, so I didn’t sent id to her right away. Figured I’d see her at a shower for that wedding, or at one of several other family-events over the summer. But when she said she wanted it was right before I was going to have a show in my studio, so I carefully set it aside for safe-keeping. Now that I had a buyer for it, I sure didn’t want anyone else going for it. Makes sense, right?

Except, then I couldn’t find where I’d put it! I wasn’t worried: as I tidied up all sorts of nooks & crannies in my studio gradually over the summer, I knew I’d find it. Except, I didn’t.

Sooooo, I finally just made another one! Finished it 12 hours before the wedding! The first Domes & Coils just had coiled wire coiled within its domes; Friends & Lovers had beads coiled within its domes; this one has wire coils or beaded coils, alternately, within its domes. I’m making it to the size she said she wanted, but I think it’s going to be a bit small, so I made a couple extra domed-hearts with the nested coils, and I’m going to take those, jump rings, and tools in case I need to do any on the spot adjustments!

I call this one Love & Commitment. Why? Well, I’m telling Debby this: I love you and I made a commitment to have this for you for the wedding, on top of the meaning of the event at which you’ll first wear it. So it just seemed an appropriate name. I sure hope she’ll like it in person as much as the one she only ever saw in a photograph.

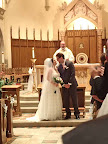
Postscript: I’m glad I took the tools: with a bit of fiddling, we got a fit she calls perfect! I was sure I’d taken a photo of her wearing it and grinning ear to ear (over the wedding, I’m sure, not just the bracelet, though she did seem happy with it). But now, I don’t see one of those. Instead, here’s a shot of the happy couple at the “you may now kiss” moment (along with yet another cousin, the priest who married them!), sent with lots of best wishes!

Posted in House & Home | Tagged: , , , , | Leave a Comment »

Crazy-busy Season

Posted by C Scheftic on 2014/12/01

Life tends to get crazy-busy this time of year, for multiple reasons, some of which I’m sure you can imagine and others would take too long to explain. So I’m just going to list a few events you may want to know about should you be interested in seeing some of my work in person:


  • November 30 – December 7: H*liday mART at Sweetwater Center for the Arts, Sewickley, PA

  • December 5-6-7: Holiday Gift Shop at the Wilkins School Community Center, Swissvale, PA

  • December 5-6-7: Open House in my Studio, to coincide with WSCC’s Holiday Gift Shop

  • December 13: Open House at the Hoyt Center for the Arts, New Castle, PA

  • December 13-14: Open House in my Studio, to coincide with an Art Studio tour in Regent Square (Swissvale, Pittsburgh, Edgewood, Wilkinsburg), PA

  • For other venues, please see the list of Ongoing locations down the right side of this blog.

If you find yourself missing any of those, no problem. Just get in touch with me: leave a comment on this post, or message me via Convergent Series page on Facebook (and, while you’re at it, a Like there would be very much appreciated…). We’ll find a way for you to explore my creations!

I’m not sure how much else I’ll manage to post this month. But I have new designs in the works, new workshop pieces I’m testing out plus, of course, new variations of ongoing favorites in both those categories … and lots more for 2015! I look forward to posting about all of those in the New Year, and I hope you’ll enjoy reading about them too.

Posted in Events, Studio | Tagged: , , , , , , , , , , , , , , , , , , , , , , , , , , , | Leave a Comment »

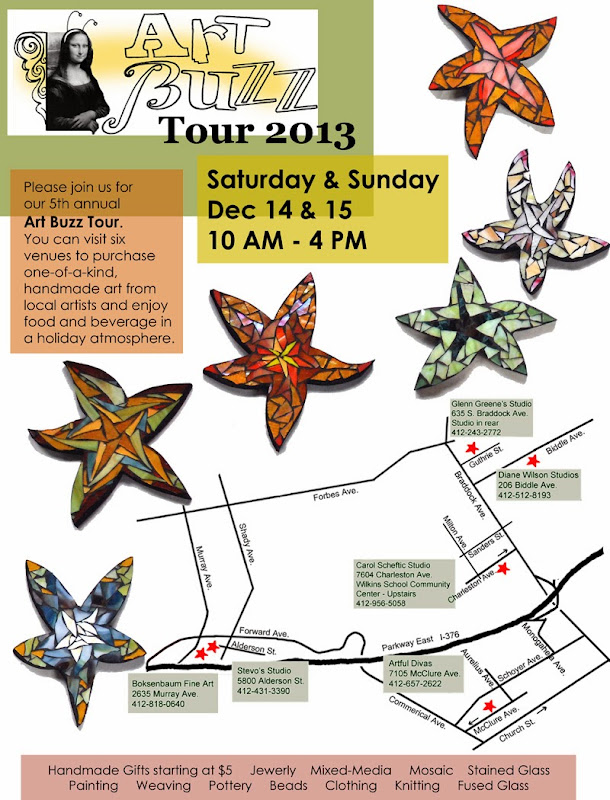
2013 Art Buzz Tour — This Weekend!

Posted by C Scheftic on 2013/12/14

Have you heard the buzz? Six sites! All in the Pittsburgh area’s “East End” this weekend: Regent Square, Swissvale, and Squirrel Hill. And my studio is one of the locations on it again this year.

I’ve got lots of jewelry on offer, plus a handful of other small adornments.

I also have aloe vera plants that need a new home, babies that i repotted from some of the big ones I keep around. (I do work with hot metals here!) BONUS: small ones are free with a purchase of $35 or more (or a discount can be applied to the price of any of the larger ones if that’s what you prefer).

Plus you’re welcome to share some of my cookies and hot mulled cider. (I also got the makings for cranberry-orange frosties but, with all the snow that’s falling, I’ll save that until there’s a request or I run out of cider, whichever comes first.)

Happy Holidays to all!

Posted in Events, Studio | Tagged: , , , , , , , , , , , , , , , , , , , , , , , , , , , , , | Leave a Comment »

2012 Art Buzz Tour — This Weekend

Posted by C Scheftic on 2012/12/03

Have you heard the buzz? It’s even louder this year! Over forty artists! Seven sites! All in the Pittsburgh area’s “East End” this weekend. And my studio is one of the locations on it again this year.

At WSCC (where I’ll be), the Holiday Gift Shop will still be running downstairs, and I am pretty sure that Daviea Davis will have her glass mosaic studio open too, upstairs across the hall from mine.

2012 Art Buzz Map

If you’re in the area, I sure hope you can stop by. To say, “Hello” and “Happy Holidays” at least. If, for some reason, you can’t get yourself there in person, how about leaving a holiday greeting as a “comment” on this blog post. Even having you say just “Hello” or “Happy Holidays” would be much appreciated!

I look forward to seeing / hearing from you, dear readers, so I can extend my best wishes for this holiday season to you too, in return, in a more personal way.

Posted in Events, Studio | Tagged: , , , , , , , , , , , , , , , , , , , , , , , , , , , | Leave a Comment »

What I did last week (part 3…)

Posted by C Scheftic on 2012/02/01

Well, by the time I’ve managed to get around to posting this, I’m really talking about the week before last, but I figured I’d keep the same basic post-title I’d started this series with, and just keep going.

After writing last week about making some textured domed disks, so that I could use them in a bracelet inspired by Maria Richmond, now I’ll talk about how I’d imagined completing the project with an idea inspired by a post by Hadar Jacobson about making magnetic clasps from steel metal clay.

I thought I’d do pretty much just what Hadar suggested. The only difference was that I used a textured layer of her rose bronze clay, rather than the smoother layers of yellow bronze and copper she showed in her instructions. I draped that over a dried layer of her pearl gray steel. After letting it all dry, inserting a bronze wire bail, and “refining” everything, I fired it as recommended.

The rose bronze cracked. The steel under-side (not shown) seems fine.

I tried again, this time using textured copper draped over pearl gray steel.

Again, the steel under-side (not shown) came out fine but, also again, the copper over the top cracked.

I patched and otherwise repaired all three pieces, and refired them.

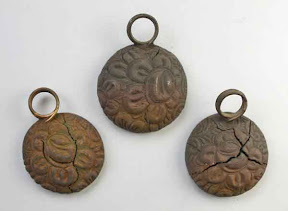
You can see that much of the wonderful kiln-induced coloring disappeared. (Compare that photo to the first two above; the colors were also mentioned in part 1….) No crisis there. One copper piece (top, above) shows only a tiny bit of cracking, at its edge. That’s not ideal but, at this point, I’m likely to leave that alone because, sigh, the other two came out worse than before! What happened? My guess (and this is only a guess), is that the steel (which sure had seemed to be sintered) had sintered some more (that is, it became denser and thus shrank some more) and the movement associated with that further shrinkage in the steel is what led to the additional cracking in the copper or bronze layer.

If I’d known that was coming, I could have measured everything much more carefully at each step along the way, and used that as a way to test my hypothesis (i.e., the guess, above). But I didn’t know; I just didn’t think to stop and take the time to measure….

Since I’d been stuck with refiring anyway, I tried a couple more. Shown, below, are the initial results from again using rose bronze and copper, respectively, but this time draped over clay made from Hadar’s newer Pearl Gray Steel XT powder. (They differ in size because I made my original textured dome elements in two different sizes as well; I point that out simply so you won’t think any difference you see could be due to variations in shrinkage. That was just my own doing….)

OK, much better! Much less cracking with that mix! Again, sanding the steel on the other side shows that it appears to be sintered. I’m not about to test that by refiring either of these. I’ll just live with a few hairline-crack issues on these pieces; all that means is that I’ll have to think especially carefully about how I use them.

Sometimes, even when I don’t think to do pre- and post-fire measurements, I do still come up with “Plan B” ideas. So, while I was at it, I made a couple toggle clasps using Hadar’s regular (i.e., yellow) bronze powder, to put in the box when I was (re-)firing the other clasp elements. Again, they were made in two different sizes. Their textures, curvature, and size match the domes I made to use with the coils; I added a heavy-gauge bronze wire loop to the toggle bars. In this photo (and the last one above), I show them after firing and after I’d brushed them just enough to confirm that they’ve sintered. I’ll shine them up a bit more before I go to use them in a piece.

Though none of the pieces from my last firing show the lovely kiln-coloring I got with the earlier batches, I do believe that there will be enough acceptable elements in all this that I can finish off my first round of bracelets with a few components left over. Earrings, perhaps? Or the start of a necklace?

[Update: I just added the “oops” tag I’d oops-ily omitted from the original post.]

Posted in General Techniques | Tagged: , , , , , , , | Leave a Comment »

What I did last week (part 2…)

Posted by C Scheftic on 2012/01/23

OK, so why did I go off making those domed disks described in my last post? Well, I started them as soon as I received this photo in the mail:

That’s not a piece of mine. It was made by the very talented Maria Richmond, and it was included in an email from the delightful Zelda’s Bead Kit Company, to illustrate a workshop that Maria was to teach there last week.

I’ve wanted to take one of Maria’s workshops for quite some time now; but never managed to have both time and money available to coincide with the projects of hers that interested me the most. But when I saw this one, I contacted her right away, to ask about the size of the disks, and learned that they were some “antique enameling disks” that Maria had bought online to include in the materials-kits for the sessoin. Yes, they are very nice disks, and it’s great that they are now going to good use. But I saw that bracelet and immediately pictured making it with hand-made, textured domed disks, designed and developed using metal clay techniques!

Thus the little collection I made last week: two different metals (copper and rose bronze, from Hadar’s metal clay powders), some of each in two different sizes, all with a deep “rose” pattern on their convex (domed) side, and with either a much finer “rose” pattern or a shallow “fern” or “swirl” on the other (inner, bowl) side (varying in such a way that I could easily tell which was made from which metal). I made those to take to Maria’s class, about twice as many as I thought I’d need, plus a few smaller ones in case I needed some minor adjustments in length.

Now, my larger pieces are slightly bigger than Maria’s disks, and my smaller ones were not quite as big as hers. It looked like five of my bigger ones would come out to just a smidge under six of hers, which seemed like a size I could wear. So I just used those, rather than try to tweak the length any further by varying the size of the pieces.

Following Maria’s instructions in all other regards, the photos to the left and right here show how my bracelet came out. I was delighted.

Maria’s sample, and all of those made in the workshop except for mine, were made entirely of copper elements (not just the disks, but also the coils, links, jump rings, and clasp pieces) and, as a last step, darkened with Liver of Sulphur (“LOS”). I chose, however, not to use LOS on mine. I figured that would overpower the kiln-colors that I liked; the metals will darken soon enough on their own with age.

Then, a few minutes after I finished mine, as I looked at it on my arm, trying to decide which side should face out, I had a real “Aha!” moment. I took it completely apart and, when I reassembled it, I alternated both metals (rose bronze – copper – rose bronze – copper – rose bronze) and the orientation of each piece (rose up, coils up, rose up, coils up, rose up). I then bent the wire-wrap connectors a bit to encourage everything to lie in a particular orientation.

But, even if it rolls up and down my arm, this way I am more likely to have some elements land wire-coil up, and others, rose-dome up, thus featuring both Maria’s wire-work idea and my own metal-clay approach, respectively. (We’ve already discussed the possibility of jointly offering something along this line as a two-part class later in the year.)

And, yep, it’s a two-sided bracelet. Somehow, I just can’t help but make fully reversible pieces. Stay tuned: I’m hoping to find time to finish up yet another variation or two on this in the next week or so.

Posted in General Techniques | Tagged: , , , , , , | Leave a Comment »

What I did last week (part 1…)

Posted by C Scheftic on 2012/01/22

The simple answer to, “What did you do last week?” would be, “I made up a handful of textured, domed disks to play with.”

In the rest of this post, I’ll discuss (with illustrations) just what I did. In my next post, I’ll explain why I did that. I hope to add another post, eventually, where I’ll review a few little tweaks I just happened to add to the plan…

I didn’t think to stop and take photos of the earlier stages in the construction of these pieces. Mostly, it was just the usual routine for working with metal clay. I began by mixing up small batches of several of Hadar’s metal clay powders that I wanted to use. The clay was then rolled out, textured (in general, on both sides), cut, shaped, dried, drilled, and in just a few cases, further “refined” (e.g., a few pieces had their edges sanded down just enough so the final result would be even and smooth) before going into the firing pans.

At this point, I started taking photos. (I have found myself tending to take a quick snapshot of each shelf or pan as it goes into the kiln. That way, if anything seems odd afterwards, I’ll have a record of what was where. Though, my usual load involves one-of-a-kind work; with so many similar pieces in this load, that isn’t going to tell me very much, is it? Oh, well.)

This photo shows the thirteen pieces I made. Ten are basic domes. The other three (to be discussed later) are the ones with little wire loops attached to them. (Click on photo to enlarge it, if necessary, to really see any such details….)

The pan to the left contains pieces made mostly using quick-fire copper clay; to the right, mostly using rose bronze metal clay. (One or two of each also contain some pearl gray steel, but those are the ones I’m going to hold off discussing for a while yet.)

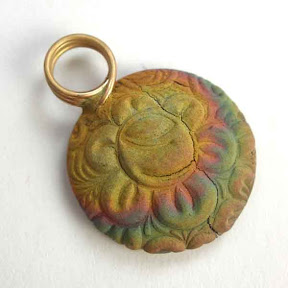
The next photo shows two of the copper domes, just as they came out of the kiln. Note the lovely color on the one to the right (convex side up). That was a surprise! (And it’s what prompted me to start my tale here, with the disks themselves, rather than just with how I used them.) I am not used to seeing much color variation on fired copper, at least not seeing it as vividly as I often see with the bronzes. My fired copper usually just looks dark, like the one on the left. Several (though not all) of the copper pieces showed delightful color this time. And the brightest colors all appeared on the convex sides, the side that I had placed face-down during the firing.
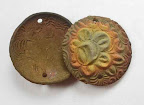
This next photo shows two other copper pieces, less colorful from the kiln, and therefore all polished up to a reasonably bright shine:

Here are four rose bronze domes, straight from the kiln. Again, these all show the side I’d fired face-down. In the past, when the bronze pieces came out with colors, it has seemed that the nicest ones seem to appear on the side positioned that way. (Though you can’t count on seeing that at all: you just have to be thankful when you do!)

Then again, this time I noticed some pretty interesting colors on the sides that were face-up as well! The pieces shown in this next photo are just the same four, from above, turned over.
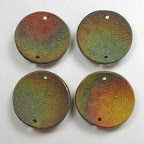
A side note: All thirteen pieces had the same “rose” texture on their convex side. The other side, however, got a slightly different treatment, depending on which metal I was using. I wasn’t sure how much I might care to know which was which as I was later working with them, but that seemed a simple yet unobtrusive way to distinguish the different metals if I wanted to quickly tell them apart.

Here are a couple more rose bronze disks. On the piece to the left, note the little red dot just to the left of the hole at the bottom.

Now, I admit, I didn’t note anything particularly memorable about that dot, itself, until I turned the piece over. Hmmmm. I wonder what tiny bit of something got into my carbon, to create the little, tan “washer” image on this side? You should be able to see it clearly at the bottom of the piece here on the left, just to the right of the hole. Its center matches the position of the red dot.

Well, I’ll never know the answer to the question of what caused that. But, here, you can see all ten disks after I finished polishing them up by varying amounts:

Knowing that the kiln-induced patina-colors are rather ephemeral, that they’ll wear off the high points, at least, as the piece is touched, worn, jostled in a jewelry box, etc., I decided to polish that off all the high points on the convex sides, while still leaving some down in the hollows. (I did give a full polish to a few select pieces that did not show much range in color.) Then I fully polished the concave sides—for several reasons, the decision to go for a full shine there was somewhat beyond my control. Partly, it had to do with how I intend to use these (see my next post). Also, it was due to the polishing tools I have that made it easy for me to limit what I’d polish on the “outside” to just the high points, but that meant I pretty much had to do a full-scale polish down in the “inside” anyway (or else, spend a lot more time on these than I thought they warranted). That was fine. I am happy with the results so far.

Please stay tuned to see what I’ve begun doing with these….

Posted in General Techniques | Tagged: , , , , , , | Leave a Comment »

Another great hollow-bead workshop.

Posted by C Scheftic on 2011/02/26


I taught a “reversible hollow domed” (aka “lentil”) bead workshop earlier this week at my studio in the Wilkins School Community Center.

Of course, I didn’t think to stop and get good photos of finished student work (lovely as it was, I was overly eager to get it into student hands!) so I illustrate this post with the element I made to demonstrate a number of relevant techniques.

(Except, bezel-setting a stone was not a part of that particular workshop: after class, I added the 6 mm bezel cup, refired the whole thing to secure that, and set the jade cabochon.)

I love the end result, and hope you do too! I’m reasonably satisfied with the photo that shows the jade cab. In my ongoing attempt to learn how to take better photographs of small, shiny, silver objects, however, I will admit that I’m really not happy with the amount of reflection in the other image. (It is, however, the best of about 30 attempts.) Yes, I know ways to solve the problem, just not affordable ones! The month is almost over (Feb is a short one!) and I haven’t make quite enough to cover rent on my studio (and I really do love that space!) let alone the other expenses involved in doing all of this, so the cost of photos (whether by hiring a photographer or investing in additional equipment myself) is one big issue behind this problem.

Still, I love making reversible hollow beads. After my students left this week, I stayed behind and made a number of samples for the three box workshops I have set for early-March. Aside from the fact that I just enjoy making and teaching those (and the way their “reversible” aspect means you get two distinct adornments for the price of one!), I’m also hoping I’ll earn enough from those to cover that month’s rent and, maybe, even this month’s shortfall. (The latter isn’t huge, but it does need to be covered somehow!)

Posted in General Techniques | Tagged: , , , | 2 Comments »

Congratulations, Ann!

Posted by C Scheftic on 2010/05/16

One of the members of our local chapter of the PMC Guild was the lucky winner of an Opaque Enameling Kit from Tonya Davidson’s great Master Muses project.

So this post is to offer congratulations to Ann, with whom I often carpool to chapter meetings. But it’s also to point out that Ann is one lucky woman: she wins things!

Green Traveler (Both Sides)

Here’s an example of why I say that: on our way home from a guild meeting last fall, Ann and I passed one of the best local bead shops, Crystal Bead Bazaar. I couldn’t believe Ann when she said she had never been there, so we parked the car and went in so she could check it out. It happened to be their anniversary, they were giving away door prizes, and Ann won the one for that particular hour. I’ve been going there for years; And was there 15 minutes and won a prize, a goodie bag full of short strands of a number of different beads.

Maybe Ann deserves such luck because she’s such a generous person. She gave me some of the beads she had won, including some green glass ones that went beautifully with the Russian Jasper beads I had bought while we were there. The photo shows how I combined them with a fine silver "lentil" bead. Thanks, Ann!

Posted in Guild | Tagged: , | Leave a Comment »

Another great thing about domes.

Posted by C Scheftic on 2010/04/16

I thought, with my last post, that I was done with entries about the Month of Earrings Challenge. But I admit, I had been wondering what happened to Vickie Hallmark afterwards.

Catching up with her blog earlier today, it turns out she took quite a tumble, with some serious (but one certainly hopes, only short-term) consequences.

Vickie Hallmark's Master Muse Ring
Vickie’s Master Muse Ring

Still, I was delighted to see that the announcement of Vickie’s latest project for Tonya Davidson’s Master Muses made it up on Wednesday. It’s for a lovely ring: a heavy-gauge wire shank topped with a PMC bezel holding a dome of torch-fired enamel. I really like this project! Here are just a few reasons why:

– The heavy-wire shank is (at least, currently) one of my favorite ways to make rings that incorporate metal clay. (Structurally, I like any form of shank-ring more than either simple band or bypass styles.)

– Even more, I’ve already noted that I like making domed-shape pieces, and this project illustrates yet another reason why. (I wish I’d been blogging longer, so I could’ve managed to get around to posting this reason sooner, but I’m happy to be able to use this project as my illustration.)

Because of the way metal clay pieces shrink a little as they dry, and even more as they are fired, it can be a bit tricky to get a bezel to come out exactly the right size to match what you are going to set inside it. But, if what you’re setting is a metal disk (regardless of the metal, and whether it’s made from regular sheet metal, or a piece of metal clay that’s been fired to pure metal), as you increase (or decrease) the amount of doming, you slowly reduce (or enlarge, respectively) the size of the disk’s circumference.

What that means is that, if you have a bezel that should shrink, in firing, to a size close to that of your dome, yet the two pieces don’t quite match, it is possible to increase or decrease the amount of doming to force the edge of the disk into the size you need.  Brilliant!

Posted in General Techniques | Tagged: | 2 Comments »

Simple Domes

Posted by C Scheftic on 2010/01/07

I like making domed shapes. Here’s a pair of earrings I recently made.

Spinner Disk Earrings

The process for making them from sheet metal was described in the July 2009 issue of Art Jewelry magazine, but of course I couldn’t simply make them that way. Not even the first time out…

Instead of using four regular metal disks, as in the magazine project, I used two of those (the copper ones), plus two made from metal clay (the silver ones). In the article, there was a small seed bead in front, but I had a bit of sterling silver wire that I’d messed up earlier, so I shaped that into two little spirals and hammered those flat to use in front. I then made the earwires from sterling silver wire, also tweaking them a bit from the way the magazine described it..

But the part that’s relevant to the “subject” of this post is that, furthermore, instead of just using flat disks (as the article had), I domed them. The copper ones were hammered first, to add a bit of texture, then “dapped” into a dome shape. The silver ones were textured early on: they’re made from metal clay, so their design was added when they were still in the clay state. I’d actually made them earlier, before thinking to use them here, and were fired flat. That converted the “clay” so what remained was just fine silver and when I decided to dome the copper disks, I was able to “dap” the silver ones too, so they’d curve the same way. When I made the earwires, then, I also formed them to match that shape as well, so they could still spin but wouldn’t wobble too much.

I like domes! Here’s the front and back of another pair of earrings I made a couple years ago. (Sorry the images aren’t too great: I’m getting a bit better with photos, but I don’t have any other domes on hand right now (they’re popular, and sell well!), so I dug this pair of shots out of my archives.)


Dome Earrings: Concave Side with LOS Dome Earrings: Convex Side (no LOS)

For those earrings, I shaped them into domes when they were still in the clay state. Moist clay. Rolled out flat, impressed with textured designs on both sides, cut into circles, and draped over a circular frame to dry into that curved shape. Then fired, polished, patina applied, and polished some more. In the grand scheme of things: easy!

I’ve used all sorts of things as the frame over which I’ve domed metal clay while it dried, including lightbulbs, ping pong balls, measuring spoons (dedicated to art, not reused for food), marbles, and more. The only trick is to find a shape that gives the desired curvature for a piece of the desired size. Oh, and to remember to make the piece a little bigger than you really want, because metal clay shrinks in the drying-firing-sintering process.

Posted in General Techniques | Tagged: , | Leave a Comment »