") Artsmiths of Pittsburgh
Artsmiths of Pittsburgh") Hoyt Center for the Arts, New Castle, PA
Hoyt Center for the Arts, New Castle, PA") Portage Hill Gallery, Westfield, NY
Portage Hill Gallery, Westfield, NY") _Open Houses in my Studio
_Open Houses in my Studio _Or…contact me about hosting a private party!
I’ve got several other high-priority things going on right now, but I just can’t resist sneaking a few moments here and there to play with this new toy!
(Sorry that the photo-colors are all over the place because I’m just shooting on my work-table as I go, not stopping to move everything over to my photo-table. And the light at my work-table varies by time of day and by which of the overhead lights are or are not on at the moment. I work in a building that’s over 100 years old, and much of the wiring is very old too.)
Fresh from the pack, when I try to break off a piece of it, it gives way in the same (what to call it? stringy? gummy?) way that diy-flex (regular silver clay with some glycerin mixed in) does:
There’s nothing wrong with clay that does that! I just note it here, in case you’re wondering why this happened to your clay. It’s normal!
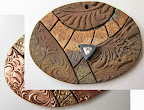
Right away, I decided to use a little “cherry blossom” texture (that I got ages ago at Cool Tools, but seems to have been discontinued…) and a butterfly-shaped pastry-cutter:
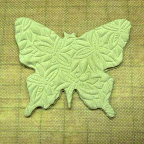
You can see (especially if you click on the image to enlarge it) that the edge of the cut is rather rough. Normally, I would smooth that out as much as possible while my clay was still wet; but I know that a lot of metal-clayers just leave it and sand the rough bits off later. I am just not into sanding clay if it can be avoided, so even when I find I’ve missed and left a rough edge behind, I still use a bit of water and various other tools to smooth out my clay. For this little test, then, I just left the edges as they were, to see how much I could smooth it once it had “dried” using my usual tools:
Pretty good!
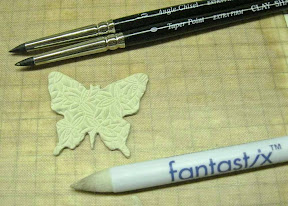
My plan had been to cut a matching shape out of the interior of this butterfly, using a paper-punch I have. Except, it seems I had not marked that punch (for my own short-memory benefit) before I made this piece, and only at this stage did I realize it was one of my “thinner” ones … meaning this piece was one-card too thick to fit into the punch. Oh well, I’ll deal with cutting it, a different way, later on. For now, let’s just look at another little play-thing.
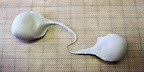
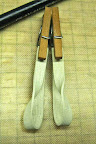
I had rolled out another little sheet, trimmed it down to a rectangle, and cut that in half. I left the pieces to air-dry overnight, and returned to find they were curving apart. I’ve seen a couple other early-testers mention curving, and having to press their clay down, but I’ve not seem that. The only curving I’ve seen has been like this, left to right:
![]()
Still, this is “flex” clay, so I never worry if it curves much in any direction. It’s simple enough to ease it back into shape:
![]()
The problem I ran into was with my next step which, of course, I did not stop to photograph. I had wanted to try something with this clay ever since seeing the little video that Mitsubishi had put out on YouTube about the product:
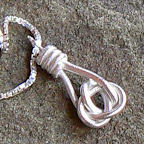
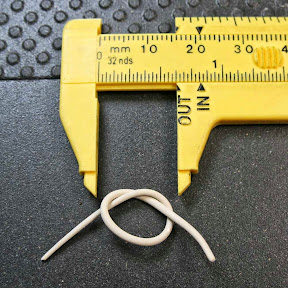
In it, they talk about how easy it is to let the clay “dry” and, since it remains flexible, you can still form it into a ring. Now, the one thing I’d always had trouble with, using the diy-flex clay, was when I wanted to join ends of “dried” flex-clay together. I found that to be far more difficult than with “wet’ clay. But I really didn’t want to invest the time in a ring first-time out. So I thought I’d just try making a couple little “Möbius bands” … where you take a strip, flip one end, and join them together. (With paper there’s tape to show the join. With clay, you get a true “Möbius” shape, where you can take a pencil, draw a line down the middle of the band, turning and drawing as you go, the whole way around, and end up where you start: there is no front or back, top or bottom of the strip. It’s all on the “same” side! If you’ve been following this blog for a while, you already know that I love to make reversible pieces. Continuous ones are even better!!!)
If you watch the video, you’ll see them make it look so easy! And I’m here to tell you their secrets: First of all, you can see the “cut” in the video stream where they left out a bit of the fussing needed to make it work (it IS possible, even with diy-flex clay) but, even more important, their band is perfectly smooth. That makes it much easier to get the join to work, because you can fuss and fill and sand it all smooth again. But I like textures, and I don’t like sanding. It’s not like it wasn’t going to work at all, but I soon realized (soon … after a twist, some water, some squidging together, some tape to hold it for a while, etc.) that it was not going to be quick and simple. I’ll work on that idea a bit more but, in the meantime, I moved on to test-plan-b for these strips.
I let the newly-damp parts dry again. I trimmed off a tiny bit at the ends that had gotten smushed; I also trimmed the second piece to match. I then gave each piece a twist, folded the ends up so the tips aligned, added a drop of water, and clipped them together:
Now, I could have gotten that shape with non-flex clay. But I would have had to do everything while the clay was wet. Or, more accurately, while it was starting to dry out, which can sometimes be a problem for me (especially when trying to make two matching pieces) and is far more often an issue with students when it all starts to crack. So, in that sense, the PMC Flex does make this project now far easier to do in a beginner class.
And, doing it this way, I could still try using a paper punch!
Not one of the fancy crafting punches, as I’d planned with the butterfly, but with a plain, small hole punch. Yeah, I could have drilled a little hole with a drill bit, but this turned out to be way more fun, once I’d gotten over the surprise!
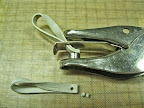
With non-flex clay, I’d never have tried that. (I’d’ve just used a drill bit.) But, with flex, even though the piece slipped down into the punch-opening (gasp!), it was really easy to pry out–carefully–with no harm done! (I took the little “holes” I’d punched out and wrapped then with a bit of moist clay. I wrapped that in a piece of plastic, and put it back into the foil pouch. And by the next day, it had all rehydrated to the point that I could not find the little bits any more.)
The thing is, if you look at the piece lying along the bottom of the photo above, you’ll see that both it and its mate (though harder to see in the punch) have a very straight, sharp edge along what will be the top end when hung. I didn’t want that sharp edge with the rest of these curves. Had I planned to do this from the start, I would have smoothed all those corners while it was still wet. But now I had dried, attached, and punched clay, and I needed to soften its edge.
With non-flex clay, I’d either wet and smooth it (as I discussed earlier in this post) or I’d take out a bit of sandpaper and smooth it down (I may try to avoid sanding when I can; but I have no qualms about doing it in situations where it really is most appropriate…). With diy-flex clay, however, I always found that sanding was pretty difficult. Actually, the fact that I really enjoyed working with diy-flex is what first led me to figure out all sorts of sanding-alternatives! Once I started using them, I just let them spread over into my non-flexible greenware too, thus replacing much of the sanding I’d earlier been taught.
But the video and the package insert talk about how you can “dry the object by heating it to 300°F for 20 minutes.” Hmmm, I’d never even though to try that with diy-flex clay with glycerin in it. And, as of my writing this, I still haven’t … with neither diy-flex nor PMC Flex! I think those two references may have caused a little confusion via some “social media” posts, where people talk about “baking” their clay. Personally, I never saw any reason to “bake” it until you want to make it hard enough to sand. (Or, if you want to harden it in the process of building some complex 3-D structure, but I’ll get to that in some other post … much later on.)
For now, I just want to go on record as saying that you can sand PMC Flex gently in its flex state, without any “baking.” which is what I did here:
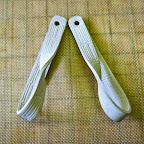
I didn’t change it a lot, but I did round out the corners as I’d wanted, while it is all still flexible.
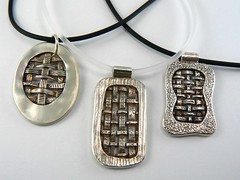
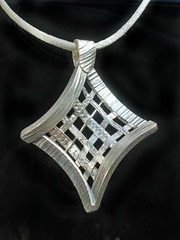
That’s all I have time for tonight. I’ve also started on a woven-silver piece that I hope to report on next.
I’m teaching a fine-silver workshop this week (non-flex: had to have that clay on hand before the PMC Flex was actually shipping, but I’ll show of the Flex a bit since I have that first trial batch), and I will report on firing this clay once all the student pieces have been fired.