") Artsmiths of Pittsburgh
Artsmiths of Pittsburgh") Hoyt Center for the Arts, New Castle, PA
Hoyt Center for the Arts, New Castle, PA") Portage Hill Gallery, Westfield, NY
Portage Hill Gallery, Westfield, NY") _Open Houses in my Studio
_Open Houses in my Studio _Or…contact me about hosting a private party!
As promised in my last post, here’s the story behind the earrings whose photo I posted there….
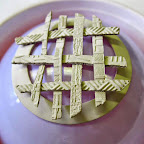
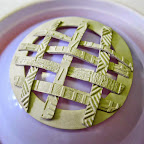
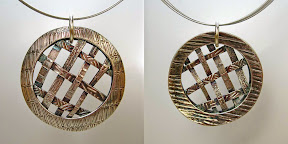
1. In my fairly early days working with metal clays—as soon as I’d moved on from just using a creme brulee torch and bought my first kiln but when I was still working on tray-tables in my family room, years before I started this blog or opened my studio—I found much inspiration in the work of CeCe Wire (one of the pioneers in metal clay techniques), and one of the things I had fun doing was making pieces that played with shrinkage. I learned about the concept in her first book, from 2003, Creative Metal Clay Jewelry: techniques, projects, inspiration, and had that reinforced when I earned my PMC Certification in a course with her, in Baltimore in 2007.
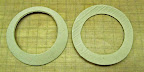
At that point, I’d make a small piece (earrings or small pendants) out of the original PMC Silver formula (no longer available), that had a shrinkage rate of 28% (and had to be fired in a kiln for a full two hours). I’d embellish it with Art Clay Silver, that had a shrinkage rate of 10%. Why those two? Because their shrinkage rates were the farthest apart of all the clays at that time on the market.
Because it was constrained by the low-shrinkage clay, the high-shrinkage clay would curve and distort in interesting ways: the fun part was trying different locations for connecting the clays to discover what results I could produce. (This was also back in the day when the nominal price of silver was a mere fraction of what it is today…. I am so glad I started that early! Even then, I did feel limited in how much sheer experimenting I could do, but nothing like it would be today….) I did some other clay combos too, but that particular pairing consistently yielded the most interesting results. The relatively high shrinkage of “original” was the key, no matter what other clay was combined with it.
I stopped doing any of that when Mitsubishi discontinued their original formula. Like many others, I was sad to see it go, but I created enough designs in other ways that the loss didn’t feel as devastating to me as it did to some folks. Since then, a few other silver clays have come on the market with shrinkage rates in the range of 20 to 25%, and at times I’d think about reviving that old technique with them, but then would get caught up in other project ideas and that would slide way down on the priority list.
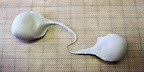
2. I have written here before about how I try to not store “leftover” clay. I just keep making things until I’ve used a packet all up. Some of my earrings are made with leftover bits. Little embellishments can be cut out or coiled up, dried, and used in later creations. The last few dregs can be shaped into little balls, dried, and stored for later use too. If I don’t have time at the end of a work session to use everything up, I will store the last bits for a brief time, but I do try to form those into something useful as soon as I can.
3. Last month, for various reasons (e.g., different projects, classes, demonstrations), I used a number of different clays, including these (as well as several others, but these are the ones relevant to the rest of this post):
| Clay Formula | Shrinkage Rate |
|---|---|
| PMC 3 | 12% |
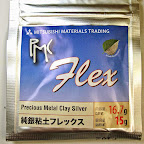
| PMC Flex | 15% |
| PMC Sterling | 15% – 20% |
| .960 made with PMC3 | Question #1 |
| .960 made with PMC Flex | Question #2, this post’s inspiration… |
Re Question #1: In a comment on the post where Celie Fago introduced the idea of home-made .960, Holly Gage estimated the shrinkage of PMC3 and Sterling to be about 13%. In a post that further disseminates the idea of using .960, Emma Gordon writes that “You can use PMC3 syringe with it, no problem.”
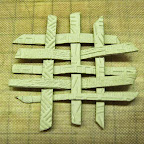
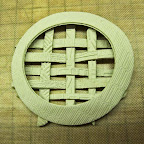
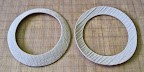
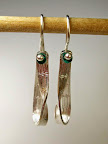
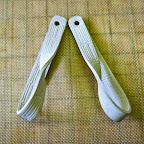
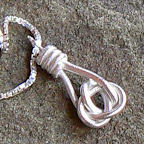
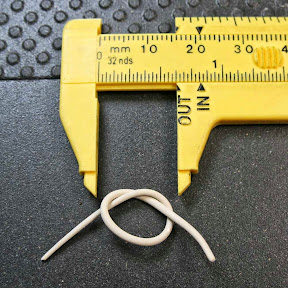
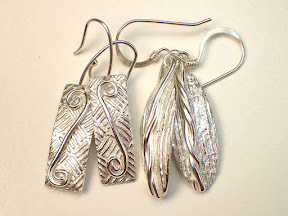
Now, maybe I’m missing something obvious, but if folks are combining PMC 3 syringe clay with .960 made from mixing PMC3 and PMC Sterling, it seemed as though I should be able to combine PMC Flex lump clay with .960 made from it and sterling: their nominal shrinkage rates are even closer! I had a bit of Flex.960 left from one activity, so I used up those dregs making a couple little pairs of earring bases. Flat ones. Definitely flat. I had a bit of regular Flex left, so I twisted a little spiral-pair for one set of earrings, and made a little twisted rope to embellish the other pair. (With the last few bits, I made a number of little balls which I then accidentally knocked all over my studio floor. I’ll hunt for those eventually!)
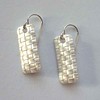
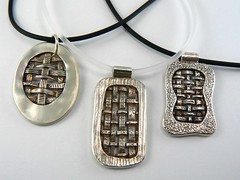
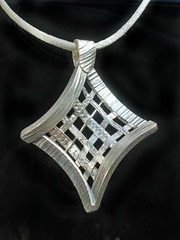
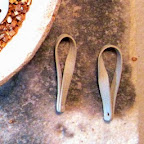
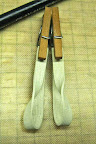
And when I fired those two pairs of earrings … the photo below shows what I got! Can you see how far they’ve curved?!! I’m not disappointed in the results. In fact, I’m happily reminded of those early CeCe-inspired domed pieces that were so much fun. It’s just that this is not what I was expecting! The shrinkage rates on these clays are nowhere near as far apart as what I was using in all domed pieces I was making a decade ago — I would have expected this with those. Just not now.
I guess this is telling me I need to find some time (where?!!) to do some more experiments! If you’ve experienced anything like this, intentionally or not, please let me know.