Convergent Series

learning, using & teaching metal clay, and other aspects of life

Posts Tagged ‘firing’

Kilns and Kiln Maintenance

Posted by C Scheftic on 2023/02/07

Well that was a fun event last weekend! I went to an electric Kiln Maintenance workshop at The Union Project.

The kiln we used for the hands-on exercises was apparently a Skutt KM1231-PK. (My kilns are not by Skutt. I got that model-name from the diagram on the page that came with the new elements we installed and then went online to confirm that!)

It is a big, electric, ceramic-studio kiln (almost 10 cu ft inside: Skutt calls it “Our Tallest Kiln”!). Such big kilns (any brand) heat up and hold the temperature reasonably evenly throughout their entire interior: good enough for most ceramics but not always close enough for the tiny safe range between sintered and melted that we have with metal clays! We tend to use much smaller kilns (often on the order of 0.20 to 0.25 cubic feet, so smaller by a factor of 40 to 50!) to help resolve that issue. Skutt does have a few great little ones, but they still require 240V circuits. Paragon makes ones that run on regular household 120V, so I went with those.

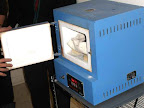
I got my Caldera first, in the winter of 2008-09 (before starting this blog) and set it up at home. I moved my workspace into a studio in 2010; that’s also around the time I got the SC-2 that I now use there. Both are great for firing metal clays! Because the Caldera can go up to 2350°F, I can also use it for mid-fire ceramics; the 2000°F limit on the SC-2 pretty much restricts me to low-fire ceramics in that one. But the front-loading door on the SC-2 makes it much easier to load and unload hot things like metals with enamels or pottery to then be raku-fired.

The little SC-2 did have some issues right at the start, resulting in my learning how to install replacement digital controllers provided under warranty (which turned out, in the end, to not have been the source of the problem!). It has continued to work great ever since that got sorted out. And the Caldera has been great too, despite having been pushed a bit harder by some of the more complex (for metal clay) firings I’ve set it to do.

Which one is better? I’m happy with both! It depends on what you want to do. I feel so lucky that I am able to have two and that they are different! I can pick the right one for certain tasks, when that matters. And when it doesn’t, I can just fire whichever one is located in the most convenient place. If I’m done making pieces in my studio and want to go home, I can take them home and fire there. If I have a lot that have been sitting around for a while, I can fire them in my studio kiln while I start making my next batch.

But while they’ve worked well for ages already, I know that eventually some part(s) or other(s) are going to need to be tended to. So when I saw this being offered I figured it was worth a shot.

The class was interesting: it was aimed at potters, and it began with some discussion of basic firing processes before going on to how various ramp speeds and hold temperatures affect particular glazes. I do some pottery, mostly mid- and high-fire at places where they do all the firing for me. But I’ve always done a bit of low- and mid-fire on my own and (since covid) have been exploring and making more small pieces, so hearing all that was a delightful bonus.

Then we went to work on one of the studio kilns! We basically dismantled the whole thing! We replaced elements. And a thermocouple. And saw how to replace relays (though that didn’t actually need to be done, so it just involved loosening and retightening a few screws). We didn’t have time to replace a couple firebricks along the top, in part because of one small technical glitch (a mis-placed tool), so that topic ended up being another presentation. But by that time I at least was getting kind of tired, felt I’d already learned a lot, so I appreciated getting that information simply as discussion. And there were lots of good handouts too. While I don’t know when I may have to apply all the knowledge I gained, I’m glad to feel prepared when the time comes!

Here are a few fun thoughts resulting from the day:

Question: How many people (students in addition to the instructor) does it take to remove the lid of a big Skutt ceramics kiln tucked into a rather tight corner?! (At this point in my life, I was just glad that half of the class, all much younger, stepped up to help!)

Answer: A lot more than the one person it takes for a little Caldera! Its lid is not connected, so you just pick the little thing up by its handles. Easy! (Removing and replacing that Skutt lid would have been far and away the hardest task of that whole day, and I’m very happy I won’t have to deal with that on mine.)

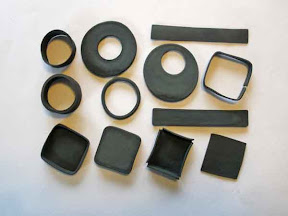
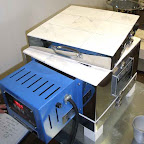
I usually run this firebrick-construction Caldera kiln on my covered & enclosed back porch. I usually plug it straight into the GFCI outlet right there. I took this photo when I was documenting the need to use an electric-company-supplied surge protector power strip during several weeks when we were urged to use them anywhere we could while they were making repairs. (I should take a better photo, but when not in use that kiln lives just inside the house, by the door you don’t see to the left there and, mid-winter, I’m not hauling it back out just for this post.)

The uppermost three “layers” are the kiln. Counting from the top here, the first and third are the two interchangeable and reversible base and cover layers. The second one down, between those two, is the “functional” middle section with three complete rounds of elements inside and the blue control section you can see towards the back. In this configuration, it can reach 2350°F. (I believe that is the maximum that any firebrick kiln can reach on 120V current. (I’ve seen some quoted as 2400, but I think that’s just a rounding-error / marketing-promotion for what is really more like 2350…) If you are aware of real exceptions, please let me know!)

The lowermost (hollow inside) layer shown here is simply serving as a sort of stand to let air circulate under the kiln. In reality, it is a “bead shelf” that can be moved up one level (so the base is really at the bottom and the “middle” level with the elements is just above this one). Doing that adds another 0.15 cu ft to the firing chamber (for a total of 0.40 cu ft) but drops the maximum temperature to just under 2000°F.

The reason to move the bead shelf up, besides getting room for a third metal clay shelf or a tall (but now low-fire) ceramic piece, is because it has a little hinged opening (on the back as I have it set up here, so not visible in this photo) that you can open to insert and remove glasswork and some other media (certain kinds of enameling, miniature ceramics you want to treat as raku, etc.).

My mind did wander a few times in this weekend’s class as I thought: how many of my entire little metal clay kilns would fit (unusably, but just thinking for fun) inside the Skutt? Well more than I own! I could stack two SC-2s over to one side, and then tuck various arrangements of components from two Calderas in around them. (I confirmed that by looking up the specs…) I could continue to fit more, perhaps even all the pieces that make up a third Caldera, but only if I took it all apart, which is clearly going way too far with that silly but fun thought exercise.

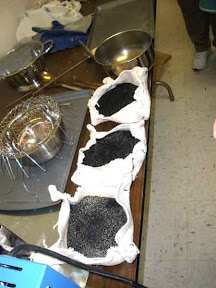
So I’ll just end with a couple photos peeking into my (original blue color) SC-2. The SC part means it was designed specifically for use with Silver Clays. The 2 means it’s the kiln in Paragon’s SC line that is sized to hold up to two shelves with silver clay (though these photos both show it with just one).

The SC kilns are a “muffle” style, not firebrick. (I believe that 2000°F is the maximum temperature for any muffle kiln, regardless of voltage: if you can document that I’m wrong, please let me know!) The elements are stashed behind that inner white material (the muffle), and when those finally fail, you end up having to replace the entire muffle…

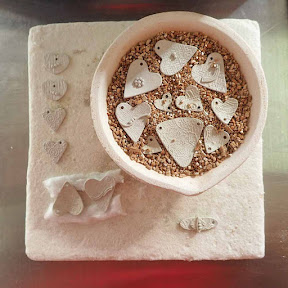
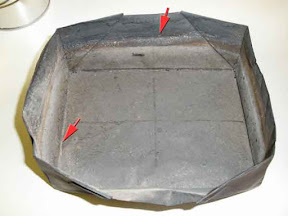
The first SC-2 photo shows it at the end of a silver firing cycle. Many pieces are on the shelf; a few others are supported by vermiculite in a small crucible.

(I often leave my annealing pan just sitting on that same cabinet top; it’s not serving any purpose here since I let everything cool before opening the kiln door.)

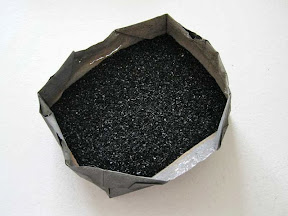
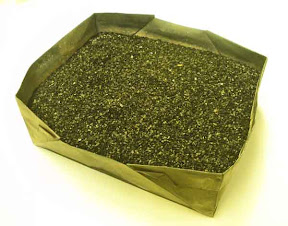
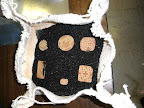
This last photo shows my SC-2 at the beginning of a “base metal” firing. Those metals (e.g., copper, bronze, steel) need to be fired in a reduction atmosphere. With metal clays, we can easily achieve that even in an electric kiln by completely burying the pieces to be fired in a box or bowl of activated carbon. (I love some reduction glazes, so I sure wish I could do that for them…)

Enough about kilns for today. I hope you found something useful in these ramblings!

Posted in Ceramics, General Techniques | Tagged: , , , , , , , , , | Leave a Comment »

3.14: Happy Pi Day 2018

Posted by C Scheftic on 2018/03/14

Two Small Pendants that shrank to different sizes
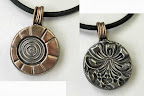
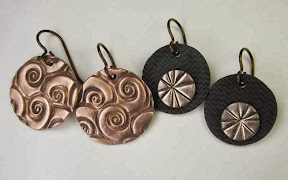
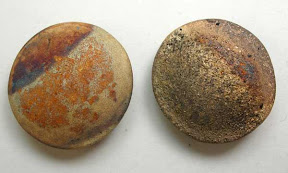
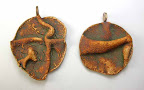
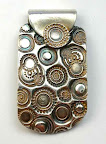
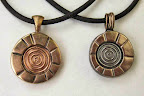
I was trying to think about what photo to post today in honor of “Pi Day” 2018 and this one came to mind. It shows something vaguely along the lines of circles and radii, so that does fit.

The real reason I chose it is because it shows similar circles with two different areas, and Pi is all about the ratio between a circle’s radius and its area. I created these two pieces a little over four years ago, shortly after Hadar came out with her “friendly,” “one fire” clays. And I wrote about how, even though they’d started out the same size, they ended up being so different. You can check my post from early February of 2014 if you missed it then (or forgot!) and are curious now.

Or you can just use this as an inspiration for making something yourself, whether that is jewelry, or pies, or something else. If you do, please leave a comment about your creation!

Posted in General Techniques, Technical Details | Tagged: , , , , , , , , , | Leave a Comment »

And now, my original reason for taking the photos with my last post….

Posted by C Scheftic on 2016/01/17

I may to have to try to do this again in the summer, when the natural lighting situation is better, because I don’t think these photos tell the tale as distinctly as I’d hoped. But this is one thing I’ve been experimenting with over the past week…. The point is to look at the difference in the color (and size) of the silver pieces at different points in their process. (Next time, instead of trying to capture so many, I think I’ll try to focus specifically on just one or two, with close-ups.)

But here is a shelf-load of pieces, ready to go into the kiln. They don’t look silver-colored at all, do they, even though they are at least 90% silver! Next time, I’ll try to burnish one in the clay-state, to try to show that the silver really is there, but for now:

And here we have that same shelf-load of pieces, after being fired, when the shelf had cooled just enough to safely remove it from the kiln. Note the “white” color of these pieces: this is normal for just-fired metal constructed from silver clay. Comparing this to the previous photo, you can also get a sense of the shrinkage that took place.

And here is that same shelf-load of pieces, after having been run through either a rotary tumbler (with mixed-size and -shape stainless steel shot) or a magnetic finisher (with tiny stainless steel pins). I need to work on the lighting for each of the different versions (and I really struggled with the meager equipment I have to get all of the shined-up ones together without too many shadows or too much glare!), but I hope you can see that they are, at last, starting to look like silver!

Posted in General Techniques, Teaching Metal Clay, Technical Details | Tagged: , , , | Leave a Comment »

Update on the Lifespan of a No-Flake Foil Firing Box

Posted by C Scheftic on 2014/02/10

A few days ago, I was talking with another metal clay artist about how I fire bronze, copper,and steel in vessels I “fold” myself from sheets of steel “no-flake” foil, when I realized it had been two years since the last time I’d mentioned them here.

Which I find interesting: in three years, I’ve used three boxes! Counting them up, I figure I put a box through a firing somewhere between 1 and 2 times a week, on average. But few things in my life are average…! No, really, it’s more like 6 or 7 times a month, but even that tends to happen in maybe two “bursts” of several firings in quick succession, then it’s several weeks before I do that again.

Something I learned from my first no-flake foil box, plus discussions with others after I wrote about that, is that the foil tends to crack open along the top edge of however much carbon is typically used. So, with my second box, I started out by piling the carbon a a little bit higher than I’d been doing. Then, when some cracking started to appear, I could just lower the level a bit, and get a number of additional uses out of it (because the holes–eventually stretching into a longer tear–were then above carbon, it didn’t leak out)! With the extra firings, it also began to crack along the top-most folds: what that meant is that I tried to be a bit more careful as I handled it, especially when moving it in and out of the kiln. Eventually, though, I decided I was carrying conservation perhaps a bit too far: after at least 75 firings over the course of a year, I took its picture and retired it!

Box #3 has lasted even longer! It has handled 80-some firings over almost 14 months. I did not keep fully-detailed records but, between the notes I do have and my general memory of the past year, I’d say that for its first year, I did a higher proportion of firings in the mid-fire range, and a smaller share in the high-fire range, than I had done with the first two boxes. That seems to have reduced the number of little holes it developed, so there were fewer to spread into wide-open cracks.

That is, until the start of this calendar year. That’s when I started playing with Hadar’s One-Fire High-Fire Trio. The single firing needed to both de-binder the clay and sinter the metals is a real treat, but when I started firing batch after batch in the high range, I noticed that the sides started warping out. So, even though Box #3 does not have any big holes, it is now being retired because I can barely fit it in he kiln any more: it is in danger of hitting the kiln’s thermocouple!

But. I still think that these boxes are well-worth their cost! Do you?

Posted in General Techniques, Technical Details | Tagged: , , , , | Leave a Comment »

One Thing Just Leads to Another

Posted by C Scheftic on 2014/02/01

If you’ve stumbled across this blog / post without a lot of previous metal clay experience, you may want to just click on the photos to enlarge them and read the brief notes there. For the rest of you, I’ll start by asking if you remember the earrings I wrote about last week?

For today’s post, I’ll start by saying a little about the steps I went through in making the bronze-parts of the two-metal earring pair I described earlier.

  • Grab a good-size chunk of Champagne Bronze clay.
  • Roll it out to a thickness of four cards.
  • Position cards around it, two cards high.
  • Use a thin, straight edge to cut two distinct sets of five intersecting lines. (This was done freehand, so their positions are similar but not identical.)
  • Use a circle cutter to make two “large” circles.
  • Use another circle cutter to make a “small” circle inside each of the “large” ones. (Again, done freehand, so their positions are similar but intentionally not identical.)
  • Do all the usual clean-up and drying of the various bits of clay.

When the circles had dried, I used the small, matching “inner” circles (where each set of lines all intersect) over some Low Shrinkage Steel XT to make the earrings I mentioned before. So far, so good.

Looking at the dry “outer” circles (washers, actually: the larger circles with their centers removed), I had another idea. Using a texture sheet with some concentric circles, I rolled out two more sheets of clay, one each from Friendly Copper and Low Shrinkage Steel XT. Then I centered one of the bronze “washers” over each of those, and cut a matching circle out of each clay. Finally, I rolled out another pair of those two clays, this time using two different “flowered” textures, and cut out a third circle of the same size from each of those. Both the circles- and the flower-design were rolled to four cards at first and then, with the textures, down to two cards. (I didn’t roll the clay with textures on both sides because: (a) I hadn’t yet decided for sure how I would use them, and (b) I wanted to center the designs on both sides the way I wanted, and doing that separately for each side was easier.) I set all those aside to dry (as well as a few other bits I’ll try to write about another time), figuring I’d use them for something….

A few days later still, I got to wondering about the “high fire” temperature of these new “one fire” clays. In general, even with this new trio, it’s the bronze that’s going to limit how hot the product can get during the sintering process. Would the “bronze embeddable” bails survive that heat? (I use them myself, on occasion, and I often offer them to students, especially in introductory workshops, because they can save a bit of time when compared to having to make one’s own bail.) So I took one of the bronze washers, attached the copper disk with circles and let that dry, then positioned the embeddable bail and attached the copper flower-design disk. Once all that had dried, I filled in a few little gaps, dried it all some more, and finally fired the piece.

The results were interesting, as shown in the first photo, above. It all sintered just fine. The bail did blister a little bit: not enough to ruin it, but enough that any metal artist “in the know” should be able to spot what happened. But I still think it’s interesting.

There was one small blister on the sintered bronze section. My first thought was that I’d overfired the batch a bit, but then I realized it was exactly over the post on the embeddable bail. Silly me, I didn’t think to capture a photo of that: What I did was to immediately see if I could polish it out. Easy! I’m not done polishing this piece (it was just a spur of the moment creation, not a planned project), but I think the photo I include here (click on it for a bigger version) gives you a hint as to the blistering on the bail (in case you’re someone who uses them too), and to the way it does look like the disk itself will polish up nicely with a little more work.

There’s one other item worth noting: how the bronze in the bail alloyed a bit with the copper on the other side! Look at the side shown to the right in the first photo, up near the bail, and notice the golden-colored patch. Alloying! Again, artistically, I’m OK with its looking like that. But it’s good to know it will happen.

A few days later, I got to wondering, would the bronze wire I sometimes use with such pieces show the same blistering? [Later clarification: I’ve used that wire in the past with pieces made using Hadar’s Quick Fire bronze. That’s a clay that takes a two-phase firing and only mid-fire temperatures and it’s always held up beautifully in pieces fired that way. Here, I’m otherwise reporting on the newer one-phase high-fire clays.]

So I made a simple wire-loop bail out of phosphor bronze (melting temp listed as 1800°F), then took the other (matching) bronze washer and the Low Shrinkage Steel XT disks, and assembled it the same way as I’d done before. I fired that using the same schedule too.

And, again, I noticed a bit of blistering on the bail and, with this wire-design, a bit of fusing across the loops. Again, I think that slightly grainy look is OK. Other than a quick clean-up, I have not yet stopped to polish this one at all. But I decided to post about it quickly because, this time, the main piece shrank much further away from the bail. In its clay state, the loops were pressed lightly down into the piece, but the post-firing separation is visible in the photo. No alloying with the steel though, which is also good to know.

But you have to see the two together to catch what surprised me the most: the difference in shrinkage! They started out exactly the same size, and look how different they are now. The current (as I write this) Hadar’s Cheat Sheet (.pdf) says that, on their own, Champagne Bronze shrinks about 30%, Low Shrinkage Steel XT about 28%, and Friendly Copper about 25%. Combos will be limited, to some extent, by the least-shinkage clay in the mix. But there’s only a 3% difference between LSStXT and FrCu, and it sure looks to me like there’s more than a 3% difference in the results here. What I can feel, but can’t really show here, is that there is maybe a 3% difference in height but it’s in the wrong direction. The one made from copper is a teensy bit thinner (i.e., more shrinkage, not less).

I really do like the results I’m getting with these clays, and the 3-hour firing time is a huge help compared to some of the others. But, with the others (and any of the “older” clays, both precious and non-precious), I think I have a pretty good feel for the shrinkage. With this new One Fire Trio, I’m still exploring….

What are you finding with them? Do leave a comment!

Posted in General Techniques, Learning Metal Clay | Tagged: , , , , , , , , | Leave a Comment »

Trying Hadar’s New “One Fire Trio”

Posted by C Scheftic on 2014/01/24

It’s taken me a while to post again as the state of mini-crises has continued, but I won’t bore you with those details. Instead, I’m delighted to report an exciting new development: At the start of the year, Hadar announced a new One Fire Trio that includes two new metal clay powders that, along with one of her older ones, can be de-bindered and sintered in just one firing (rather than the two separate ones that many others require). Their total firing time is just under 3 hours. Wow! Compared to the usual 8 hours (if you fuss in between) or 12 (if you don’t fuss but do sacrifice more carbon), that’s a huge difference!

The older member of the trio is Low Shrinkage Steel XT. On its own, it could be fired in a single kiln-run, but that limited the combinations in which it could be used. Also, it’s a high-fire clay, so it could only be used in small amounts with some of her other clays, the ones fired at lower temperatures. But, with the introduction of two new clays—Champagne Bronze and Friendly Copper, both of which also use high-fire and single-phase processes—it is now possible to produce more combinations.

Each of Hadar’s metal clay powders have their own advantages and disadvantages compared to the others. No one product (or small set of products) from her or (or any other producer) is yet able to achieve everything an artist might want. But each new combination offers new opportunities, which is what makes them so exciting! I am sure that some people got these clays and proceeded to develop complex creations. But me, I prefer to get to know the clays in simpler ways first, to discover their advantages and limitations. I have a few more-complex pieces in the works, and I’ll get around to completing their construction and firing them eventually. This post will show a few of the simpler pieces I tried first.

The earring pair to the left was made with Friendly Copper. The pair to the right used Low Shrinkage Steel XT in back, with the embellishment in Champagne Bronze. After firing, the copper and bronze were very lightly polished (just a quick pass with one set of (3M yellow) radial bristle disks); the steel is as it came out of the kiln; the earwires are anodized niobium (that I just happened to have handy). If / when I can find the time, I may fiddle with finishing them a bit more but, for now, I just could not resist offering this quick sneak peek!

The second (smaller) photo shows the other side of the steel pair, after each piece has been quickly polished in the same way as the copper and bronze on the fronts. I did that because I wanted to show the polished-steel color on its own, even though I liked the black+gold contrast in the combination on the other side of these. (Although ensuring that the black will stay black—neither shining up to gray nor rusting out—will require some of that additional finishing I just mentioned….)

One note on firing: Hadar says that firing any of the clays in this trio takes her 2:45 (2 hours and 45 minutes). For these, I used a brick kiln, outdoors on a covered patio, when the air temperature was around 25°F (-4°C). I also know that this particular kiln tends to overshoot the goal temperature early on in the firing process, regardless of the temperature of the air surrounding it, though it holds the temperature fine once it’s had the chance to swing up and down a few times. My work-around for that is to set a two-step program, where I first get it near the goal temperature and tell it to hold there for a couple of minutes (allowing it to spike higher there), then ramp it slowly to the real goal where it can hold for the required firing time. With those two differences between my set-up and hers, firing these pieces still took only 2:58. As I said above, that’s a real treat!

Another note on my kiln: I don’t leave it outside all the time. I keep it inside and just haul it out when I need to fire it. (If I fire it indoors in winter, when I don’t have any good way to vent it and I’m using carbon to provide an oxygen-reduced atmosphere inside the kiln, my CO detectors signal a problem!) Hauling it in and out takes only a few minutes each way, so it’s not a major problem, even when the temperatures are in the 20s. But, they’re currently hovering around 0°F, and that puts enough of a strain on my furnace, me, and more. I’m not leaving doors open to move kiln, kiln “furniture,” the stand, various tools, power strip, gloves, safety glasses, and more both out and then back in again.

In other words, even though I have more pieces underway, it may be a while before I get around to firing them and posting the results. It’s just winter … and I don’t mind at all living at winter’s pace … for a while.

Posted in General Techniques, Learning Metal Clay | Tagged: , , , , , | 1 Comment »

Smart Bronze: By Jove, I Think I’ve Got It! (Summary — Post 6 of 6)

Posted by C Scheftic on 2013/06/30

Before I wrap up my Smart Bronze test-reporting, I am inclined to take one last post to review and summarize a few of my thoughts about what I just put myself through.

My Test Firings.

Over the last five posts, I outlined the eight firings I called “trials” to master the firing of this particular clay. If I were starting the whole thing today, I think I could hit the right numbers in a mere three trials. Yes, that’s more than one test-firing, but I do find that to be a very manageable number. (Yes, eight was too many!) Why do I say three?

My first two firings were based on Hadar’s earliest information, right as this new product was released, before she had updated her Instruction Manual. Today, I would be starting with the later information, and avoid a couple of initial mis-steps with this new product.

My last two firings were, really, my first two production firings. I counted them as tests mostly because, having encountered some earlier problems, I was being particularly cautious before declaring my testing done.

Finally, the problems I had in one firing in the middle were simply because I’d spaced out and incorrectly programmed my kiln. Those did give me some more “confirmation” of what I thought had been going on but that should have been avoidable.

That leaves me with the three firings I think I would have taken to get it right. And you should be able to hit it right in two or three yourself, because you will know the following….

The “Trick” to Smart Bronze.

The conversion of all metal clays from a powder-form into a metal-structure one (oh, and regardless of whether they are precious metal (silver, gold) or non-precious (elemental copper or various bronze or steel alloy formulations)) requires that both (a) all the binder be burned off and, then, (b) the metal sinter and “soak” into a nice, densely-packed arrangement. In some cases, those can be done in one (sequential) process; in others, it requires two (separate) firing processes. “Smart Bronze” falls into the former category, which is its primary appeal over a number of other bronze formulations.

But you really do have to let Smart Bronze pieces spend a full hour in the “debindering” process. In a single-fire product, all the binder burnout happens during the ramp-phase of a firing. If it’s not taking your kiln an hour to do that ramping, you are probably not removing all the binder, and that will limit the metal’s ability to fully sinter correctly regardless of the temperature or time at which you “hold” it. You have two options for slowing it down: reduce the ramp-speed, or simply build a few minutes of “hold” time partway through the heating-up phase of a firing. (I did the former, as noted in this series of posts, with my brick kiln. I am thinking I may well try the latter when I get around to trying to fire this clay in my ceramic muffle kiln.)

Once you are sure you’ve adequately provided for the binder-burnout phase, only then can you confirm the actual goal-temperature that’s needed to allow sintering to take place. I know that our instinct, when sintering does not seen to happen as we’ve expected, is to try to adjust the final temperature or hold time with the expectations that such tweaking will solve the problem. But, until you get all that binder burned out, your metal will not sinter properly. You have to master the burnout-phase first. Every situation I have heard about where there has been a problem with Smart Bronze (at least so far) has involved inadequate sintering that, at least as far as I could tell, resulted from a problem in the initial heating up part of the process, when the binder should all be burning off.

A Note on the Color of Sintered and Polished Smart Bronze.

The two rings pictured with this post both contain large areas that have been polished smooth. The round, seamless ring has been completely polished. So has the band of the double-fire ring, as well as large, raised areas of its texture. In such cases, the metal polishes up to a bright, golden-yellow color.

On textures with lots of fine detail, however, such as the earring pairs in my last post, where you can’t really polish everything to a super-high shine, then the color looks to me to be more of a greenish-bronze. (During the testing, I tried both: (a) using sanding plus further polishing, and (b) tumbling in a rotary tumbler. And I got a similar greenish tone either way.)

I’m not saying that either one of the colors — golden yellow or greenish bronze — looks better than the other. Just that they are rather different, and seem to be a result of the texture rather than any other construction, firing, or polishing approach that I’ve yet been able to determine. I have definitely begun planning pieces with one shade or the other in mind (e.g., with respect to some particular stone-color I may choose to add to a piece). I’d love to hear whether (or not!) you find a similar pattern in the pieces you make out of Smart Bronze.

Because, my readers, I sure am hoping you’ll try Smart Bronze too. Once you “get it,” it’s great. I’d love to hear how your results compare to mine!

Posted in Learning Metal Clay, Technical Details | Tagged: , , , | Leave a Comment »

Smart Bronze: By Jove, I Think I’ve Got It! (Post 5 of 6)

Posted by C Scheftic on 2013/06/30

This post continues the story I’ve been telling about coming to understand Smart Bronze metal clay….

By now I was feeling time-pressure on top of some test-process frustration. What pressure? The various “test” pieces in Smart Bronze had not taken that much time to make, in and of themselves. But their firings had been eating up kiln-time. I was making and firing pieces in other metals in between so that I’d have enough inventory for the Three Rivers Arts Festival (held June 7 through 16 this year). Aside from the rings, which I’d been doing just for myself, I’d been thinking the “test” pieces might serve as the “loss leaders” in my collection at the Festival: an option for someone who really wanted something of mine but could not afford the higher-end pieces. (I’d make sure to cover my actual costs with them, but would take some loss on my time by just calling that testing-learning overhead.) And I write about all of this, now, as a teacher: to illustrate that even someone who, in general, does know what she’s doing … can also hit roadblocks, make mistakes, continue exploring, and figure things out. Just in time!

Here’s what happened next:

Trial #7: Early June in a Brick Kiln

Hadar (still) said: Ramp at 1400 per hour to 1430°F and hold for 2 hours.
What I entered (correctly, this time!): Ramp at 1350 to 1395 and hold for 2 hours.
Program completed in 2:59.

Test pieces: Taking a risk, I fired all of these: another open-ended ring shank, several botanic pendants and a collection of earring elements. All came out looking fine! Whew!

Trial #8: Early June in a Brick Kiln.
Or, have I moved beyond Trial Firings to Real Firings?!

Hadar said: Ramp at 1400 per hour to 1430°F and hold for 2 hours.
I entered: Ramp at 1350 to 1395 and hold for 2 hours.
Program completed in 2:59.

Test pieces: Once I’d attached a new “top design” to the ring shank from trial #7, I fired that in the kiln, along with another collection of little earring components. (Shown, here, are ten pieces I included in this particular load.) Once again, all came out looking fine. I could actually wear the ring! In the time since these last two “test” firings and my getting around to writing this report, I’ve sold almost all the earrings and pendants I stuffed into these test-loads. Success, at last!

And the ring, which I wore constantly during the Three Rivers Arts Festival and have continued to wear frequently since, is holding up beautifully:


I’ll close this series with one final post, summing up what I’ve learned in the process.

Posted in Learning Metal Clay, Technical Details | Tagged: , , , | Leave a Comment »

Smart Bronze: By Jove, I Think I’ve Got It! (Post 4 of 6)

Posted by C Scheftic on 2013/06/29

This post continues the story I’ve been trying to tell for the past two days….

Trial #6: End of May in a Brick Kiln, in which you will see how your tester spaced out momentarily….

Why had that last load’s wrap-ring broken: was there a weak spot, or was the firing program still not right? I didn’t want to risk breaking the seamless ring too, but I thought maybe I’d try firing it a second time just to be safe. I’d also made an open-ended ring “shank” for a double-fire ring that I could put into this load, as well as a couple other simple textured butterfly pendants I’d made up while the last load had been firing. And I’d nudge the hold-temperature up just a tiny bit while I was at it.

Hadar (still) said: Ramp at 1400 per hour to 1430°F and hold for 2 hours.
What I thought I entered (which I’ll explain in a moment):
Ramp at 1350 to 1395 and hold for 2 hours.
Program completed in 2:59.

Test pieces: Now, I had blistering. Just two little blisters on the open-ended shank (shown: first, right). The textured pendants were bubbly all over. So was the seamless band (shown: second, left): it had had a “perfect” finish on it but, since I’d broken the other ring I’d fired with it, I’d stuck it in to see if a second firing would better-sinter it and now it looked a mess. Fixable, I hoped, but still … why?!

My first reaction was, yes, the load had been slightly larger than the previous one, but why so much blistering? Having felt a little bit frustrated at the start of this trial, now that feeling was building up even more. I’d worked on a few pieces in other metals between trials #5 and #6, and succeeded in gaining a bit of positive reinforcement for myself from their success. So I returned to more of those after trial #6. And. as I went to put those in the kiln, and set up the program to fire those, that’s when I noticed that I’d somehow spaced-out entering the program for trial #6, and gotten wrong both the goal temperature (slipping back to the previous trial’s number) and the ramp (where I’d entered the (wrong) goal number, not the ramp number). And, somehow, the firing time came out to be the same as other test loads, so that was no clue either. Argh…. ( I had actually been starting to wonder if, somehow, the load-timer was malfunctioning and always just returning the last reliable number it had ever had….) But, now, here’s what I’d done:

What I meant to enter: Ramp at 1350 to 1395 and hold for 2 hours.
What it seems I entered: Ramp at 1400 to 1400 and hold for 2 hours.

Little differences can mean a lot! What can I learn from my observations, both before and after I realized my mistake? The textured pieces had bubbles that clearly did not belong to their textures. Ugly! But, though the rings both, at first, looked fix-able, I was even more disappointed by them! The seamless band had blistered, but I was able to work away at it (for a very long time!) with various sanding attachments on my rotary tool until I got it back to a nice condition. Not as pristine as it had been after its earlier polishing, but still very nice. And, it had shrunk another whole size (meaning it had gone down by a total of three ring sizes), which told me that the refiring had resulted in more sintering. At least that was a good sign. But the open-ended band, on the other hand, did not seen to have shrunk much, if at all; worse yet, it broke into three pieces when I slipped it (carefully!) onto my ring mandrel to check its size. Even though it looked at least reasonably well debindered, was it possible that the faster ramp had prevented all the binder from burning out? Or … what?! Of course, I’d made a mistake. It was just “little differences” here and all I needed to do was to go back to the pattern I’d been developing and it should work. I kept telling myself that.

So, let’s take a little break here, to clear our heads….

Posted in Learning Metal Clay, Technical Details | Tagged: , , , | Leave a Comment »

Smart Bronze: By Jove, I Think I’ve Got It! (Post 3 of 6)

Posted by C Scheftic on 2013/06/29

This post continues the story I started telling yesterday, morning and evening….

By the time I got around to trying Smart Bronze again, a newer version of Hadar’s manual was out. Dated May 15, 2013, it told me that my goal in the first trial, 1420°F, was really only 10° below the (latest) recommendation, of 1430°F, whereas I’d intended to aim for 20° below Hadar’s recommended temperature. My second trial had still gone a bit too fast, yes, but it turns out that one really had been at my typical Hadar-clay adjustment of 20° less than the stated goal. That explained all the melting and left me a bit less worried, now, about whether I could get away with dropping my goal temperature some more as I also slowed the ramp speed.

Trial #3: Just after Mid-May in a Brick Kiln

Hadar (by then) said: Ramp at 1400 per hour to 1430°F and hold for 2 hours; total firing should take 3 hours.
I entered: Ramp at 1365 to 1400 and hold for 2 hours. This should have taken over 3 hours; the program completed in 2:58.

Rationale for my new program: (1) Further slowing the ramp should continue to improve the binder burnoff. (2) This was still only 30° below Hadar’s newer target (hold) temperature.

Test pieces: the last (and smallest) two “golden threads” loops that I’d made along with the ones “lost” in the first two trials.

Results (shown, held up inside a slit in some green foam): Both test pieces seemed, at first, as though they might be debindered and sintered. But one small segment did break under very slight pressure (i.e., yes, the “threads” were thin, but this felt like a “normal wear” issue; I had not deliberately test-bent them but, instead, just lightly squeezed a wire-like bit with my fingers to get a good grip on it for polishing). It was hard to see the inside of the small ends. They seemed sintered, but perhaps not fully so. Still, this felt increasingly close to a program that should work.

What to try next: Since there had been so much melting in the previous trial, at 1410, I was hesitant to blame any inadequate sintering on too low a firing (hold) temperature. Since any not-burned-off binder will inhibit sintering, I decided to maintain the temperature and try dropping the ramp-speed a bit more….

Trial #4: End of the third week of May, in Brick Kiln

Hadar said: Ramp at 1400 per hour to 1430°F and hold for 2 hours.
I entered: Ramp at 1350 to 1400 and hold for 2 hours.
Program completed in 2:59.

Test pieces: I wasn’t sure if the thinness of the “threads” might have been a factor in the previous failure. So for this trial I reverted to a simple design I know and understand well: two small, round, simple, stamped butterfly pieces. (One each at 3 and 4 cards thick.)

Results: Debindering seemed to have happened as needed. The pieces sintered into a nice, solid metal. A few small blisters appeared, but they were fairly easy to polish down. The results looked lovely but I have no pictures: sorry! The reason for that is great: As I was finishing their polishing and stringing them up to photograph, a delightful fellow walked into my studio looking for a gift for his twin daughters and bought them both!

Trial #5: Brick Kiln

Hadar (by then) said: Ramp at 1400 per hour to 1430°F and hold for 2 hours.
I entered: Ramp at 1350 to 1390 and hold for 2 hours.
Program completed in 2:59.

Test pieces: I was ready to go for it! I’d had several ring bands ready for weeks! One was made using the “seamless” ring approach; the other was made as a bypass or wrap-ring although I did “connect” the edges of the two ends as they passed each other. I did the latter because I wanted to help keep the piece a bit more stable than it would have been had I left it with “loose” ends.

Results: Both seemed to debinder and sinter beautifully. My only concern was that they had not shrunk by the predicted 2.5 sizes. I was seeing them as not quite 2 sizes smaller. Was that enough? Had I dropped the temperature a little too much? Maybe. Maybe not. But I was hopeful. I first polished the wrap-ring, which looked gorgeous, so I wore that happily while I worked on the seamless ring. When I left my studio at the end of the day, the seamless ring was sitting there waiting to be photographed with its kiln-mate. (It’s shown, here, alone.) I wore the wrap-ring home. The next two days had me moving some furniture and packing-boxes from a recent home improvement project, along with other normal daily activities. I continued to wear the wrap-ring and, half-way through the second day, it suddenly broke into three pieces.

Admittedly, the wrap-ring design did have one “thin” spot. The band was an even thickness all around (which you can see from its greenware-state photo (brown color) above), but it been cut in a tapered shape, so it had the least “height” right where it met the large starting-edge. Which could have been a point of weakness. Which could have explained its breaking open. Or, maybe even breaking into two pieces. But its breaking into three pieces hinted to me that there was another problem somewhere. Less obvious, of course, was the exact nature of that problem.

Should I worry about the pendants I’d just sold? I think not. They were thinner, and less likely than a ring to get knocked around a lot. Still, there was another pause in my testing so I could think this through some more: and another point at which I’ll pause this record too.

Posted in Learning Metal Clay, Technical Details | Tagged: , , , | Leave a Comment »

Smart Bronze: By Jove, I Think I’ve Got It! (Post 2 of 6)

Posted by C Scheftic on 2013/06/28

This post continues the story I started this morning, reporting activities from last month….

Trial #1: Early May in Brick Kiln

Hadar (back at that time) said: Ramp at 1400 to goal-temp of 1440 and hold for 2 hours.
I entered: Ramp at 1400 to goal-temp of 1420 and hold for 2 hours.
This should have taken just over 3 hours; the program completed in 2:42.

Test pieces: one small stamped disk and one “golden threads” loop (the latter was a simple project from Hadar’s blog when she introduced the product she calls Brilliant Bronze).

Results: Two test pieces were simultaneously under- and over-fired! That is they were under-fired in relation to the debindering phase, and over-fired in relation to the sintering phase.

How did I know this? What I found were small, uneven blobs of bronze (i.e., over-fired at the end) that, when handled and examined, disintegrated into small bits of metal and dust (i.e., under-fired at first). The firing finished late at night and I was tired and a bit frustrated: I tossed them before thinking to try to take a photograph.

What to try next: Even though this material can be fired in just one round, the conditions still have to be right for both (1) debindering and (2) sintering to happen as desired during the (1) ramp and (2) hold phases, respectively. Clearly, this kiln-program was not the right one on either count. I’d have to adjust it in several ways.

Trial #2: Early May in Brick Kiln

Hadar (still, back then, though later revised) said: Ramp at 1400 to 1440 and hold for 2 hours.
I entered: Ramp at 1375 to 1410 and hold for 2 hours.
This should have taken over 3 hours; the program completed in 2:45.

Rationale for my new program: (1) I was hoping the slower ramp would allow for better binder burnoff. (2) Since Hadar’s other clays all worked great for me at 20° less than her posted temperature, I wasn’t yet ready to go plunging further than 30° below her number.

Test pieces: two more “golden threads” loops that I’d made along with the first-trial one. (Thinking I’d done with testing after one try, I’d added small ball embellishments to these.)

Results (shown): Both test pieces seemed, at first, to be a bit better debindered and sintered than the previous trial. They did show some signs of melting, but nothing like the last time. Still, they broke under very light pressure while holding them to photograph them. It was hard to see the inside of the small ends. They might have been somewhat sintered, but certainly not fully so. Still, this felt like some (if small) progress from the first mess.

At that point, I took some time off from this testing, and will pause my report here. Before I close this post, however, I’ll add one other thought.

A Comment on the Name: Smart Bronze.

As a customer, who is buying this product to use myself, the name almost makes some sense. First of all, unlike many other base-metal clay products (from Hadar and others), it should be possible to process this one in a single (reduced oxygen) firing. Many of the others require two firings of one sort or another, but this product was developed to be “smart” enough to both debinder and sinter all in one go. Which is very convenient! Also, it does polish up to a lovely color, a color that one might call “very smart”…. (And, for anyone familiar with Hadar’s Clays, a curious pun in comparison to her Brilliant Bronze.) But, as a maker, I do find it an awkward name. It’s not one I would want to use on the label of a piece I made using it. More on this in a later post (most likely after I’ve finished this whole series on testing).

Because that’s it for right now. But I’ll be back as soon as I can with more info.

Posted in Learning Metal Clay, Technical Details | Tagged: , , , | Leave a Comment »

Smart Bronze: By Jove, I Think I’ve Got It! (Post 1 of 6)

Posted by C Scheftic on 2013/06/28

The newest Hadar’s Metal Clay Powder product is called Smart Bronze. I spent over a month playing around with it, and I think I finally figured out some things about it. (Not everything, mind you, but at last I feel well on my way!) After then spending a few weeks catching up on a several other urgent tasks, I’m hoping I can finally find time to post here a collection of thoughts and experiences.

A Bit of Context.

OK, it’s not like a spent a solid month and more figuring this out. The time I spent did cover most of May, slipping into early June, but it was in dribs and drabs. To begin with, I am not a full-time jewelry artist! I do learn, explore, make, sell, write, and teach about it. Some weeks, it does end up being just about all I do. But there are other stretches when I don’t touch the stuff at all. Most of the time it’s somewhere in between those extremes. Averaging out over a whole year, I figure that I do this about quarter-time, or maybe a third (depending on how you count both “this” stuff and “full” time…), but only that. Whatever the actual proportion, it’s a delightful fraction, I must say! But more than that would feel like work and, though I am trying to treat it all in a very professional way, I also really want to keep this for fun. My point is that the fun I had figuring out Smart Bronze was a very part-time part of that part-time activity: though I’ll drag the description out for several posts, in reality it all went rather quickly.

Also, I have two kilns, in two different styles: one firebrick, and one ceramic muffle. So far, I’ve done all my Smart Bronze testing in the firebrick kiln. When I find some more drib-drab time, I’ll try it out in the muffle kiln too. But if you are reading this in the hope of learning from my experience before firing the stuff yourself, it may help you to know that both my kilns have inside dimensions of about 8 by 8 by 6 inches. The firebrick one can reach 2350°F; the muffle, 2000°F. Smart Bronze fires well below both those limits.

To fire base metal powder clay in my firebrick kiln, I most often use a box I’ve folded myself out of stainless steel tool wrap (e.g., the No Flake Foil sold by CoolTools), and the carbon that Hadar Jacobson recommends in her Instruction Manual (coconut shell-based, acid-washed, size 12×40). With that particular combination of kiln + box + carbon, for the majority of Hadar’s clays, through testing I have found that the ramp-speed she suggests works fine, but I should lower the goal-temperature by about 20°F from what she recommends to get full sintering without blistering or other signs of over-firing. (It could just be a difference in our kilns, but another factor could be that my lightweight foil boxes transmit the heat a little better than the heavier stainless steel bowls I think she uses?) I might do a little more adjusting for smaller containers or much fuller loads, but for what I was firing in these trials, I started out thinking that a drop of 20° should be the only adjustment I’d need.

Finally, whenever I first try any new clay, I always do at least one “test” firing first. I know that some artists plunge right in to make a new masterpiece and just fire it, but I can’t bring myself to risk something like that until I feel really certain I’ve mastered enough of the relevant firing details. At the other extreme, some people will just roll out a plain slab of clay about the same size and thickness as their intended masterpiece, and test-fire that. While much safer, I can’t quite bring myself to simply “waste” a good chunk of metal (even if it’s not a precious metal) that way, not to mention the firing -time and –energy. I have found, instead, a middle ground that works for me: I make several very simple pieces. If they fail, I’ve lost a few more minutes of my time than I would have if I’d just fired a plain slab. But I want to believe that the firing will work and, when it does, then I will have a simple little piece that I can sell inexpensively or give as a small token-style gift (instead of just a piece of “waste” material).

Working with Smart Bronze.

I found the working properties of this product to be comparable to other Hadar’s Metal Clay powders. That is, it is easy to mix into a clay form. It’s easy to work with. It has a very nice feel to it. None of Hadar’s clays are sticky, like some metal clays tend to be. (Yes, you do want to use a bit of olive oil between them and any textures, stamps or cutters you press into moist clay, but it’s not like you have to work in a complete cloud of release agents to keep it from sticking to everything!) Smart Bronze has a very good working time, and it’s easy to rehydrate if you work more slowly. It dries to a very hard state, which makes it easy to clean up and polish pre-fire (which is a feature I really appreciate).

Firing Smart Bronze.

Ah, but now, this is where the real testing comes in.

The latest version of Hadar’s Instruction Manual is always available as a .pdf file for free download from her blog. (It’s available from some other sites too, but Hadar’s blog reliably has the most up-to-date edition.) I first tried firing Smart Bronze when the then-latest version of the manual was from April 30, 2013, and it gave this information for firing that new “Smart Bronze” alloy:

Brick kiln: Ramp at 1400°F/778°C per hour to 1440°F/782°C. Hold 2 hours.
Muffle kiln: Ramp at 1400°/778°C per hour to 1495°F/810°C. Hold 2 hours.

By the time I’d completed my first few test loads, there was a newer version, dated May 15, 2013, and it had been updated to read:

Brick kiln: Ramp at 1400°F/778°C per hour to 1430°F/776°C. Hold 2 hours.
Muffle kiln: Ramp at 1400°F/778°C per hour to 1470°F/799°C. Hold 2 hours.
Pieces thicker then 10 cards or mixed with other metals should be pre-fired.

Notice that, while the ramp (speed) remains the same, there are some significant differences in the goal-temperature from one to the next: a ten-degree drop for brick kilns, and a whole twenty-five degree drop for muffle kilns! So the tests I am about to describe involve changes in temperature that are due to both new temperatures recommendations from Hadar and observation of my own results. (And readers of this blog should be able to skip the first few “issues” I encountered by just checking for the very latest version of the Instruction Manual at Hadar’s website! It’s possible there will be yet more modifications as Hadar travels and gets to see for herself how this product works in many other kilns.)

But this post seems long enough for now. I’ll be back soon with what I found out once I really got going! (Yes, in addition to my earlier comments that my testing spanned more than a month, that’s another really big hint that it took me “several” test firings to work this out!)

Posted in Learning Metal Clay, Technical Details | Tagged: , , , | Leave a Comment »

How long did it take you to learn how to do this?

Posted by C Scheftic on 2013/05/30

So far, I have not made many pieces out of steel. I have used bit of steel as small accents, but only a few times as the main element in my work.

But, over the last few weeks, a number of us who work with and teach about Hadar’s Clays have been doing some explorations with the “Low Shrinkage Steel XT” product. Shown is a photo of a dozen pieces, which are about half of the ones I made during this exercise. While most of them turned out pretty much as I would have expected, there were a few surprises that I’m still trying to understand. I will likely have to make a few more pieces like the surprise-ones (when I find some more time to just explore), to see if the pattern repeats or if the surprises were nothing more than the occasional surprise.

Specifically, we’ve been looking at shrinkage. All metal clays shrink from when you first shape a piece in that medium to when it ends up as fully-sintered metal. Different products shrink different amounts. Some shrink more as they dry (go from wet clay to what we call greenware); others shrink more as they are fired (as the binder burns out and the atoms sinter (arrange themselves into a regular metal structure)).

Even working with just one product, different pieces will shrink different amounts in different directions. This leads to some interesting results, such as the fact that rings (usually) shrink smaller (though how much depends on the size and shape of the ring), the clay around cracks (usually) shrinks away from the opening (thus making it look larger after it’s been fired), and holes (usually) remain about the same size (depending on how big and what shape they are in relation to the clay around them).

With my background in mathematics and statistics, I tend to think of shrinkage as a “degrees of freedom” issue: if a clay wants to shrink a certain percentage and, for some reason, it can’t shrink that much in one direction, it compensates by shrinking more in the direction where it has more freedom to shrink. Except, it’s nowhere near as exact as that might make it sound…. It may vary from one time to the next. It may also vary from one artist to the next.

Why? Is it the amount of water in the clay? The humidity in the air? The altitude at which you work? The attitude with which you work? Phase of the moon? I could go on, but I think you get the idea: some variations are fairly clear while, for others, your guess is as good as mine! (Feel free to suggest additional ideas in the comments: I could use both solid suggestions and a few good laughs!)

But I write all this simply because I wanted to take a moment to say how much I enjoy exploring this entire “powder metallurgy” process: trying slight variations that go increasingly farther away from an original starting point just to see what happens. That is, in relation to the question in the title of this post (which I’ve been asked more times than I care to count) my answer is this: I hope to continue to learn as long as possible. I want to keep adding more information to my store of knowledge but, at the same time, I hope I’m never done learning!

Posted in General Techniques, Learning Metal Clay | Tagged: , , , , , | Leave a Comment »

Pre-firing Hadar’s Clays

Posted by C Scheftic on 2013/04/14

A Bit of Background (skip to next section if you already know the science behind metal clay firing):

Stainless Steel Bowl with
base metal greenware
(yellow bronze and
burnished brilliant bronze).

The firing of fine silver metal clays is easy! Design, construction, and finishing are each more complex than the firing itself. Yes, firing does involve some details but, once you’ve sorted out placement, position, temperature, and time, you may just turn on the kiln and go do something else while the binder burns out, the metal particles sinter, and the load finishes.

Metal clay artists working with other metals, however, know that the firing process for those is much more complex. The difference is that precious metals don’t react with oxygen when they’re heated, but non-precious metals do react. This may cause undesirable color changes (such as firescale from the copper in sterling silver). Even worse, though, these reactions can change and damage the actual structure of the solid metal even if you’re working it at temperatures lower than where they’d melt. (This is not specific to metal clay: you can destroy other metal forms the same way.) Could you just restrict the amount of oxygen during the sintering process? Not exactly! Because the “clay” in metal clay involves binders, you first have to burn off all the binder before the metal particles can sinter. And, to burn off the binder, you need oxygen. In short: at first, you do need oxygen and then, later on, you don’t want to have it.

So each “base metal” clay product provides its own instructions for firing. These offer their approach for how to (a) allow enough oxygen to burn off the binder, while (b) still allowing the metal to sinter successfully. If you understand that as the goal, and like to play around, you can try various ways to make it happen regardless of what any particular manufacturer recommends.

(A couple of years ago I wrote a series of ten posts about my experiences firing Art Clay Copper according to their instructions. In the end, I decided that I was going to abandon Art Clay’s all-open-air approach, and stick to one of the strategies that restrict oxygen during sintering even for that product.)

Now, to the Point of this Post:

For many years, in the instruction manual provided on her blog, Hadar Jacobson recommended a two-phase firing schedule for her clays (which also required a cooling phase in between). It took a long time to complete a full firing cycle (basically an entire work day), but it worked. The length of the firing process did somewhat limit the number of production runs a metal clay artist could complete, depending on how many kilns you had available, but it was even more limiting in relation to most class and workshop settings.

At some point in the last year or so, Hadar started talking about a different approach. This one used something she called pre-firing (a relatively short (half-hour-ish) firing on top of carbon to burn off the binder) followed by one full-scale firing (where you then cover the pieces with carbon and fire for a couple hours to sinter the metal). Best of all, there was no need to wait between the two! Once pre-firing was done, you could proceed straight to the final firing. That pretty much cuts in half the time required to fire a complete load.

Hadar offered two suggestions for doing this pre-firing. In each, you place the pieces on top of a layer of carbon inside an appropriate firing vessel. Then you burn off their binder either:

  • on the top of a gas stove burner, or
  • inside a kiln.
No Flake Foil Box with
six pieces of
base metal greenware &
one repair to re-fire.

Regardless of which device you chose to use, you would then cover the pieces with carbon and follow up with a firing that was pretty much the same as her old phase-2 process.

I tried it both ways and, suddenly, I began having all sorts of problems. Yes, they were ones I had seen before, but then only rarely, and they had provided enough clues for me to quickly diagnose any problems and fix them. Now, however, I was not finding ways to fix things. And, hey, the old method might have been long, but it worked for me. So I kept on using it.

But with the latest version of her Instruction Manual, Hadar has stopped even mentioning the old way. And pretty much everyone in the group of teachers going for accreditation in her program seemed to have shifted over. So, sigh, I’ve spent the last few weeks simply trying to figure out open-air pre-firing for myself.

I have not yet mastered the in-kiln method, but it seems I’m not the only one having some trouble with that one. The problem there is that, sometimes, part of the binder on the “down” side of pieces does not burn out, so the metal then cannot sinter. This may stem from the fact that, with no heat coming up from the bottom, the carbon is insulating that area too well. Heat will reach that side of each piece, eventually, once the carbon itself gets hot enough, but that may risk leaving top-sides exposed to oxygen for too long. Another approach, trying to solve that by turning the pieces over during the pre-firing, means handling very hot pieces in their most fragile state, de-bindered but un-sintered. No, thank you! Some people seem satisfied to solve this dilemma by simply firing their pieces twice, once with each side up; but if it takes that much to get them to sinter I figure I might as well just stick with the older method.

Stainless Steel Bowl with
de-bindered base metals.
(Re-fired piece is the one not black.)

But I think I am finally getting the hang of the stove-top method!!! The problems I’d been having were that my pieces were curling and/or cracking, which I knew meant they were getting too hot too fast. Hadar kept talking about turning the heat down if you saw the pieces on fire, but I never saw any flames. She talked about turning the heat down once you saw binder-smoke starting to appear, and I was taking a lot of care to do that immediately. She and the other instructors talked about how long their pre-firings took, and mine were well within those limits. After multiple attempts, I finally figured out that I really did have to heat the pieces on a very, very low flame. Maybe it’s just my stove, but I’m down to a mere fraction of the flame I’d use simply to boil water. Curiously, doing it this way does not seem to take much longer over-all than what I’d been doing before: it takes a bit longer before I see any binder burning off, but the pieces blacken completely rather quickly.

Another problem I’d had was that sometimes one or even a few pieces would not seem to burn off their binder. But I’m getting better at moving the container around over the flame, when that does happens, which seems to solve that.

I am still having the occasional failure (i.e., a bit more often than the old way), but I’m clearly making progress here. All seven butterflies in my last mid-fire load, for example, turned out fine.

Seven Butterflies
with two polished
to confirm sintering.

But, there’s something else to consider. In addition to the time that is “lost” to the occasional failure, one also has to actively watch the entire pre-firing process. You can’t do anything else useful. Well, maybe you can; but I sure can’t. It happens too quickly to catch a brief nap (yeah, I’ve been known on occasion to sleep through an entire silver-load); and it takes too much attention to spend time doing fine-finishing on pieces from the last load (which is what I usually try to do during firings). With silver pieces, I never really counted any “firing” time into their cost because I could accomplish other things while that was happening; with these pieces, however, now I do have to factor that into the price I charge for them. (I’d have that same dilemma with the in-kiln pre-fire method.) So I’m still trying to figure out how I feel about all this, but at least I have that feeling of accomplishment over approaching mastery of what currently seems to be the most popular method for pre-firing Hadar’s clays.

Seven Butterflies with
preliminary polishing complete.

By the way, even though I really am kind of swamped with to-dos, I finally figured out a way to add captions to photos that would work with this blog! It was easy, once I spent a bit of time on the task. I mention it, however, because there are some other metal clay hints buried in those notes; I’m really hoping to find time to write more about other aspects of firing in the coming weeks….

Oh, and all the pollinator-pieces used as illustrations here will be available at the Western PA Garden Marketplace on April 20. It’s not an art-event: the emphasis is on gardens and landscaping. My being there is just a little “bonus” treat, on top of all the plants and garden supplies. But if you’re reading this from the western PA area, it’d be great if you were to stop by and say “Hello!” on Saturday.

Posted in General Techniques, Learning Metal Clay, Technical Details | Tagged: , , , , , , | 6 Comments »

A Tale of Two Lentils

Posted by C Scheftic on 2013/03/23

One of the early assignments in the accreditation program for Hadar’s Clay teachers involved having to make a sealed, hollow bead, and to fire it. (There’s more than that, but this post is only about that part.)

Of course, who can make just one? I did restrain myself: I made only two. Both are “lentil” beads. One was made from Quick Fire Bronze (which I’ve happily used for ages now), and one using Brilliant Bronze (which is newer to me, and not always successful but one I’ve been determined to master). I made all four “pieces” (both sides, both beads) the same size (diameter and thickness). I did drape the Quick-Fire one over a “steeper” curve than I used for the Brilliant Bronze. After completing the rest of the construction process, I fired them (along with several other pieces I was making for the Western PA Garden Marketplace on April 20). Shown, above, are the results.

The Quick Fire one is shown to the left. It sintered and looks great. It held its curvier-shape well, the seams held, and the kiln gave lovely colors (that, for this exercise, will eventually disappear…).

The Brilliant Bronze one is shown to the right. All the seams held together, no cracks appeared, and it appears to have sintered. Well, to be honest, it appears to be over-fired! It has a rough, sort of pitted, almost bubbled surface. Its edges shrank an extra amount, resulting in a sort of “rim” the whole way around it. Worst of all, perhaps, it slumped a bit: its shape no longer has a nice, even, slight curve to it. Instead, it sort of bulges off to one side (which is hard to see in the photo here).

How did this happen? Well, I knew that Brilliant Bronze should be fired about ten degrees lower than the “other” bronze. But there are several “other” bronzes! And I had a copy of Hadar’s shrinkage-rate chart that led me to believe that it could be fired at either the mid- or high-fire range — and there is a “bronze” that fits the bill for “other” at each of those!

So, here’s the secret: If you EVER have ANY sort of problem using one of Hadar’s clays, first be sure you have the latest information! Always go and check her blog (look at the list on the right side of the screen there). Apparently I had missed that there’d been a typo in an early version of the shrinkage chart, so I had not gone to grab the update. The chart that’s out there now makes it clear that Brilliant Bronze is a mid-fire formula only. Meaning I have to fire it a bit lower than the Quick Fire Bronze.

So the next time I fire Brilliant Bronze, I’ll just lower the firing temperature a few degrees more, and look forward to an even more successful outcome.

In the meantime, though, I have a collection of pieces with butterflies, with roses, and with hibiscus flowers that I made out of Quick-Fire Bronze XT (the high-fire bronze formula) that are calling out to be fired next. Here’s hoping!

Posted in Hadar's Teachers | Tagged: , , | 2 Comments »

Yep, I’m still a bit baffled….

Posted by C Scheftic on 2012/09/10

This will just be a relatively quick little follow up on my recent load of “crispy” bronze and copper pieces.

The two draped pieces actually polished up nicely. Somehow that even helped with the clunky sound they were making, that had made me even more dubious about their quality. The more-irregular one, of course, is still riddled with cracks and tiny holes: it will just look prettier in my “do as I say, not as I do” box of “teaching moments.” But none of the polishing added to the disintegration of that piece, nor did it reveal any holes in the rounder one. OK, so far.

I have not yet tried to polish the tulip with a copper flower on a bronze background because I know that one will take a good bit of work. The other two tulips turned out OK, but not as nice as I’d’ve liked. The bronze (flower) on the one to the left had actually bubbled a tiny bit and, although that did look OK after some grinding, sanding, and polishing, once I exposed it to the patina solution, small spots appeared where the edge of the blisters had been. I’m thinking that the tin in the bronze must have somehow “disappeared” at those points, leaving more copper to react with the patina chemicals. And, despite a lot of grinding on the other one, I did not seem to have eliminated all signs of the earlier cracking.

I have enough else to do right now anyway, I may just put those into the “seconds” bin that’s always seemed popular among my teenage visitors. Less than ideal, but perhaps not a total loss.

Posted in General Techniques, Technical Details | Tagged: , , , , , , , , , | Leave a Comment »

Well, gosh, was that ever exciting…!

Posted by C Scheftic on 2012/09/09

For a number of reasons not worth going into here, I’ve been a bit distracted lately. No crises, just too many things that need my attention all at once. (Yes, like most 21st Century American women, there are always a lot of demands on my time. But sometimes the number just sneaks up over the top of what is manageable.) And then, there are the days when you think you really are accomplishing something, at last, only to find out that was not the case. This post is a tale of both of those at once.

But, since this is a metal clay blog, let me begin by reviewing the process for firing items made from Hadar’s clay powders. The first photo with this post shows three pieces that had been fired earlier, had cracked a bit in that process, were then patched, and had just been refired in the session to be discussed here. That kind of cracking happens sometimes when mixing copper and bronze, as in these pieces, and the patching and refiring—often multiple times—is just part of the game if you want those mixed-metal (sometimes referred to as “married metal”) looks. (I’ll talk more about that more some other time….)

For full details on the firing process, of course, you should always check Hadar’s blog itself. But, in general, there’s a multi part process:

0. You mix the clay, form the piece, let it dry, and then…
1. You burn off the binder, taking as long as you need according to the size of the piece(s) as well as the method you are using (for jewelry-size pieces, this can often range from a quick 1/4 hour to 2 full hours; larger pieces can take even longer) and, finally
2. You “sinter” the remaining powdered metal into a more solid form during a two-hour firing process.

This discussion addresses only steps 1 and 2. (I started counting at 0 because the final two steps are often referred to as Phase 1 and Phase 2 firings.)

When Hadar first introduced her clays, the basic process went like this:

A1. Fire the pieces buried in carbon, uncovered, in the kiln. Let everything cool back to room temperature.
A2. Top up the carbon, if needed, and refire the still-buried pieces, uncovered, in the kiln.

Later, although she says that the above process still works, Hadar introduced this alternative approach:

B1. Fire the pieces on top of a layer of carbon, covered, on a gas stove-top.
B2. Immediately and carefully cover the pieces with carbon, then fire them (cooled or not, either way is OK), uncovered, in the kiln.

(There is more to all of it, but we can ignore that for now….) In each case, between step 1 and 2, the pieces are fragile: you have the formed-shape, but it’s then composed entirely of metal powder with no binder holding it together any more. It’s very fragile. I have been under the impression that a few of the main differences between the A and B approaches where that:

– The full B-process takes much less time and consumes less energy than A, but…
– Pieces in the B-method are at a very slightly higher risk of being cracked as you move and bury them.

I’ve been using both, off and on / back and forth, depending on whether I had time to actually watch Phase 1 (B) or didn’t want to watch but could wait longer (A). All the pieces photographed for this post were fired, in a single batch, using the B-process. Two of the three oval pieces (above) were polished up a bit after being fired in the same batch; the third one (left-most) and both of the two round pendants are shown just as they came from the kiln. The thing you can’t really tell from a photo of the two “draped” ones is that they feel, oh how to say this, sort of “crisp”!?

Yes, and the point of this whole post is to admit that I’m the one who crisped them up!

As I said at the start, I had a lot of things on my mind as well as a few people doing things in my studio as I began firing these. I was carefully watching the Phase 1 firing on top of a propane camp-stove on a rolling cart. Some unexpected visitors arrived, adding to the activity in the room. While enjoying the company, all I really wanted was to finish this firing, finish answering questions, go home, and have a nice dinner. I was trying to keep everyone moving along, introducing and talking and answering questions and what-not. When Phase 1 finished, I had to figure out where to put the hot lid safely out of range of the curious visitors, as I rolled carts around and proceeded to the two-hour Phase 2 in a kiln. I got everything situated, got the kiln going, spent the next hour getting questions answered and projects finished, got everyone out of the room, and was walking back to my little “office” area to finish up some paperwork when I looked at the table next to the kiln and thought, “Why is that cup-full of carbon just sitting there?”

OH, NO! I had forgotten to pour it over the pieces after Phase 1. They were in the kiln un-buried in carbon! The whole thing with these clays is they need to be fired in a “reduction atmosphere,” that is, with the carbon reacting with the oxygen in the air inside the firing chamber and thus reducing how much of that oxygen is available to react with the copper at kiln-temperatures. How much? Well, that’s not as clear. But that’s the basic principle, the way to avoid damaging the structure of the metal….

No, NO, NOOOO! If it had just been a few minutes, well, maybe. But we were an hour into a two-hour firing. Were they all ruined? Was there anything I could do?!!

I quickly increased the amount of heat-resistant material I had in front of the kiln, put on my high-heat gloves and IR-safety glasses, grabbed a few tools, took a deep breath, and opened the kiln. One obvious concern: what might the “thermal shock” do to the pieces or even to the kiln itself?!! I whipped the bowl out, set it down, closed the door as quickly as I could. Everything was glowing! In another context, it might have been considered a lovely color, but not here. I gently poured the cup of carbon over the pieces, took another deep breath, re-opened the kiln, replaced the bowl, closed it all back up, took off the safely gear, sat down, and started shaking. What had I just done? Would it work? Should I have just given up on that load? What about the kiln?

And the phone rang. I answered it. A long-time friend, someone I talk with only occasionally, was on the line (er, with cell phone, perhaps I should say in the air?). It had been no more than a minute since I’d closed the kiln back up. (As I reached over to answer the call I was, in fact, thinking how glad I was that the phone had not rung while I was in the midst of that attempted “recovery” process! Even if I had not stopped to answer it, that would have been another distraction at a crucial moment: whew!) My caller asked how I was. I was still shaking a bit, and surprised by the call. I said, “I don’t know. I may or may not have just ruined a whole bowl-full of jewelry pieces.” He’s a sweetheart, someone who has been all “You go, girl!” about my journey down this jewelry-making path, and he launched right into some nice little comments about how “things” sometimes happen and I shouldn’t beat myself up or question my abilities, I was good at this and he knew I knew it, …. When he finally paused for a moment I said, “Thanks. I love your support here. But what really has me worried is that, between the time I spent making pieces, firing some of them once, patching them, making a few new ones, firing those …. if I’ve lost them all, then I may just have lost hours that I simply do not have to spare right now. And it’ll be almost an hour before I know how much time I have just wasted by letting myself be distracted.” Luckily, there was nothing more in danger right at that moment, so we quickly moved on to chat about other things for a while. I didn’t get the paperwork done but doubt I could have concentrated on that anyway. I did get to catch up a bit with someone who’s known me since my teens, and we talked for longer than I’d’ve given myself if I’d still been focused on … paperwork.

So, what’s the outcome?

There was one small crack in the kiln-wall beforehand, and it’s now a bit bigger. Not a serious problem, I think, just one burst of extra-quick aging. I’ll simply continue to keep my eyes on that, and hope there’s nothing more.

The three mixed-metal tulip-ovals had been previously sintered (and were just in that load having some cracks patched) all look like they survived. The patches sank down too much, which may or may not have happened anyway. I can try to polish out the cracks, or else patch the patches and refire them. They don’t seem to exhibit much in the way of the various copper-oxides that we’re trying to avoid via the carbon firings. At this point, though they may not end up being quite as strong as I’d like, I still think they may be OK.

The other two all-bronze draped pendants, well, as I said, they are crisp. The slightly-bigger, slightly-more-irregular one is criss-crossed with cracks and holes. Yes, not just cracks (which I would not have expected from in this single-metal piece) but also little holes that you can actually see light through (which I’ve never seen before, and which are too small to really see in the photo, even if you click to see a larger version). I figure that piece can go into one of my “teaching moment” displays. The other one, well, it doesn’t have all the same cracks and holes, but there’s something odd about it. Maybe it’s just the way the edges curled up, and I’ll get used to it over time, but it sounds a bit crisp too. I may hold onto it, but it’s not one I’d wear because I don’t want to “advertise” a piece I’m unsure about. I may give it to one good friend who I’m pretty sure will be OK with my saying, “I can’t sell this because I’m not sure it will hold up. But if you want it, you can have it on one condition: if/when it breaks or does something odd, give it back to me so I can what happened. I’ll replace it with something else.”

And, finally, there’s that thing about time, and being overloaded just now: which clearly means it’s time to end this post, get some other things done and write about those later on, once I’ve managed to catch my breath again. Oh, and I’m sorry this is so long. It takes me longer to write shorter pieces—to do the editing needed to end up with a shorter piece—and I’m still feeling waaaay behind. So I hope you’re OK with this rambling version of the tale….

Posted in General Techniques, Technical Details | Tagged: , , , , , , , | 2 Comments »

Maybe I should try a white lab coat?

Posted by C Scheftic on 2012/07/01

I was just wondering if being dressed in white might help me in my ongoing struggle to get decent photos of small shiny objects without unwanted colored reflections in them….

In person, I think it’s somewhat more obvious that the design on this intentionally-simple ring involves a butterfly on some flowers, with ferns around the ring-band. The LOS patina came out nicely, with a sort of blue-tint to the butterfly and a sort of rosy-color deep into the roses. I know that the butterfly would stand out more from the flowers if I’d used textures with more contrast, but I’m happy with subtle difference–the camouflage–that I achieved this way. Yet at some point I just stopped counting the number of shots I have taken trying to get one that looks even remotely like what I see. (O the joys of digital cameras with their instantaneous results!) I hope you can see my intended design because mostly what I see here are various reflections on the silver….

Oh well, the important thing is that students in my next ring class, who will be there in person (at Zelda’s Bead Kit Company later this month), can see the points I’ll be making with this and the other dozen-ish rings I’ll be taking to illustrate various aspects of ring-making.

I’ll have two rings (this and one other) that I’ll use specifically to illustrate post-fire sizing. I don’t use the “ring pellets” that seem popular among many metal clay artisans. I understand what they do, but I cannot fathom why they seem so popular. I’m happy to have a ring come out a tiny bit small–in fact, I construct mine so that they come out of the kiln a very controlled amount too small! And I don’t care at all if they do not emerge from the kiln in a perfectly round shape–though mine rarely change shape during firing. Even if I wanted a ring to end up round and it came out of the kiln a slightly different shape, it’s easy enough to get a properly fired-to-metal ring into round, and to strengthen it in the process of getting it to the desired shape.

Once my ring has been fully-fired and, unlike the one shown here, usually before I apply any patina (but my snapshots of the other new, and as-yet-untreated ring, have even more distracting reflections), that’s when I do all the sizing, shaping, and work-hardening of the finished metal to achieve just the fit I want and to give my creation as much strength as possible. In most cases, my ring will end up a bit bigger than it started (meaning it will then fit just right) and a bit oblong or oval (so it will stay put when worn, much better than a round one does), both of which are results that I want. Even if I were to use the pellets, I’d still do all that … so I just don’t bother with them.

Yes, it did take me a slight leap of faith, back in the beginning, to believe that metal clay really turned into a true metal that you could metal-smith. And, yes, I’ve seen people with under-fired pieces that were still too brittle to treat that way. But a pellet isn’t going to solve any of that…. If you’re making rings, especially silver ones, I encourage you to make one a few sizes too small, and fire it for a full two hours, so you can try some gentle yet firm hammering on the edges of the band and around the band itself to see what happens in terms of both size and strength. Bypass rings, in fact, are particularly good for this exploration (better than ones like the construction shown here) because the bypass rings really let you feel how much stiffer / stronger they get as you work them. They are also a bit more forgiving as you aim for a certain size!

If you try this, please do let me know what you find, knowing that another reason I was thinking about the white lab coat is because I look at learning about the metal clay process, and the best ways to work with both the clay products and the final all-metal results, as a series of ongoing experiments.

Posted in Photographing Jewelry, Teaching Metal Clay | Tagged: , , | Leave a Comment »

The lifespan of a no-flake-foil firing box….

Posted by C Scheftic on 2012/01/30

I folded this little firing box out of No-Flake Foil (from Cool Tools) some time last April, although I didn’t record the exact date because, at the time, I had no clue it was ever going to be worth noting.

I first wrote about this particular box in a post last July, after I’d noticed a little flurry of discussion about what people used to fire the copper, bronze, steel, or other metal clays that needed to be buried in carbon. At that time, I said it had held up just fine through several dozen firings.

I do tend to fire pieces in spurts (some weeks, nothing; other weeks, multiple loads) but, since then (especially, prior to the last “Holiday Season”!), it has survived dozens more.

The last time I emptied it out, however, during this past weekend and after it had provided almost ten months of regular service, I was sad to note that it has begun to sprout a few little holes. They are tiny and not easy to see (so of course I highlighted them with big red arrows for you in the photo!). But I know they signal the beginning of the end for this particular box.

So I thought I should note the date that it has been retired from duty as my primary firing box. My number-two box will step into that role. The experimenter in me isn’t quite ready to part with number-one yet, of course, so I’ve got it stashed away at the moment. I may try using it again a few more times, just so I can document its demise for my own information.

But, really, it’s just foil. There may be nothing more worth noting about it, except that I am amazed, and delighted, that it has already done so well for this long.

Posted in General Techniques, Technical Details | Tagged: , , , , , | Leave a Comment »

Snowy White versus Shiny Silver

Posted by C Scheftic on 2011/11/28

As I was polishing up a few pieces recently, I decided to take a “comparative” photograph that I could save and use when discussing a certain point in some of my workshops. (In my studio, I often have a few examples available, but sometimes I don’t think to pack them up when I teach at other sites…) And, while I was at it, post about it here too, for anyone curious about the topic.

Q: What topic? A: When you work with fine silver metal clay, and fire it (either with a torch or in a kiln), what’s the “white stuff” (or, sometimes even, “glittery white stuff”) you see on the piece?

The answer to that question is: it’s the silver! When the clay is fired, and the binder burns away, and the silver atoms move in closer and re-organize themselves, then they tend to form a crystal structure such that they are all lined up and the light reflects off them in all directions, giving a white appearance. Depending on exactly how they line up as they cool, it may be more of a white-white or a glittery-white, but it’s still white. (I’ve no idea if this is technically accurate but, in the mental model I have of this, I think of it as comparable to how snowflakes form. As in how, under different circumstances, it will end up heavy or fluffy, etc.) Metal artists then use one or more of a range of techniques for burnishing the silver, polishing it, forcing the crystal bits to lie down all in the same direction so the light reflecting off them has that normal, shiny, metallic color. (Other metal clays will produce a similar effect in their all-metal end-product. On a number of occasions already, I’ve posted about the range of colors one sometimes gets when firing copper and, especially, various bronzes. It also happens with gold and steel, though I don’t recall ever stopping to capture that in a photo … yet.)

In the shot near the top of this post, the bottom two pieces remain in that “kiln-white” color, while the top two have been polished to more of a silvery-metallic look. More polishing could get them even shinier, but I thought that was enough for those pieces, at least for the time being.

As for the snowy-white ones, they do have to be polished: That finish is not stable. Anything you do to it (from the lightest rubbing to bumping it and so on) will undo-that “white” look. It won’t necessarily make it all shiny, but it will turn that part so it’s more clearly a silver shade. So the safest thing is to just polish it from the start, to whatever extent seems most appropriate (to both your artistic vision and your technical skills; for example, one could polish the high points to a very shiny state, and leave the more-protected valleys with some of the white look).

I’ve just finished adding a patina to one of the polished pieces with some “liver of sulphur,” so I will close for now with a photo of that.

Posted in Teaching Metal Clay | Tagged: , , , , | Leave a Comment »

Foil-Firing Base-Metal Clays

Posted by C Scheftic on 2011/07/06

One question that seems to keep recurring (everywhere from individual conversations to the big, international Yahoo group on Metal Clay) involves what people use for firing their various copper, bronze, and / or steel clays, so I decided to write a bit about what I’ve been doing.

At first (~2008) I used the stainless steel “steam table” pans that were the original suggestion for this. The clays fired OK (i.e., the metals sintered), but the pans flake black crud. (I’ve seen hints that the technical term is that they “spall,” though I know that word with a slightly different connotation, so I’m not sure…) Anyway, it’s not a crisis, but cleaning it up is just one more little thing to tend to, and I’m seeking to simplify this process as much as possible.

Later on, a number of ideas for other, alternative firing vessels started to circulate. Some people fire in used metal cans (i.e., reusing the kind food comes in, which would mean having the inner plastic linings burn off as you fire them; and, while cheaper than the steam table pans, they still flake). Others suggested building vessels out of fiber blanket. Neither of those held much appeal for me: I never tried either one.

Last winter and spring, Hadar Jacobson blogged about several other options, such as building a frame out of kiln posts, drilling an opening into firebrick, and building a box from ceramic cloth and T-pins. I tried the first and third of those. The posts are easier to find, the cloth is easier to use, but neither quite fit my “simplify” goal. Hadar also talks about working with several options in the instruction manual she provides. (Aside: Her manual is useful even if you’re using other copper or bronze clays! You may have to adjust specifics of the firing schedules to fit other products, but Hadar does a great job of explaining in a simple way what’s going on, what you want to have happen, and what might be going wrong if you encounter problems.) In the past year, also, several manufacturers came out with a range of fiber or ceramic firing boxes, but at least the ones I investigated appeared somewhat high-priced to me. (Or, perhaps a better way to say it is that the ones I checked seemed high for my budget for this, so I just stopped hunting. If you have found any well-priced ones, do let me know!)

Right after Hadar was here late last winter (when I gained motivation to do more with these non-precious metal clays) I decided to try something Hadar had not discussed, and to invest in some No-Flake Firing Foil. (I got mine from CoolTools.) That’s what I’ve been using quite happily now for the last few months. It does take a little fiddling-with before the first time you use it–you do have to fold it into the box shape–and then you should fire some test pieces to verify the temperatures to use–which you should do with any new firing vessel you try (or new kiln, or new carbon, etc.). But after that, this kind of box is both very easy and much more affordable than most of the other options.

The first photo with this post shows a newly-contructed firing pan before its first use. The foil comes with instructions on how to fold this particular box, and there’s a video available on the product-page. From my (somewhat basic) knowledge of origami boxes, this does seem to be a pattern that yields a relatively large-volume basic box from a given amount of material, so I did not try to second-guess the instructions there. But I will note two things about the instructions….

(1) They provide finished dimensions for various sizes of foil one might start with, but there’s no reason to limit yourself to just those. Make a box of whatever size will fit the foil you have and the size of your kiln. (Be sure to leave room for air to circulate all around the box!) Try a few paper models first, if you don’t already have experience folding boxes, so you see how it works and get a sense for the size. But, here’s the trick: the instructions list only sizes for rectangular boxes because that’s what you want to build. Not a square!

Any rectangular box will have a sort of “flap” of material that gets folded over the short edges and part-way around the long ones. (You should be able to see it on the photos with this post.) A square one won’t have that flap. You want the flap for two reasons:

  • Those “flaps” seem to increase the stability of the box, and
  • You can fold up the corners of the flaps on one long side of the box to mark the “front”–something that’s useful when you’re putting a carbon-filled box into your kiln (and especially important with front-loaders, because you don’t want to position any pieces along the un(der)heated front edge).

(2) The instructions and video use the traditional origami trick of making two folds at the very start that you just open back up again. They simply mark the center of the sheet. If you can find and mark the center-lines yourself, you can start with that rather than those two folds. That’s why my “new” box (above) has black ink lines, rather than folds, down the center. Why does that matter?

Well, some people report that these boxes only hold up for a couple of firings. Mine have held up much longer. The one shown here has been through several dozen two-phase firings, has not been treated with any particular care, and seems to be holding up just fine.

When pressed for more information, those reporting early failures say that their boxes seem to fail along the folds. Not necessarily the center ones in particular, but along folds somewhere. Now my theory is that they are not failing after, say, two or three or four firings: I think they are beginning to fail with their very first use, but the problem only gets big enough to see after several more. If you put a hole in the foil while folding it, it will get bigger with each firing, through the heating (expansion) and cooling (contraction). So the trick is to not put holes in the foil to begin with!

Thus, I chose to not make those first two folds, which must then be reopened. You’ve got to mark the center line accurately or the box won’t come out with everything lined up right, and doing it via that fold is an easy way to mark it. So either be careful folding and unfolding those lines or, if you can find both centers another way, do that.

Then, proceed with the rest of the instructions. Crease smoothly, but not so harshly that you rip little holes in the edge. Unfold smoothly too, also with care.

And, then, enjoy the treasures that emerge after being fired in such a box…

Please leave a comment if you’ve found anything useful in this post! It’s great to hear from readers. (I can see from my “blog stats” that you are out there! But comments offer even more motivation to keep on writing these notes….)

UPDATE: This box lasted for seven more months of regular use! Since this topic keeps coming up, and I keep pointing folks to this post, I’ve decided to add a link to my follow-up post.

Posted in General Techniques, Technical Details | Tagged: , , , , , | 11 Comments »

Some more notes from Hadar’s workshop.

Posted by C Scheftic on 2011/04/10

I don’t want to go on forever about this, but I am using this blog to keep some notes for myself about our recent workshop with Hadar Jacobson, as well as to write some comments for others to read. So, if you’ll bear with me, this post will cover a number of “loose ends” from that, then I’ll probably add one final note, and then I’ll move on to posting about other things.

The photo at the left shows Hadar’s own design for “firing vessels” that are made using a piece of “ceramic cloth” formed into a bowl shape and held together with stainless steel T-pins. In this workshop, we started out having three kilns available to us, so here you see three vessels lined up with the results of a test-firing in each of those three kilns. Test-firing means to run some “test pieces” through the entire two-phase firing process each and every time you change any (one or more) of the variables: try a new kiln, use a different size or type of firing vessel, introduce a different carbon (type or supplier), make pieces out of a different metal or brand of clay, etc. In fact, we also tested and then used a fourth kiln later on and, at one point, tried a different material for firing vessel construction that required its own test as well. (I’ll try to remember to write a bit more about testing and test pieces eventually, whenever I get around to trying out in my own kiln some carbon from a new source.)

The vessel on the bottom in that photo (far left, if you faced the table straight on) shows a bit more ash than do the other two, but not enough to be of concern. Once the test pieces had been sifted out from the carbon, we examined each piece by looking at and feeling it. Since they all seemed ok, the next step was to begin to buff a “back” edge very lightly. (Of course, I hear that and think, “Wait! My reversible pieces don’t have a back!” There’s no problem, of course, if the piece has sintered. If it hasn’t, then I’ll just be stuck with doing any necessary patching on one of the two “front” sides of the piece but, hopefully, that will be a rare occurrence.) Once they pass that test, they can be sanded a bit more aggressively.

As I know well from previous experience, when Alice and I were experimenting with these clays on our own and together, an unsintered piece typically makes its condition known very quickly. Luckily, all of our test pieces seemed just fine. That meant we could proceed with both firing some of the pieces that had taken more work to construct and the lesson on all the steps for post-firing polishing.

I will mention that Hadar had brought an example of an unsintered piece so folks could see what one looked like. Because I’d wanted to ask her a few questions about “sintering issues,” I had also brought a couple problem-pieces. So we were both able to share our examples for everyone to learn from, in addition to having the successful pieces from our kiln-tests to use in the polishing demo.

Speaking of firing our actual artworks, to the right here is a photo of the first vessel loaded up and ready to go. Several things to note:

  • Each piece is at least half an inch from the edge of the vessel and from all of its neighbors.
  • Each piece is positioned horizontally. Some people write or teach about positioning them vertically. That does allow you to fit more pieces in at one time, but Hadar insists that there can be enough of a difference in the amount of heat reaching the top and the bottom of a piece that one end may sinter while the other does not. She says she has not found as much discrepancy edge-to-center as she has top-to-bottom, so this way produces more consistently successful results.
  • The pieces are positioned in a single layer. Once again, you can fit in more pieces if you use multiple layers, spaced at least a half inch apart, but Hadar reports more examples of unsintered pieces from that arrangement. Better to just do as many different firings as you need than to have to worry a lot more about sintering with every single piece.
  • The “front” of the vessel should be clearly indicated. Here, it is marked with a T-pin, though that doesn’t really show up in the photo. In top-loading firebrick kilns that have heating elements running around all four walls, this is not crucial. In front-loading muffle kilns, however, with elements on the back and sides but not on the door in front, this is necessary. Since we had a mix of the two types of kilns, better to be safe than sorry, and just mark all the vessels. (Remember: once the pieces are covered with carbon, you can no longer see what’s where! That’s why you mark the outside of the vessel itself. And you do it in a way that will survive the firing, in case you need to remove the vessel from the kiln between the two firing phases, especially because the pieces are extremely fragile at that point.)
  • In a front-loading kiln, in most cases, pieces should be placed around the back and sides of the vessel. Not in front, towards the door.
  • In either a front- or a top-loading kiln, in most cases, pieces should not be placed in the center of the vessel.
  • The one exception to the previous two rules is this: If you have one of the really round firing vessels, you may want to test whether pieces placed in the center, or near the front in a front-loader, will sinter. In some cases, this does seem to work…
  • It is best to fire together only pieces that are roughly similar in size. If you mix sizes, curiously, the ones most likely not to sinter are the smaller ones. (Yes, that;’s what Hadar said but it’s also something I have observed.) It seems almost like the big pieces somehow draw the sintering-heat away from the smaller ones… Experience has shown that, the more even the size of your pieces, the more even will be the sintering. (Here’s yet another situation where I wish I better understood the whole science of these processes!)
  • You can make a few exceptions to those rules, if you know what you’re doing, and take care in the process. In the load illustrated above, for example, Hadar placed pieces of similar size around three sides but, finding she had one small piece left, she put it on the fourth side with extra space around it and fired this in a top-loader.

The next photo on the left shows our first load going into a front-loading muffle kiln. Note that:

  • The vessel is raised up on kiln posts, so that air can circulate all around it.
  • There is no lid on the vessel.
  • The vent-hole plug has been removed.

The last photo, below, shows our second load as it began to fire in a top-loading firebrick kiln. While you can’t see inside this one, it also has the vessel raised to allow circulation, and it does not use a lid on the vessel here either. The purpose of this particular photo is to show that:

  • While there is no actual vent-hole on this kiln, an equivalent effect can be achieved simply by placing the lid slightly askew.

Whew! That covered a lot more than I was expecting when I started this post. What can I say: the workshop was just loaded with interesting and useful information!

Posted in Learning Metal Clay | Tagged: , , , | Leave a Comment »