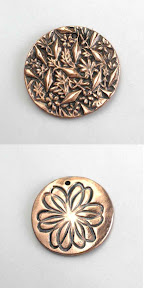
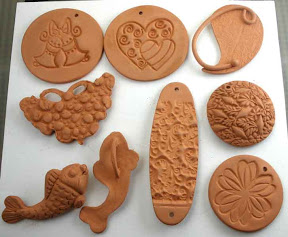
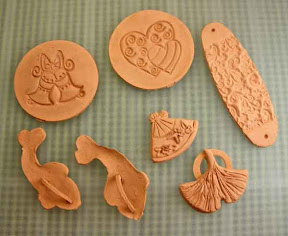
In this post, I’ll say a bit about firing Art Clay Copper. It’s a different process than any of the other metal clays.
With silver clays, you arrange your pieces on a shelf and put that into the kiln. Then you turn the kiln on and, if it has a digital controller, you program that to reach a certain temperature and hold that for a specific length of time. When it’s done, you wait for things to cool down a bit (easier on the kiln itself, and safer for you as the operator), and then remove your pieces. Folks often just set their kilns to fire over night, figuring they can wake up to pieces that have been fired and cooled. If you want to take them out hot, however, you can either quench them in a bowl of room-temperature water or just let them air-cool on the shelf for a while before you touch them. (Other factors may be involved, such as whether they include glass or stones, but that’s the general process.)
With other copper-based clays, you fill a firing vessel with a layer of activated carbon, arrange your pieces on that, cover them with more carbon, and then (depending on which product you are using) may or may not put a lid on the vessel. Then you put that into a cold kiln, and proceed as with silver. For some such clays, a two-stage firing process is used; there are other variations involving whether you let them cool in the kiln or use a slotted tool to scoop them out of the hot carbon.
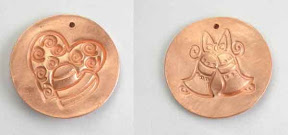
But the process for Art Clay Copper is different. Pieces made of this clay can be fired on an open shelf (just like silver and gold are). It is recommended that you put something on the shelf to help prevent the pieces from sticking to it: fiber paper or fiber blanket are two such possible aids to releasing the fired pieces. Once they’re all ready, you set them aside, and fire up the kiln. Your kiln should be empty, except for a few small posts that will, eventually, hold your shelf. You get it up to 1,778 degrees Fahrenheit first. Then you open the door (wearing appropriate safety gear), quickly insert the shelf with your pieces on it, and close the door again right away. You let it fire, like that, for 30 minutes.
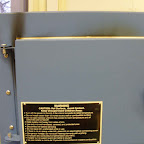 This photo shows my kiln after two such firings. The yellowish discoloration along the top of the door is the result of previous firings. The dark brown streak up the left (hinged) side is new, from these copper firings!
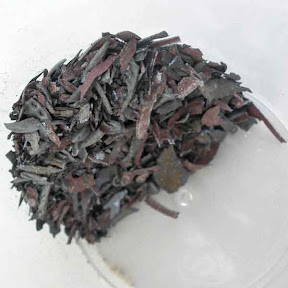
And after firing, however, Art Clay Copper requires several additional steps. Before the firing time is up, you must prepare a bucket or large bowl of water and place it as close as you reasonably can to your kiln. Then, as soon as the firing is done and with the kiln still up at full temperature, you open the door, reach in with an appropriate tool (I used tongs) and grab the shelf. Moving as quickly as possible, you dump the pieces into the water to quench them. (Once again, dealing with pieces that have inclusions such as glass or stones complicates the matter more than I will address right now.)
Realize that, when you open the kiln door, the interior is all aglow. You can see the kiln elements and your pieces all bright from the heat. (You should, at this point, be wearing safely glasses with filters that will protect your eyes from the infrared glow, as well as gloves and clothing that will resist the heat!) But as soon as air from the room starts to rush into the kiln, the hot copper starts to form firescale oxides. It takes just a fraction of a second. So you have to act quickly, to minimize the amount of firescale that appears. And dumping the pieces into the quench bowl causes a lot of that black crud to just pop off into the water.
If it doesn’t all pop off, the instructions say that you can place the pieces in what is known as pickle, which is a metalsmith’s term for a hot acid bath. That should remove the rest. The word “should” in that sentence should give you a clue that there’s more to this story. That will appear in my next post.
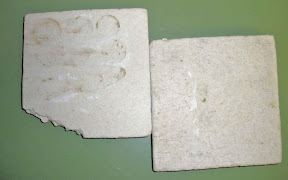 For now, however, I’ll end with a shot of the two kiln shelves I used, showing what they looked like after being uses for this purpose.
On the one with the broken corner (it arrived broken, so that’s not a result of this process), you can see the residue from where the pieces did stick a bit, despite my having used some release paper. On both it and the other one (which I used for the first firing, with pieces aligned just along its left side as it’s placed here), you can see some remnants of that paper too. I’d not read nor heard any comments about that from others, so while I knew it was a possibility, it’s not really something I was expecting. I won’t be using these, or at least these sides, for subsequently firing silver pieces….


") Artsmiths of Pittsburgh
Artsmiths of Pittsburgh") Hoyt Center for the Arts, New Castle, PA
Hoyt Center for the Arts, New Castle, PA") Portage Hill Gallery, Westfield, NY
Portage Hill Gallery, Westfield, NY") _Open Houses in my Studio
_Open Houses in my Studio _Or…contact me about hosting a private party!
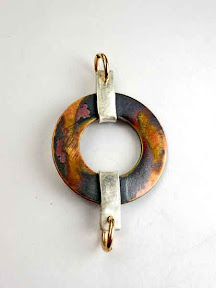
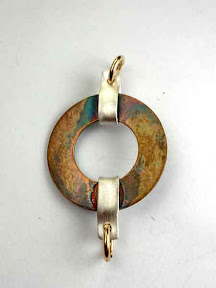
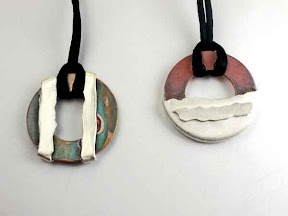 Here are a couple more of the pieces I tried, hugging silver metal clay around large copper sheet washers. I get the construction part of the process (where the silver is the potentially tricky part) but I’m clearly still trying to figure out the best finishing methods (with the copper).
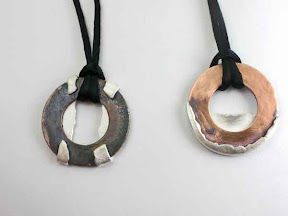 This second photo shows the “backs” of both those pieces. The one that’s red on the front, with the semi-circle of silver, had been very black on the back (also, as expected). This shot shows what it’s like after I’ve ground almost all of that off. (I didn’t quite finish the job because I had to get them off to a friend who’s photographing them for another purpose … more on that in a later post.)