Convergent Series

learning, using & teaching metal clay, and other aspects of life

Archive for the ‘Learning Metal Clay’ Category

May Studio Events

Posted by C Scheftic on 2023/05/01

Now that Mitsubishi has discontinued their (wonderful!) “PMC” line of metal clays, I’ve been experimenting with some of the other brands that are available. I want to do a few more tests before I start writing about them but for now I’ll add this one quick note:

I can work just fine with any of them, myself. I think I may have identified a couple favorites for my own use. But I have yet to find one that doesn’t have some major setback or other for use in classes. (This is not a total surprise: my favorite type within the PMC-brand to use for classes was not my first choice for the one I would work with in my studio!).

But I still have a few more to test out before I make any final decision (and since I am now into peak garden-prep season, my art-time is a bit constrained…).

Still, the point of this post: I have some great new pieces out of my recent explorations with these new clays, and I’ve got them ready to send off to new homes at either of the two events I have in May (which can also be found on my Facebook Page or website for Convergent Series) are:

  • First Sunday, May 7, 1 to 5 pm 
    (Moved a week earlier than in recent months to allow for shopping before Mothers Day.)
  • Third Saturday Extra-Special, May 20, 9-ish am to Noon 
    (And a second chance this month because this coincides with the wonderful Regent Square Community Yard Sale and WSCC’s annual Plant and Used Books sale.)

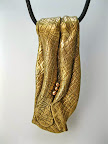
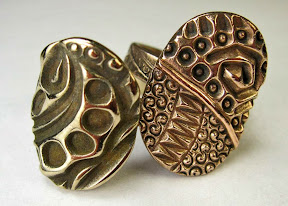
Since posts usually contain pictures, I’ll close with this one. Do stop by to discuss which product I used for it, and see my other newest treats!

Posted in Events, Learning Metal Clay, Studio | Tagged: , , , , , , , , | Leave a Comment »

I knew it would work!

Posted by C Scheftic on 2018/09/16

There is absolutely nothing special about the enamel work on this piece but it is a proof-of-concept for an idea I’ve had for ages:

Proof of Concept
  • save a bit of left-over (negative space!) bronze metal clay from a piece cut with one of my Silhouette machines;
  • fire that onto a piece of copper to sinter it; then
  • enamel onto the copper around the bronze!

I figured it should work, and I’m happy to finally confirm for myself that it does.

So the big question now is: when can I find time to make another batch of bronze pieces so I’ll have more “scraps” to play with!

And I ask myself, what was I waiting for?!!  I’ve wanted to do this with bronze and copper since I first started using bronze clays! When did Hadar release her first “Quick Fire” bronze?  2010?  If that’s right, since then!  But I waited what seems forever before taking even the next step (though, to be fair, I was playing around with a lot of other ideas in the meantime).

I remember how it felt the obvious thing to do when cutting clays with one of my Silhouette cutters (in this case, my Portrait).  Though I’d had that thought for a while, I remember firing that particular “drop” of cut-out clay onto a copper oval during my initial trials of “one fire brilliant bronze.” (That was the last of Hadar’s “one fire” clays that I tried, and I struggled with it a bit through several rounds of testing … but it is now a favorite when I want to work in bronze!)  I came across the “blank” last week as I was firing a few steel pieces with enamel: it was the last piece I fired before cleaning everything up so I could use that work-table for an Open House this weekend.

Looking back for when I’d made this piece to test with, I realized that it had been sitting in a corner of my studio waiting for me to stop and enamel it for over 3 years!  At the time, I did make three more such “blanks” to play with, but now I know I’ll spend even more time designing pieces for additional possibilities from both their positive and negative space components…

O, yes, that’s why I waited! On top of that, even the test-piece shown here has a simple “separation enamel” flower on its other side!  Simple in case this side should have failed for some reason, but there because …. that’s just what I try to do!

And now I ask myself: why couldn’t I have just been satisfied with making pieces that are reversible?f  But I know the answer: while there’s a big part of me that really likes, and strives for relatively “simple” designs, there is another part that just has to add some little “twist” while I’m at it…

Are you drawn more to minimalist or complex designs? (Not just mine: anyone’s!?)  Leave a comment!

Posted in General Techniques, Learning Metal Clay | Tagged: , , , , | 3 Comments »

A few final pieces from 2017…

Posted by C Scheftic on 2017/12/21

Whenever I walked into my studio last week, I passed lots of red and green Christmas decorations throughout the building.

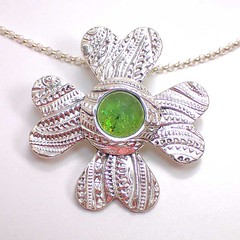
Urban Flower: Lucky Shamrock (Four-leaf Clover)As I sat down with some silver clay and a small box of dichroic glass cabs, I think that decor is what lead me to be drawn to several green pieces.

With over half of my studio turned into a show-room, and only one “holiday” show left after I’d have time to fire and finish anything I made between visitors, I had to work simple.

But then my maker’s-sales brain kicked in and I picked up those green cabs and used them in … shamrocks! Three fine silver pendants for spring.

And the “lucky” four-leaf one, with a “spring green” piece of glass, has already been purchased! Knowing that it will age slowly over time, the customer wanted it like this, without any patina. I managed to grab this quick photograph while the buyer selected a chain to go with it. The photo shows a sterling rolo chain though it went out the door on (what I do agree was a better choice for this particular texture) a foxtail style chain.

Urban Flowers: Two ShamrocksFor those interested in technical details, all three of these were made with PMC Plus and PMC Flex. Why those clays? I’d taught a lentil-bead class last week in which we used Plus, and I had a lot left from a big packet I’d opened there, so I used that for the backing pieces, the leaves, and the bails. To be sure those were fully sintered, that much was fired at full time & temperature: nominally, that’s 1650°F for two hours. (I say nominally because, since my kiln fires about 50° hot, I set it to 1600 … which means it should have fired at about 1650… And I did hold it for two hours.) That gives all the “structural” elements the maximum strength possible for that particular silver formula, even though it would have been way too hot for the glass.

The next day I made the “bezel” elements to surround each glass piece and hold those in place from the top. I used PMC Flex for that. I could’ve used PMC3 or Art Clay 650 or any of the “low-fire” fine silver formulas but, again, the Flex is what I had handy, so that’s what I used. The point here is that I needed a clay that would reliably sinter at a low-enough temperature that I could fire the glass in place! Clay fired down at “glass” temperatures might not be quite strong enough for the leaves (that hang off to the side) or the bail in back (from which the piece is hung when worn), but with a good, strong backing, the use of a lower sintering temperature should be fine for just holding the glass onto strong backing pieces. I used a four-segment program that experience has shown to provide good strength to the silver bezel while keeping the glass happy.

I did choose to add a patina as I finished polishing these two after their second firing. And, if you’re interested in a few notes I wrote about using a mix of sterling and fine silvers in this sort of design, feel free to check out my post from October of last year.

Even though these designs reflect the shape of shamrock (young clover) leaves, because of the textures I used and the glass centers, I’m calling them part of my Urban Flowers series. I never claimed that my urban flowers were going to be biologically correct representations of particular species, more that the plants would serve as “inspiration” for those pieces.

In some ways that concept also fits with the colored glass ornaments I make during the summer (when I can work outdoors). Those are designed with a double-loop on the top of the ornament and a flat bottom to the glass bases: they can hang on your Christmas tree if you want and then, for the rest of the year, you can set them on a table or desk and use them ho hold whatever kind of note or photograph or other reminder that you want!
2015_11_FiveCardHolders_OneGearBusinessCard_PB241207
Similarly, I hope that these shamrock pendants fit both with the green fir / pine / spruce decorations during winter holidays, and can continue being worn to reflect the natural world as spring returns! Or maybe the heart-shaped leaves will even warm someone’s heart in time for Valentine’s Day?! Regardless of the “connection” made, I do hope the rest of these will soon find good, new homes!

Posted in General Techniques, Learning Metal Clay, Studio, Teaching Metal Clay | Tagged: , , , , , , | Leave a Comment »

Exploring my “Urban Flowers” Series

Posted by C Scheftic on 2016/10/17

This post is going to jump into the middle of a story about several different things I’ve been working on: adding a little bit of color to my creations by incorporating some glass (especially dichroic glass) and working with sterling silver metal clays.

Why start in the middle? Well, I really do miss writing about all the explorations I do in my studio. I haven’t been saying much about them lately because we still don’t have reliable internet access in the building … and I used to compose posts as I worked. You can probably imagine that, after a long day of working on explorations (and more), the last thing I want to do is go home and stay up for hours more writing from there. But it’s a gorgeous fall day and I suddenly decided to enjoy it by staying home this morning, sitting out on my back porch with a cup of tea, and writing about a piece I just finished on Friday.

I will provide a bit of background:

The second, or maybe it was the third, piece I ever made using metal clay incorporated a lovely, long, oval, pink glass bead, set with loops of syringe-clay to hold it in place. It was fun to do, but it took me a few more years before I got into adding glass on any sort of regular basis. About six or seven years ago, I went through a phase of using glass fairly often. Then I moved off in other directions, with what remained of my collection of glass pieces sitting in a corner of one of my stash-drawers. I’d acquire another bit of glass every now and then until, a few years later, I made a few more pieces using some of those, and taught it as the final project in a couple of private lessons and multi-session intensive workshops.

ProjectSample_Glass_SwirlGlassInFineSilverProbably the main reason I didn’t keep pushing with glass is because I’d felt limited to using PMC3 or Art Clay 650: those were the only metal clays that could reliably be fired with glass. Now, those are both fine metal clays: I have been quite happy using either one of them. But glass just isn’t happy at the 1650°F (900°C) for two hours that all fine silver clays require for the strongest sintering, even with those formulas. Although they will technically sinter at lower temperatures and shorter times, they still don’t get as dense, and thus won’t get as strong, as they could do at 1650°F for two hours. They do come out perfectly acceptable, and I hope people will treat any piece with glass somewhat gently … but I just like going for the strongest pieces possible.

Still, I do love glass. So this summer I made some more fine silver pieces with dichroic glass cabochons, called them class samples, and included that process in another four-day session I was scheduled to teach at The Artsmiths of Pittsburgh. The first photo with this post shows one of the sample pieces I made for that class. While a couple of my samples used the same PMC3 and Art Clay 650 that I’d used in the past (mostly to refresh my memory of how I’d done it) this one and several others used PMC Flex. Flex is similar to PMC3 but it has a slightly longer working time (good for workshop students not yet comfortable enough with metal clays to work really fast) and it remains a bit flexible when dried (which makes it very useful for anyone fashioning the parts that capture and hold the glass). And, though there’s still the problem of not sintering to the maximum density possible, it does sinter reasonably well at temperatures where glass remains happy. So, for fine silver with glass, it seemed a good choice.

Urban Flower #7 (Blue Lagoon)Now, at last, on to the Urban Flowers explorations:

After I’d made those samples, on some of the hottest days this summer when I just didn’t feel like going out to work in my garden, I got to thinking about a possible new series of pieces, ones I’ve taken to calling my Urban Flowers. They are flower-like designs, but from my imagination. While they may be based on some actual flower varieties (and may or may not be named for their inspiration), I am not attempting to make biologically-accurate representations. They’re just a city-girl’s dreams. The textures come from urban life: wallpapers, flooring, construction debris, household objects, etc., and they feature glass (or, occasionally, something else that is commonly found in urban environments).

Urban Flower #5 (Purple Haze)I’d been happily exploring these designs, mostly using PMC Flex, while working on some other styles completely and, for those, using diy-960 clays (i.e., mixing PMC+, PMC3, PMC Flex, and/or Art Clay 650 with PMC Sterling clay).

And then CoolTools released EZ960. OK, I didn’t really need it, as I’d been doing fine with my various diy-960 combos, but why not give it a try? Soon after, both PMC and Art Clay released their own silver-rich sterlings (PMC One-Fire Sterling, a .960 formula, and Art Clay 950, where the number designation has switched from a minimum Celsius firing temperature to a Fine Silver percentage). I got some of each of those and started testing them too. At some point, I hope to find a chance to write about all that testing. For now, though, let’s stick to the Urban Flowers story.

While I do love the color of plain fine silver, I can also appreciate the gain in strength that it gets when a bit of copper is added to produce sterling silver. And, as noted above, I much prefer to produce pieces that are strong. The 950-960 formulas will be stronger than a 999 fine silver; they get you to almost as much strength as you can get in the great 900-925 alloys. Plus, they have the benefit that they are as easy to fire as the 999 clays (i.e., much easier than the 900-925 ones, where having more copper complicates the firing). So, yes, any 960 (diy or commercial product) will be a compromise, but still an excellent choice.

With one exception: the 950-960 clays need temps and times higher than glass can take without just melting.

But, d’oh, why didn’t I think of this before (even with the .999 fine silver clays!)? I work with base metal clays, and I do some pottery, and we’re talking about multiple firings to get many of those to work. So here’s the inspiration I had, and the first (simple) piece I made to test it out….

I made an Urban Flower base out of EZ960: the petals, the stem (if included), the bail on the back … everything but the glass and the bit that holds the glass in place. I fired all of that according to the schedule for 960, to achieve maximum strength. Afterwards, I positioned a glass cab, surrounded that with a .999 fine silver washer shape to contain it, made sure that was well-attached to the already-fired petals, and fired the whole thing again at a schedule that worked for just the “bezel” and the glass. After a bit of tumbling, polishing, and patina, voila! It may not be perfect, but I am really happy with this result! (Though both the silver and the glass are brighter in person than they look in this photo….)

Urban Flower No. 8 (Gold Cinquefoil)

What do you think?

I do still need to figure out a reasonable pricing schedule to accommodate the fact that I’m doing two firings, and that attaching the unfired clay to the fired metal can be a little trickier than attaching two unfired elements. Though that will add a small amount, in the grand scheme of things, it won’t be much. Once I’ve found time to make more to extend the series, and refined the process of doing it this way, I can see how the time works out and apply that even to my initial-trial pieces too. The only real problem with this approach is the way the two firings will affect trying to do this in a class … but it’s just another reason to offer multi-session workshops, rather than the quick one-shot ones, when including easy but still advanced topics.

Posted in General Techniques, Learning Metal Clay, Teaching Metal Clay | Tagged: , , , , , , | Leave a Comment »

Trying Hadar’s White Satin

Posted by C Scheftic on 2014/02/19

Another new clay means another trial making rings!

Though I love rings–both wearing them myself and admiring those on others, in shops, at galleries–and I love making small adornments using metal clays, in general rings are not my favorite things to make. I’ll leave the reasons for that for another post specifically about rings. Why? Because today I want to talk about rings made from another “new” clay! Now that I’m familiar with a number of different types of metal clay, one of the things I often do to try to get myself comfortable with a new one is to make myself some rings out of it–to test what it’s like to work with–and then wear them everywhere–to test how they hold up. And my first question about an iron-bronze formula in particular was whether it would hold up as well as I might expect under all the stresses I put on rings.

So one of the first things I made when I got my hands on a (pre-release!) tube of Hadar’s new White Satin was to try making a couple of rings. I wasn’t going to be able to make them my favorite way (with iron in it, I was not going to count on being able to fire the shank first and then form it around a mandrel–a method that pretty much guarantees it will come out a perfect fit–and I was too eager to try it to first make a little test strip to see if/how I could manipulate it, though if will try that eventually…). And I didn’t want to make a ring using the “common” metal clay way, shaping a band in the clay-state (with lots of potential shrinkage-issues during firing). So my first White Satin rings were a pair of seamless stackers with each one textured on one side (using the “eastern paisley” design from Cool Tools) and plain on the other side.

My plan was to make them two different shapes, and wear them with the “plain” sides together. And, no, they didn’t warp during firing: I made the openings oval on purpose!

I usually make my rings either oval (as shown here) or square-ish (a rounded-corners trapezoid). The latter is easy with metal I can whack around something like the finger-shape mandrel from Rio Grande. Since I wasn’t yet ready to try that with White Satin, I just cut the clay itself with an oval opening. Hadar said rings would shrink about 3 sizes, so I used that for my beginning estimate.

Though, since I was making my rings oval, I did cut the opening a tad smaller than that. What I really did was to fit a narrow strip of metal inside a ring sizer at the +3 size, but then trim it a tad smaller. I then shaped that into an oval, and used that to cut my clay. The reason for down-sizing a tad is that, to put on an oval ring, I turn it sideways until it’s passed over my knuckles, but then turn it back up to wear. The “twist” allows the larger-direction opening (still at the +3 size) to fit over the larger-dimension part of my finger. But when it gets twisted back again, the straighter side (now smaller and narrower) holds each ring upright better, so I don’t have to keep straightening them.

The rings shown here were fired and then polished. And they did come out fitting the finger for which I was trying to make them! Since they contain iron, which will rust, they were sprayed with an acrylic protectant. Since they are rings, I have no clue how long that protection may or may not last. That’s what I’m now trying to test! I’ve been wearing them off and on for almost two weeks (more on than off, but nowhere near constantly) before taking these snapshots. They seem to be holding up fine in the short term. It’ll just take more time to see how they do over a longer stretch.

In the meantime, I am very happy with the results so far, and I hope you appreciate this early-report.

~~~~~

Update: This post originally referred to White Satin as a form of steel. I have since decided that it is more appropriately described as a form of iron-bronze, and have edited the post to reflect that. (Bronze is an alloy of copper and tin. Different proportions yield metals of a different color. Rose bronze, for example, has more copper than does the typical yellow-bronze. White bronze has more tin. which produces a nice color when used as an accent, but results in a metal that is too “fragile” to be used as a major structural component. Hadar’s White Satin is a bronze formula that contains some iron too, which produces a black-metal that can be polished to a white-metal color but has the strength more like that of a typical bronze….)

Posted in General Techniques, Learning Metal Clay, Technical Details | Tagged: , , , , | 6 Comments »

I Made It Onto “Hadar’s List”!!!

Posted by C Scheftic on 2014/02/14

It has been one long, fun, hard, exciting, challenging year, with lots I’ve learned and still more I’ve been inspired to explore further, but I’m now a “graduate” of the Hadar’s Clay™ Teachers’ Accreditation Program.

As I write this, there are about two dozen of us around the world. Maybe a dozen or so more should be added in the next month. There’s a second group that should finish before the end of the year. I feel truly honored to have had the opportunity to spend the past year working with such an amazing and wonderful group of artists and explorers.

I look forward to the adventures we’ll continue to have together, and to continuing to share them with my students and with all my other readers here. Check for links to my workshops down the right side of this blog. My first four-part series based on this program will run in my studio during April and May of this year. (I’m still teaching silver too, and have four individual classes set up for that in March.) Do let me know if you’re interested in either the silver classes or the base metals series … or both!

Posted in Hadar's Teachers, Learning Metal Clay, Teaching Metal Clay | Tagged: , , , , , , , | 2 Comments »

Another Quick Peek—Another New Ring

Posted by C Scheftic on 2014/02/08

Here’s another Champagne Bronze ring, this one topped by (hey, I just couldn’t resist it) a Champagne CZ. This one took a little while to tell me what it wanted to be….

It incorporates several of the other bits I said I’d try to write about another time in an earlier mention of shrinkage. The strip that I bent into this band didn’t shrink anywhere near as much as I’d expected, which caused me to re-think how I’d assemble it. The oval pieces on the top shrank about as much as I was expecting in length by width but, as far as I can tell, they shrank not at all in height. And that height matters in the re-design of this ring too: I’d thought I might make it so that they could spin (like the petals in my fine silver flower ring with ruby), but their thickness made that difficult. Yeah, I know ways around that, but this was just a supposedly-quick little trial piece, so I tried something else, to confirm how well they’d fuse in place. That did work out well and, again, I like the color (even though it still looks a bit more like sparking rose´ than champagne to me, though not quite as much as the first one I tried).

I can of course make a bronze spinner later, when I can find time to do more accurate calculations on the shrinkage and actually plan it out. For now, I’ll just wear this one as-is, and quite happily, as a test of how rings made this way with this new product will hold up. Which is probably all for the good anyway, as I’d’ve treated a spinner as a special-occasion ring, when having another nice Champagne Bronze ring for everyday wear is far more practical.

Posted in General Techniques, Learning Metal Clay | Tagged: , , , , | 2 Comments »

Quick Comparison of Two Bronzes

Posted by C Scheftic on 2014/02/05

Have you been wondering why, so far, all my posts about Hadar’s new One Fire Trio have mentioned shrinkage? Every single metal clay piece of any sort will shrink during processing: as you let it dry (i.e., as the water evaporates), burn off the binder and, finally, sinter it. During each of those steps, things contract a bit. Exactly how much varies by product and technique, but it still happens. For many items, this either isn’t an issue (so what if a lentil bead comes out a tad smaller) or it can even be an advantage (for sculptural pieces, being able to work a bit bigger and have details end up magically smaller can be a real treat).

But, for rings, where the band-size really does matter, then shrinkage matters. A lot. Which is why several of my recent posts have noted shrinkage among the various One Fire Trio products in particular.

Even though I’m still puzzling over that, I have to tell you that there is one feature of Hadar’s new Champagne Bronze powdered metal clay product that I just love: with Champagne Bronze, I can bend ring shanks around a mandrel!

Years ago, working with fine silver, I figured out a way to make rings that I love (and that I later found out that some, but apparently not a high proportion of, others use and love too), a way that removes most of the shrinkage concerns. I make the strip that will become the band first. And fire it as a strip, so it shrinks. Then, I bend the fired-strip into the ring shape that I want, fiddle and adjust and tweak it so that it’s exactly what I want. I add any top-decoration to that, and refire the whole thing. The bit on top will shrink a bit, but if my estimate of that is off a fraction of a millimeter, it’s rarely noticeable. But the already-fired band should (if it was fired properly the first time) come out the same size it went in. To be sure, that approach does not work for every possible ring design but, for the ones where it does— Voila!—there are simply NO sizing issues.

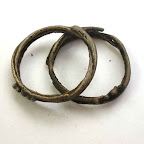
That was a real advantage when I made the spinning-flower ring with ruby, shown first above. When I ventured into Hadar’s Smart Bronze (another one-fire clay), I was advised against trying to bend that, so I had to use the “traditional metal clay” methods with it. Though I like the two rings (second photo) that I made with it, neither ended up sized quite the way I’d wanted. They’re for me, so I just wear them on different fingers than I’d planned; the only problem with that shift is that I can’t wear them in combination with some other rings the way I’d wanted. (I don’t wear rings when I work, but I love wearing lots of them when I’m out and about.)

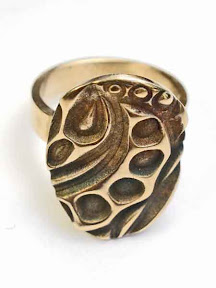
What I’m reporting today, however, is that my first Champagne Bronze ring fits beautifully. I include a photo of it, below, paired with one from my first attempts with Smart Bronze. The difference in the size and shape of the decorative top was intentional (i.e., I’m not trying to illustrate shrinkage this time); the image does, however, give you a good hint as to the difference in the color of the two products. (Next to Smart Bronze, this does look a bit pink. Next to Copper, or even Rose Bronze, this looks to be much more of a yellow-bronze tint. I’ll try to post a few more comparisons, using some other pieces, but it may take me a while. There’s lots to do right now, too much to justify all the time I’ve spent with Champagne Bronze and Friendly Copper. But, me, I just felt I had to try to complete at least one such ring! So … more when I get caught up elsewhere.)

Posted in General Techniques, Learning Metal Clay | Tagged: , , , , | 2 Comments »

One Thing Just Leads to Another

Posted by C Scheftic on 2014/02/01

If you’ve stumbled across this blog / post without a lot of previous metal clay experience, you may want to just click on the photos to enlarge them and read the brief notes there. For the rest of you, I’ll start by asking if you remember the earrings I wrote about last week?

For today’s post, I’ll start by saying a little about the steps I went through in making the bronze-parts of the two-metal earring pair I described earlier.

  • Grab a good-size chunk of Champagne Bronze clay.
  • Roll it out to a thickness of four cards.
  • Position cards around it, two cards high.
  • Use a thin, straight edge to cut two distinct sets of five intersecting lines. (This was done freehand, so their positions are similar but not identical.)
  • Use a circle cutter to make two “large” circles.
  • Use another circle cutter to make a “small” circle inside each of the “large” ones. (Again, done freehand, so their positions are similar but intentionally not identical.)
  • Do all the usual clean-up and drying of the various bits of clay.

When the circles had dried, I used the small, matching “inner” circles (where each set of lines all intersect) over some Low Shrinkage Steel XT to make the earrings I mentioned before. So far, so good.

Looking at the dry “outer” circles (washers, actually: the larger circles with their centers removed), I had another idea. Using a texture sheet with some concentric circles, I rolled out two more sheets of clay, one each from Friendly Copper and Low Shrinkage Steel XT. Then I centered one of the bronze “washers” over each of those, and cut a matching circle out of each clay. Finally, I rolled out another pair of those two clays, this time using two different “flowered” textures, and cut out a third circle of the same size from each of those. Both the circles- and the flower-design were rolled to four cards at first and then, with the textures, down to two cards. (I didn’t roll the clay with textures on both sides because: (a) I hadn’t yet decided for sure how I would use them, and (b) I wanted to center the designs on both sides the way I wanted, and doing that separately for each side was easier.) I set all those aside to dry (as well as a few other bits I’ll try to write about another time), figuring I’d use them for something….

A few days later still, I got to wondering about the “high fire” temperature of these new “one fire” clays. In general, even with this new trio, it’s the bronze that’s going to limit how hot the product can get during the sintering process. Would the “bronze embeddable” bails survive that heat? (I use them myself, on occasion, and I often offer them to students, especially in introductory workshops, because they can save a bit of time when compared to having to make one’s own bail.) So I took one of the bronze washers, attached the copper disk with circles and let that dry, then positioned the embeddable bail and attached the copper flower-design disk. Once all that had dried, I filled in a few little gaps, dried it all some more, and finally fired the piece.

The results were interesting, as shown in the first photo, above. It all sintered just fine. The bail did blister a little bit: not enough to ruin it, but enough that any metal artist “in the know” should be able to spot what happened. But I still think it’s interesting.

There was one small blister on the sintered bronze section. My first thought was that I’d overfired the batch a bit, but then I realized it was exactly over the post on the embeddable bail. Silly me, I didn’t think to capture a photo of that: What I did was to immediately see if I could polish it out. Easy! I’m not done polishing this piece (it was just a spur of the moment creation, not a planned project), but I think the photo I include here (click on it for a bigger version) gives you a hint as to the blistering on the bail (in case you’re someone who uses them too), and to the way it does look like the disk itself will polish up nicely with a little more work.

There’s one other item worth noting: how the bronze in the bail alloyed a bit with the copper on the other side! Look at the side shown to the right in the first photo, up near the bail, and notice the golden-colored patch. Alloying! Again, artistically, I’m OK with its looking like that. But it’s good to know it will happen.

A few days later, I got to wondering, would the bronze wire I sometimes use with such pieces show the same blistering? [Later clarification: I’ve used that wire in the past with pieces made using Hadar’s Quick Fire bronze. That’s a clay that takes a two-phase firing and only mid-fire temperatures and it’s always held up beautifully in pieces fired that way. Here, I’m otherwise reporting on the newer one-phase high-fire clays.]

So I made a simple wire-loop bail out of phosphor bronze (melting temp listed as 1800°F), then took the other (matching) bronze washer and the Low Shrinkage Steel XT disks, and assembled it the same way as I’d done before. I fired that using the same schedule too.

And, again, I noticed a bit of blistering on the bail and, with this wire-design, a bit of fusing across the loops. Again, I think that slightly grainy look is OK. Other than a quick clean-up, I have not yet stopped to polish this one at all. But I decided to post about it quickly because, this time, the main piece shrank much further away from the bail. In its clay state, the loops were pressed lightly down into the piece, but the post-firing separation is visible in the photo. No alloying with the steel though, which is also good to know.

But you have to see the two together to catch what surprised me the most: the difference in shrinkage! They started out exactly the same size, and look how different they are now. The current (as I write this) Hadar’s Cheat Sheet (.pdf) says that, on their own, Champagne Bronze shrinks about 30%, Low Shrinkage Steel XT about 28%, and Friendly Copper about 25%. Combos will be limited, to some extent, by the least-shinkage clay in the mix. But there’s only a 3% difference between LSStXT and FrCu, and it sure looks to me like there’s more than a 3% difference in the results here. What I can feel, but can’t really show here, is that there is maybe a 3% difference in height but it’s in the wrong direction. The one made from copper is a teensy bit thinner (i.e., more shrinkage, not less).

I really do like the results I’m getting with these clays, and the 3-hour firing time is a huge help compared to some of the others. But, with the others (and any of the “older” clays, both precious and non-precious), I think I have a pretty good feel for the shrinkage. With this new One Fire Trio, I’m still exploring….

What are you finding with them? Do leave a comment!

Posted in General Techniques, Learning Metal Clay | Tagged: , , , , , , , , | Leave a Comment »

A very quick shrinkage comparison of Hadar’s “One Fire Trio”

Posted by C Scheftic on 2014/01/25

Here’s a photo showing a few more little bits from my first trial firing of Hadar’s One-Fire Trio. Though I didn’t start out by making them as perfectly-similar as would be required for a scientific comparison, I did roll and cut them to the same size. So, in order, from the most shrinkage to the least are: Champagne Bronze (C), Low Shrinkage Steel XT (L), and Friendly Copper (F).

I’ll have to see if the apparent ratios continue to hold with other cubes. (That is, some differences could just be due to my having mixed more or less water into the different products. And I just stamped the letters in by hand, which could have changed the shapes a bit too.) But, with the other pieces I fired at the same time, the ratios do seem to vary depending on the shape of the piece being fired. I don’t have enough data yet to be sure, and these cubes are the only items where I made three matching pieces to start with.

But I will say that, while the Champagne Bronze cube did shrink somewhere around the proposed 30% rate all around (per the Cheat Sheet for Hadar’s Quick-fire Clays on her blog), a ring shank made from the same batch shrank barely 15% in length and a bit less than that in width. (Its height/thickness is just too small for me to accurately measure whether all the remaining shrinkage went into that, or not.)

Still, I figured I’d share the preliminary results. Please add a comment if you try these clays and find results that are either similar or different!

Posted in General Techniques, Learning Metal Clay | Tagged: , , , | Leave a Comment »

Trying Hadar’s New “One Fire Trio”

Posted by C Scheftic on 2014/01/24

It’s taken me a while to post again as the state of mini-crises has continued, but I won’t bore you with those details. Instead, I’m delighted to report an exciting new development: At the start of the year, Hadar announced a new One Fire Trio that includes two new metal clay powders that, along with one of her older ones, can be de-bindered and sintered in just one firing (rather than the two separate ones that many others require). Their total firing time is just under 3 hours. Wow! Compared to the usual 8 hours (if you fuss in between) or 12 (if you don’t fuss but do sacrifice more carbon), that’s a huge difference!

The older member of the trio is Low Shrinkage Steel XT. On its own, it could be fired in a single kiln-run, but that limited the combinations in which it could be used. Also, it’s a high-fire clay, so it could only be used in small amounts with some of her other clays, the ones fired at lower temperatures. But, with the introduction of two new clays—Champagne Bronze and Friendly Copper, both of which also use high-fire and single-phase processes—it is now possible to produce more combinations.

Each of Hadar’s metal clay powders have their own advantages and disadvantages compared to the others. No one product (or small set of products) from her or (or any other producer) is yet able to achieve everything an artist might want. But each new combination offers new opportunities, which is what makes them so exciting! I am sure that some people got these clays and proceeded to develop complex creations. But me, I prefer to get to know the clays in simpler ways first, to discover their advantages and limitations. I have a few more-complex pieces in the works, and I’ll get around to completing their construction and firing them eventually. This post will show a few of the simpler pieces I tried first.

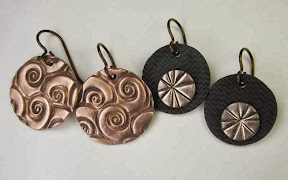
The earring pair to the left was made with Friendly Copper. The pair to the right used Low Shrinkage Steel XT in back, with the embellishment in Champagne Bronze. After firing, the copper and bronze were very lightly polished (just a quick pass with one set of (3M yellow) radial bristle disks); the steel is as it came out of the kiln; the earwires are anodized niobium (that I just happened to have handy). If / when I can find the time, I may fiddle with finishing them a bit more but, for now, I just could not resist offering this quick sneak peek!

The second (smaller) photo shows the other side of the steel pair, after each piece has been quickly polished in the same way as the copper and bronze on the fronts. I did that because I wanted to show the polished-steel color on its own, even though I liked the black+gold contrast in the combination on the other side of these. (Although ensuring that the black will stay black—neither shining up to gray nor rusting out—will require some of that additional finishing I just mentioned….)

One note on firing: Hadar says that firing any of the clays in this trio takes her 2:45 (2 hours and 45 minutes). For these, I used a brick kiln, outdoors on a covered patio, when the air temperature was around 25°F (-4°C). I also know that this particular kiln tends to overshoot the goal temperature early on in the firing process, regardless of the temperature of the air surrounding it, though it holds the temperature fine once it’s had the chance to swing up and down a few times. My work-around for that is to set a two-step program, where I first get it near the goal temperature and tell it to hold there for a couple of minutes (allowing it to spike higher there), then ramp it slowly to the real goal where it can hold for the required firing time. With those two differences between my set-up and hers, firing these pieces still took only 2:58. As I said above, that’s a real treat!

Another note on my kiln: I don’t leave it outside all the time. I keep it inside and just haul it out when I need to fire it. (If I fire it indoors in winter, when I don’t have any good way to vent it and I’m using carbon to provide an oxygen-reduced atmosphere inside the kiln, my CO detectors signal a problem!) Hauling it in and out takes only a few minutes each way, so it’s not a major problem, even when the temperatures are in the 20s. But, they’re currently hovering around 0°F, and that puts enough of a strain on my furnace, me, and more. I’m not leaving doors open to move kiln, kiln “furniture,” the stand, various tools, power strip, gloves, safety glasses, and more both out and then back in again.

In other words, even though I have more pieces underway, it may be a while before I get around to firing them and posting the results. It’s just winter … and I don’t mind at all living at winter’s pace … for a while.

Posted in General Techniques, Learning Metal Clay | Tagged: , , , , , | 1 Comment »

Smart Bronze: By Jove, I Think I’ve Got It! (Summary — Post 6 of 6)

Posted by C Scheftic on 2013/06/30

Before I wrap up my Smart Bronze test-reporting, I am inclined to take one last post to review and summarize a few of my thoughts about what I just put myself through.

My Test Firings.

Over the last five posts, I outlined the eight firings I called “trials” to master the firing of this particular clay. If I were starting the whole thing today, I think I could hit the right numbers in a mere three trials. Yes, that’s more than one test-firing, but I do find that to be a very manageable number. (Yes, eight was too many!) Why do I say three?

My first two firings were based on Hadar’s earliest information, right as this new product was released, before she had updated her Instruction Manual. Today, I would be starting with the later information, and avoid a couple of initial mis-steps with this new product.

My last two firings were, really, my first two production firings. I counted them as tests mostly because, having encountered some earlier problems, I was being particularly cautious before declaring my testing done.

Finally, the problems I had in one firing in the middle were simply because I’d spaced out and incorrectly programmed my kiln. Those did give me some more “confirmation” of what I thought had been going on but that should have been avoidable.

That leaves me with the three firings I think I would have taken to get it right. And you should be able to hit it right in two or three yourself, because you will know the following….

The “Trick” to Smart Bronze.

The conversion of all metal clays from a powder-form into a metal-structure one (oh, and regardless of whether they are precious metal (silver, gold) or non-precious (elemental copper or various bronze or steel alloy formulations)) requires that both (a) all the binder be burned off and, then, (b) the metal sinter and “soak” into a nice, densely-packed arrangement. In some cases, those can be done in one (sequential) process; in others, it requires two (separate) firing processes. “Smart Bronze” falls into the former category, which is its primary appeal over a number of other bronze formulations.

But you really do have to let Smart Bronze pieces spend a full hour in the “debindering” process. In a single-fire product, all the binder burnout happens during the ramp-phase of a firing. If it’s not taking your kiln an hour to do that ramping, you are probably not removing all the binder, and that will limit the metal’s ability to fully sinter correctly regardless of the temperature or time at which you “hold” it. You have two options for slowing it down: reduce the ramp-speed, or simply build a few minutes of “hold” time partway through the heating-up phase of a firing. (I did the former, as noted in this series of posts, with my brick kiln. I am thinking I may well try the latter when I get around to trying to fire this clay in my ceramic muffle kiln.)

Once you are sure you’ve adequately provided for the binder-burnout phase, only then can you confirm the actual goal-temperature that’s needed to allow sintering to take place. I know that our instinct, when sintering does not seen to happen as we’ve expected, is to try to adjust the final temperature or hold time with the expectations that such tweaking will solve the problem. But, until you get all that binder burned out, your metal will not sinter properly. You have to master the burnout-phase first. Every situation I have heard about where there has been a problem with Smart Bronze (at least so far) has involved inadequate sintering that, at least as far as I could tell, resulted from a problem in the initial heating up part of the process, when the binder should all be burning off.

A Note on the Color of Sintered and Polished Smart Bronze.

The two rings pictured with this post both contain large areas that have been polished smooth. The round, seamless ring has been completely polished. So has the band of the double-fire ring, as well as large, raised areas of its texture. In such cases, the metal polishes up to a bright, golden-yellow color.

On textures with lots of fine detail, however, such as the earring pairs in my last post, where you can’t really polish everything to a super-high shine, then the color looks to me to be more of a greenish-bronze. (During the testing, I tried both: (a) using sanding plus further polishing, and (b) tumbling in a rotary tumbler. And I got a similar greenish tone either way.)

I’m not saying that either one of the colors — golden yellow or greenish bronze — looks better than the other. Just that they are rather different, and seem to be a result of the texture rather than any other construction, firing, or polishing approach that I’ve yet been able to determine. I have definitely begun planning pieces with one shade or the other in mind (e.g., with respect to some particular stone-color I may choose to add to a piece). I’d love to hear whether (or not!) you find a similar pattern in the pieces you make out of Smart Bronze.

Because, my readers, I sure am hoping you’ll try Smart Bronze too. Once you “get it,” it’s great. I’d love to hear how your results compare to mine!

Posted in Learning Metal Clay, Technical Details | Tagged: , , , | Leave a Comment »

Smart Bronze: By Jove, I Think I’ve Got It! (Post 5 of 6)

Posted by C Scheftic on 2013/06/30

This post continues the story I’ve been telling about coming to understand Smart Bronze metal clay….

By now I was feeling time-pressure on top of some test-process frustration. What pressure? The various “test” pieces in Smart Bronze had not taken that much time to make, in and of themselves. But their firings had been eating up kiln-time. I was making and firing pieces in other metals in between so that I’d have enough inventory for the Three Rivers Arts Festival (held June 7 through 16 this year). Aside from the rings, which I’d been doing just for myself, I’d been thinking the “test” pieces might serve as the “loss leaders” in my collection at the Festival: an option for someone who really wanted something of mine but could not afford the higher-end pieces. (I’d make sure to cover my actual costs with them, but would take some loss on my time by just calling that testing-learning overhead.) And I write about all of this, now, as a teacher: to illustrate that even someone who, in general, does know what she’s doing … can also hit roadblocks, make mistakes, continue exploring, and figure things out. Just in time!

Here’s what happened next:

Trial #7: Early June in a Brick Kiln

Hadar (still) said: Ramp at 1400 per hour to 1430°F and hold for 2 hours.
What I entered (correctly, this time!): Ramp at 1350 to 1395 and hold for 2 hours.
Program completed in 2:59.

Test pieces: Taking a risk, I fired all of these: another open-ended ring shank, several botanic pendants and a collection of earring elements. All came out looking fine! Whew!

Trial #8: Early June in a Brick Kiln.
Or, have I moved beyond Trial Firings to Real Firings?!

Hadar said: Ramp at 1400 per hour to 1430°F and hold for 2 hours.
I entered: Ramp at 1350 to 1395 and hold for 2 hours.
Program completed in 2:59.

Test pieces: Once I’d attached a new “top design” to the ring shank from trial #7, I fired that in the kiln, along with another collection of little earring components. (Shown, here, are ten pieces I included in this particular load.) Once again, all came out looking fine. I could actually wear the ring! In the time since these last two “test” firings and my getting around to writing this report, I’ve sold almost all the earrings and pendants I stuffed into these test-loads. Success, at last!

And the ring, which I wore constantly during the Three Rivers Arts Festival and have continued to wear frequently since, is holding up beautifully:


I’ll close this series with one final post, summing up what I’ve learned in the process.

Posted in Learning Metal Clay, Technical Details | Tagged: , , , | Leave a Comment »

Smart Bronze: By Jove, I Think I’ve Got It! (Post 4 of 6)

Posted by C Scheftic on 2013/06/29

This post continues the story I’ve been trying to tell for the past two days….

Trial #6: End of May in a Brick Kiln, in which you will see how your tester spaced out momentarily….

Why had that last load’s wrap-ring broken: was there a weak spot, or was the firing program still not right? I didn’t want to risk breaking the seamless ring too, but I thought maybe I’d try firing it a second time just to be safe. I’d also made an open-ended ring “shank” for a double-fire ring that I could put into this load, as well as a couple other simple textured butterfly pendants I’d made up while the last load had been firing. And I’d nudge the hold-temperature up just a tiny bit while I was at it.

Hadar (still) said: Ramp at 1400 per hour to 1430°F and hold for 2 hours.
What I thought I entered (which I’ll explain in a moment):
Ramp at 1350 to 1395 and hold for 2 hours.
Program completed in 2:59.

Test pieces: Now, I had blistering. Just two little blisters on the open-ended shank (shown: first, right). The textured pendants were bubbly all over. So was the seamless band (shown: second, left): it had had a “perfect” finish on it but, since I’d broken the other ring I’d fired with it, I’d stuck it in to see if a second firing would better-sinter it and now it looked a mess. Fixable, I hoped, but still … why?!

My first reaction was, yes, the load had been slightly larger than the previous one, but why so much blistering? Having felt a little bit frustrated at the start of this trial, now that feeling was building up even more. I’d worked on a few pieces in other metals between trials #5 and #6, and succeeded in gaining a bit of positive reinforcement for myself from their success. So I returned to more of those after trial #6. And. as I went to put those in the kiln, and set up the program to fire those, that’s when I noticed that I’d somehow spaced-out entering the program for trial #6, and gotten wrong both the goal temperature (slipping back to the previous trial’s number) and the ramp (where I’d entered the (wrong) goal number, not the ramp number). And, somehow, the firing time came out to be the same as other test loads, so that was no clue either. Argh…. ( I had actually been starting to wonder if, somehow, the load-timer was malfunctioning and always just returning the last reliable number it had ever had….) But, now, here’s what I’d done:

What I meant to enter: Ramp at 1350 to 1395 and hold for 2 hours.
What it seems I entered: Ramp at 1400 to 1400 and hold for 2 hours.

Little differences can mean a lot! What can I learn from my observations, both before and after I realized my mistake? The textured pieces had bubbles that clearly did not belong to their textures. Ugly! But, though the rings both, at first, looked fix-able, I was even more disappointed by them! The seamless band had blistered, but I was able to work away at it (for a very long time!) with various sanding attachments on my rotary tool until I got it back to a nice condition. Not as pristine as it had been after its earlier polishing, but still very nice. And, it had shrunk another whole size (meaning it had gone down by a total of three ring sizes), which told me that the refiring had resulted in more sintering. At least that was a good sign. But the open-ended band, on the other hand, did not seen to have shrunk much, if at all; worse yet, it broke into three pieces when I slipped it (carefully!) onto my ring mandrel to check its size. Even though it looked at least reasonably well debindered, was it possible that the faster ramp had prevented all the binder from burning out? Or … what?! Of course, I’d made a mistake. It was just “little differences” here and all I needed to do was to go back to the pattern I’d been developing and it should work. I kept telling myself that.

So, let’s take a little break here, to clear our heads….

Posted in Learning Metal Clay, Technical Details | Tagged: , , , | Leave a Comment »

Smart Bronze: By Jove, I Think I’ve Got It! (Post 3 of 6)

Posted by C Scheftic on 2013/06/29

This post continues the story I started telling yesterday, morning and evening….

By the time I got around to trying Smart Bronze again, a newer version of Hadar’s manual was out. Dated May 15, 2013, it told me that my goal in the first trial, 1420°F, was really only 10° below the (latest) recommendation, of 1430°F, whereas I’d intended to aim for 20° below Hadar’s recommended temperature. My second trial had still gone a bit too fast, yes, but it turns out that one really had been at my typical Hadar-clay adjustment of 20° less than the stated goal. That explained all the melting and left me a bit less worried, now, about whether I could get away with dropping my goal temperature some more as I also slowed the ramp speed.

Trial #3: Just after Mid-May in a Brick Kiln

Hadar (by then) said: Ramp at 1400 per hour to 1430°F and hold for 2 hours; total firing should take 3 hours.
I entered: Ramp at 1365 to 1400 and hold for 2 hours. This should have taken over 3 hours; the program completed in 2:58.

Rationale for my new program: (1) Further slowing the ramp should continue to improve the binder burnoff. (2) This was still only 30° below Hadar’s newer target (hold) temperature.

Test pieces: the last (and smallest) two “golden threads” loops that I’d made along with the ones “lost” in the first two trials.

Results (shown, held up inside a slit in some green foam): Both test pieces seemed, at first, as though they might be debindered and sintered. But one small segment did break under very slight pressure (i.e., yes, the “threads” were thin, but this felt like a “normal wear” issue; I had not deliberately test-bent them but, instead, just lightly squeezed a wire-like bit with my fingers to get a good grip on it for polishing). It was hard to see the inside of the small ends. They seemed sintered, but perhaps not fully so. Still, this felt increasingly close to a program that should work.

What to try next: Since there had been so much melting in the previous trial, at 1410, I was hesitant to blame any inadequate sintering on too low a firing (hold) temperature. Since any not-burned-off binder will inhibit sintering, I decided to maintain the temperature and try dropping the ramp-speed a bit more….

Trial #4: End of the third week of May, in Brick Kiln

Hadar said: Ramp at 1400 per hour to 1430°F and hold for 2 hours.
I entered: Ramp at 1350 to 1400 and hold for 2 hours.
Program completed in 2:59.

Test pieces: I wasn’t sure if the thinness of the “threads” might have been a factor in the previous failure. So for this trial I reverted to a simple design I know and understand well: two small, round, simple, stamped butterfly pieces. (One each at 3 and 4 cards thick.)

Results: Debindering seemed to have happened as needed. The pieces sintered into a nice, solid metal. A few small blisters appeared, but they were fairly easy to polish down. The results looked lovely but I have no pictures: sorry! The reason for that is great: As I was finishing their polishing and stringing them up to photograph, a delightful fellow walked into my studio looking for a gift for his twin daughters and bought them both!

Trial #5: Brick Kiln

Hadar (by then) said: Ramp at 1400 per hour to 1430°F and hold for 2 hours.
I entered: Ramp at 1350 to 1390 and hold for 2 hours.
Program completed in 2:59.

Test pieces: I was ready to go for it! I’d had several ring bands ready for weeks! One was made using the “seamless” ring approach; the other was made as a bypass or wrap-ring although I did “connect” the edges of the two ends as they passed each other. I did the latter because I wanted to help keep the piece a bit more stable than it would have been had I left it with “loose” ends.

Results: Both seemed to debinder and sinter beautifully. My only concern was that they had not shrunk by the predicted 2.5 sizes. I was seeing them as not quite 2 sizes smaller. Was that enough? Had I dropped the temperature a little too much? Maybe. Maybe not. But I was hopeful. I first polished the wrap-ring, which looked gorgeous, so I wore that happily while I worked on the seamless ring. When I left my studio at the end of the day, the seamless ring was sitting there waiting to be photographed with its kiln-mate. (It’s shown, here, alone.) I wore the wrap-ring home. The next two days had me moving some furniture and packing-boxes from a recent home improvement project, along with other normal daily activities. I continued to wear the wrap-ring and, half-way through the second day, it suddenly broke into three pieces.

Admittedly, the wrap-ring design did have one “thin” spot. The band was an even thickness all around (which you can see from its greenware-state photo (brown color) above), but it been cut in a tapered shape, so it had the least “height” right where it met the large starting-edge. Which could have been a point of weakness. Which could have explained its breaking open. Or, maybe even breaking into two pieces. But its breaking into three pieces hinted to me that there was another problem somewhere. Less obvious, of course, was the exact nature of that problem.

Should I worry about the pendants I’d just sold? I think not. They were thinner, and less likely than a ring to get knocked around a lot. Still, there was another pause in my testing so I could think this through some more: and another point at which I’ll pause this record too.

Posted in Learning Metal Clay, Technical Details | Tagged: , , , | Leave a Comment »

Smart Bronze: By Jove, I Think I’ve Got It! (Post 2 of 6)

Posted by C Scheftic on 2013/06/28

This post continues the story I started this morning, reporting activities from last month….

Trial #1: Early May in Brick Kiln

Hadar (back at that time) said: Ramp at 1400 to goal-temp of 1440 and hold for 2 hours.
I entered: Ramp at 1400 to goal-temp of 1420 and hold for 2 hours.
This should have taken just over 3 hours; the program completed in 2:42.

Test pieces: one small stamped disk and one “golden threads” loop (the latter was a simple project from Hadar’s blog when she introduced the product she calls Brilliant Bronze).

Results: Two test pieces were simultaneously under- and over-fired! That is they were under-fired in relation to the debindering phase, and over-fired in relation to the sintering phase.

How did I know this? What I found were small, uneven blobs of bronze (i.e., over-fired at the end) that, when handled and examined, disintegrated into small bits of metal and dust (i.e., under-fired at first). The firing finished late at night and I was tired and a bit frustrated: I tossed them before thinking to try to take a photograph.

What to try next: Even though this material can be fired in just one round, the conditions still have to be right for both (1) debindering and (2) sintering to happen as desired during the (1) ramp and (2) hold phases, respectively. Clearly, this kiln-program was not the right one on either count. I’d have to adjust it in several ways.

Trial #2: Early May in Brick Kiln

Hadar (still, back then, though later revised) said: Ramp at 1400 to 1440 and hold for 2 hours.
I entered: Ramp at 1375 to 1410 and hold for 2 hours.
This should have taken over 3 hours; the program completed in 2:45.

Rationale for my new program: (1) I was hoping the slower ramp would allow for better binder burnoff. (2) Since Hadar’s other clays all worked great for me at 20° less than her posted temperature, I wasn’t yet ready to go plunging further than 30° below her number.

Test pieces: two more “golden threads” loops that I’d made along with the first-trial one. (Thinking I’d done with testing after one try, I’d added small ball embellishments to these.)

Results (shown): Both test pieces seemed, at first, to be a bit better debindered and sintered than the previous trial. They did show some signs of melting, but nothing like the last time. Still, they broke under very light pressure while holding them to photograph them. It was hard to see the inside of the small ends. They might have been somewhat sintered, but certainly not fully so. Still, this felt like some (if small) progress from the first mess.

At that point, I took some time off from this testing, and will pause my report here. Before I close this post, however, I’ll add one other thought.

A Comment on the Name: Smart Bronze.

As a customer, who is buying this product to use myself, the name almost makes some sense. First of all, unlike many other base-metal clay products (from Hadar and others), it should be possible to process this one in a single (reduced oxygen) firing. Many of the others require two firings of one sort or another, but this product was developed to be “smart” enough to both debinder and sinter all in one go. Which is very convenient! Also, it does polish up to a lovely color, a color that one might call “very smart”…. (And, for anyone familiar with Hadar’s Clays, a curious pun in comparison to her Brilliant Bronze.) But, as a maker, I do find it an awkward name. It’s not one I would want to use on the label of a piece I made using it. More on this in a later post (most likely after I’ve finished this whole series on testing).

Because that’s it for right now. But I’ll be back as soon as I can with more info.

Posted in Learning Metal Clay, Technical Details | Tagged: , , , | Leave a Comment »

Smart Bronze: By Jove, I Think I’ve Got It! (Post 1 of 6)

Posted by C Scheftic on 2013/06/28

The newest Hadar’s Metal Clay Powder product is called Smart Bronze. I spent over a month playing around with it, and I think I finally figured out some things about it. (Not everything, mind you, but at last I feel well on my way!) After then spending a few weeks catching up on a several other urgent tasks, I’m hoping I can finally find time to post here a collection of thoughts and experiences.

A Bit of Context.

OK, it’s not like a spent a solid month and more figuring this out. The time I spent did cover most of May, slipping into early June, but it was in dribs and drabs. To begin with, I am not a full-time jewelry artist! I do learn, explore, make, sell, write, and teach about it. Some weeks, it does end up being just about all I do. But there are other stretches when I don’t touch the stuff at all. Most of the time it’s somewhere in between those extremes. Averaging out over a whole year, I figure that I do this about quarter-time, or maybe a third (depending on how you count both “this” stuff and “full” time…), but only that. Whatever the actual proportion, it’s a delightful fraction, I must say! But more than that would feel like work and, though I am trying to treat it all in a very professional way, I also really want to keep this for fun. My point is that the fun I had figuring out Smart Bronze was a very part-time part of that part-time activity: though I’ll drag the description out for several posts, in reality it all went rather quickly.

Also, I have two kilns, in two different styles: one firebrick, and one ceramic muffle. So far, I’ve done all my Smart Bronze testing in the firebrick kiln. When I find some more drib-drab time, I’ll try it out in the muffle kiln too. But if you are reading this in the hope of learning from my experience before firing the stuff yourself, it may help you to know that both my kilns have inside dimensions of about 8 by 8 by 6 inches. The firebrick one can reach 2350°F; the muffle, 2000°F. Smart Bronze fires well below both those limits.

To fire base metal powder clay in my firebrick kiln, I most often use a box I’ve folded myself out of stainless steel tool wrap (e.g., the No Flake Foil sold by CoolTools), and the carbon that Hadar Jacobson recommends in her Instruction Manual (coconut shell-based, acid-washed, size 12×40). With that particular combination of kiln + box + carbon, for the majority of Hadar’s clays, through testing I have found that the ramp-speed she suggests works fine, but I should lower the goal-temperature by about 20°F from what she recommends to get full sintering without blistering or other signs of over-firing. (It could just be a difference in our kilns, but another factor could be that my lightweight foil boxes transmit the heat a little better than the heavier stainless steel bowls I think she uses?) I might do a little more adjusting for smaller containers or much fuller loads, but for what I was firing in these trials, I started out thinking that a drop of 20° should be the only adjustment I’d need.

Finally, whenever I first try any new clay, I always do at least one “test” firing first. I know that some artists plunge right in to make a new masterpiece and just fire it, but I can’t bring myself to risk something like that until I feel really certain I’ve mastered enough of the relevant firing details. At the other extreme, some people will just roll out a plain slab of clay about the same size and thickness as their intended masterpiece, and test-fire that. While much safer, I can’t quite bring myself to simply “waste” a good chunk of metal (even if it’s not a precious metal) that way, not to mention the firing -time and –energy. I have found, instead, a middle ground that works for me: I make several very simple pieces. If they fail, I’ve lost a few more minutes of my time than I would have if I’d just fired a plain slab. But I want to believe that the firing will work and, when it does, then I will have a simple little piece that I can sell inexpensively or give as a small token-style gift (instead of just a piece of “waste” material).

Working with Smart Bronze.

I found the working properties of this product to be comparable to other Hadar’s Metal Clay powders. That is, it is easy to mix into a clay form. It’s easy to work with. It has a very nice feel to it. None of Hadar’s clays are sticky, like some metal clays tend to be. (Yes, you do want to use a bit of olive oil between them and any textures, stamps or cutters you press into moist clay, but it’s not like you have to work in a complete cloud of release agents to keep it from sticking to everything!) Smart Bronze has a very good working time, and it’s easy to rehydrate if you work more slowly. It dries to a very hard state, which makes it easy to clean up and polish pre-fire (which is a feature I really appreciate).

Firing Smart Bronze.

Ah, but now, this is where the real testing comes in.

The latest version of Hadar’s Instruction Manual is always available as a .pdf file for free download from her blog. (It’s available from some other sites too, but Hadar’s blog reliably has the most up-to-date edition.) I first tried firing Smart Bronze when the then-latest version of the manual was from April 30, 2013, and it gave this information for firing that new “Smart Bronze” alloy:

Brick kiln: Ramp at 1400°F/778°C per hour to 1440°F/782°C. Hold 2 hours.
Muffle kiln: Ramp at 1400°/778°C per hour to 1495°F/810°C. Hold 2 hours.

By the time I’d completed my first few test loads, there was a newer version, dated May 15, 2013, and it had been updated to read:

Brick kiln: Ramp at 1400°F/778°C per hour to 1430°F/776°C. Hold 2 hours.
Muffle kiln: Ramp at 1400°F/778°C per hour to 1470°F/799°C. Hold 2 hours.
Pieces thicker then 10 cards or mixed with other metals should be pre-fired.

Notice that, while the ramp (speed) remains the same, there are some significant differences in the goal-temperature from one to the next: a ten-degree drop for brick kilns, and a whole twenty-five degree drop for muffle kilns! So the tests I am about to describe involve changes in temperature that are due to both new temperatures recommendations from Hadar and observation of my own results. (And readers of this blog should be able to skip the first few “issues” I encountered by just checking for the very latest version of the Instruction Manual at Hadar’s website! It’s possible there will be yet more modifications as Hadar travels and gets to see for herself how this product works in many other kilns.)

But this post seems long enough for now. I’ll be back soon with what I found out once I really got going! (Yes, in addition to my earlier comments that my testing spanned more than a month, that’s another really big hint that it took me “several” test firings to work this out!)

Posted in Learning Metal Clay, Technical Details | Tagged: , , , | Leave a Comment »

How long did it take you to learn how to do this?

Posted by C Scheftic on 2013/05/30

So far, I have not made many pieces out of steel. I have used bit of steel as small accents, but only a few times as the main element in my work.

But, over the last few weeks, a number of us who work with and teach about Hadar’s Clays have been doing some explorations with the “Low Shrinkage Steel XT” product. Shown is a photo of a dozen pieces, which are about half of the ones I made during this exercise. While most of them turned out pretty much as I would have expected, there were a few surprises that I’m still trying to understand. I will likely have to make a few more pieces like the surprise-ones (when I find some more time to just explore), to see if the pattern repeats or if the surprises were nothing more than the occasional surprise.

Specifically, we’ve been looking at shrinkage. All metal clays shrink from when you first shape a piece in that medium to when it ends up as fully-sintered metal. Different products shrink different amounts. Some shrink more as they dry (go from wet clay to what we call greenware); others shrink more as they are fired (as the binder burns out and the atoms sinter (arrange themselves into a regular metal structure)).

Even working with just one product, different pieces will shrink different amounts in different directions. This leads to some interesting results, such as the fact that rings (usually) shrink smaller (though how much depends on the size and shape of the ring), the clay around cracks (usually) shrinks away from the opening (thus making it look larger after it’s been fired), and holes (usually) remain about the same size (depending on how big and what shape they are in relation to the clay around them).

With my background in mathematics and statistics, I tend to think of shrinkage as a “degrees of freedom” issue: if a clay wants to shrink a certain percentage and, for some reason, it can’t shrink that much in one direction, it compensates by shrinking more in the direction where it has more freedom to shrink. Except, it’s nowhere near as exact as that might make it sound…. It may vary from one time to the next. It may also vary from one artist to the next.

Why? Is it the amount of water in the clay? The humidity in the air? The altitude at which you work? The attitude with which you work? Phase of the moon? I could go on, but I think you get the idea: some variations are fairly clear while, for others, your guess is as good as mine! (Feel free to suggest additional ideas in the comments: I could use both solid suggestions and a few good laughs!)

But I write all this simply because I wanted to take a moment to say how much I enjoy exploring this entire “powder metallurgy” process: trying slight variations that go increasingly farther away from an original starting point just to see what happens. That is, in relation to the question in the title of this post (which I’ve been asked more times than I care to count) my answer is this: I hope to continue to learn as long as possible. I want to keep adding more information to my store of knowledge but, at the same time, I hope I’m never done learning!

Posted in General Techniques, Learning Metal Clay | Tagged: , , , , , | Leave a Comment »

Pre-firing Hadar’s Clays

Posted by C Scheftic on 2013/04/14

A Bit of Background (skip to next section if you already know the science behind metal clay firing):

Stainless Steel Bowl with
base metal greenware
(yellow bronze and
burnished brilliant bronze).

The firing of fine silver metal clays is easy! Design, construction, and finishing are each more complex than the firing itself. Yes, firing does involve some details but, once you’ve sorted out placement, position, temperature, and time, you may just turn on the kiln and go do something else while the binder burns out, the metal particles sinter, and the load finishes.

Metal clay artists working with other metals, however, know that the firing process for those is much more complex. The difference is that precious metals don’t react with oxygen when they’re heated, but non-precious metals do react. This may cause undesirable color changes (such as firescale from the copper in sterling silver). Even worse, though, these reactions can change and damage the actual structure of the solid metal even if you’re working it at temperatures lower than where they’d melt. (This is not specific to metal clay: you can destroy other metal forms the same way.) Could you just restrict the amount of oxygen during the sintering process? Not exactly! Because the “clay” in metal clay involves binders, you first have to burn off all the binder before the metal particles can sinter. And, to burn off the binder, you need oxygen. In short: at first, you do need oxygen and then, later on, you don’t want to have it.

So each “base metal” clay product provides its own instructions for firing. These offer their approach for how to (a) allow enough oxygen to burn off the binder, while (b) still allowing the metal to sinter successfully. If you understand that as the goal, and like to play around, you can try various ways to make it happen regardless of what any particular manufacturer recommends.

(A couple of years ago I wrote a series of ten posts about my experiences firing Art Clay Copper according to their instructions. In the end, I decided that I was going to abandon Art Clay’s all-open-air approach, and stick to one of the strategies that restrict oxygen during sintering even for that product.)

Now, to the Point of this Post:

For many years, in the instruction manual provided on her blog, Hadar Jacobson recommended a two-phase firing schedule for her clays (which also required a cooling phase in between). It took a long time to complete a full firing cycle (basically an entire work day), but it worked. The length of the firing process did somewhat limit the number of production runs a metal clay artist could complete, depending on how many kilns you had available, but it was even more limiting in relation to most class and workshop settings.

At some point in the last year or so, Hadar started talking about a different approach. This one used something she called pre-firing (a relatively short (half-hour-ish) firing on top of carbon to burn off the binder) followed by one full-scale firing (where you then cover the pieces with carbon and fire for a couple hours to sinter the metal). Best of all, there was no need to wait between the two! Once pre-firing was done, you could proceed straight to the final firing. That pretty much cuts in half the time required to fire a complete load.

Hadar offered two suggestions for doing this pre-firing. In each, you place the pieces on top of a layer of carbon inside an appropriate firing vessel. Then you burn off their binder either:

  • on the top of a gas stove burner, or
  • inside a kiln.
No Flake Foil Box with
six pieces of
base metal greenware &
one repair to re-fire.

Regardless of which device you chose to use, you would then cover the pieces with carbon and follow up with a firing that was pretty much the same as her old phase-2 process.

I tried it both ways and, suddenly, I began having all sorts of problems. Yes, they were ones I had seen before, but then only rarely, and they had provided enough clues for me to quickly diagnose any problems and fix them. Now, however, I was not finding ways to fix things. And, hey, the old method might have been long, but it worked for me. So I kept on using it.

But with the latest version of her Instruction Manual, Hadar has stopped even mentioning the old way. And pretty much everyone in the group of teachers going for accreditation in her program seemed to have shifted over. So, sigh, I’ve spent the last few weeks simply trying to figure out open-air pre-firing for myself.

I have not yet mastered the in-kiln method, but it seems I’m not the only one having some trouble with that one. The problem there is that, sometimes, part of the binder on the “down” side of pieces does not burn out, so the metal then cannot sinter. This may stem from the fact that, with no heat coming up from the bottom, the carbon is insulating that area too well. Heat will reach that side of each piece, eventually, once the carbon itself gets hot enough, but that may risk leaving top-sides exposed to oxygen for too long. Another approach, trying to solve that by turning the pieces over during the pre-firing, means handling very hot pieces in their most fragile state, de-bindered but un-sintered. No, thank you! Some people seem satisfied to solve this dilemma by simply firing their pieces twice, once with each side up; but if it takes that much to get them to sinter I figure I might as well just stick with the older method.

Stainless Steel Bowl with
de-bindered base metals.
(Re-fired piece is the one not black.)

But I think I am finally getting the hang of the stove-top method!!! The problems I’d been having were that my pieces were curling and/or cracking, which I knew meant they were getting too hot too fast. Hadar kept talking about turning the heat down if you saw the pieces on fire, but I never saw any flames. She talked about turning the heat down once you saw binder-smoke starting to appear, and I was taking a lot of care to do that immediately. She and the other instructors talked about how long their pre-firings took, and mine were well within those limits. After multiple attempts, I finally figured out that I really did have to heat the pieces on a very, very low flame. Maybe it’s just my stove, but I’m down to a mere fraction of the flame I’d use simply to boil water. Curiously, doing it this way does not seem to take much longer over-all than what I’d been doing before: it takes a bit longer before I see any binder burning off, but the pieces blacken completely rather quickly.

Another problem I’d had was that sometimes one or even a few pieces would not seem to burn off their binder. But I’m getting better at moving the container around over the flame, when that does happens, which seems to solve that.

I am still having the occasional failure (i.e., a bit more often than the old way), but I’m clearly making progress here. All seven butterflies in my last mid-fire load, for example, turned out fine.

Seven Butterflies
with two polished
to confirm sintering.

But, there’s something else to consider. In addition to the time that is “lost” to the occasional failure, one also has to actively watch the entire pre-firing process. You can’t do anything else useful. Well, maybe you can; but I sure can’t. It happens too quickly to catch a brief nap (yeah, I’ve been known on occasion to sleep through an entire silver-load); and it takes too much attention to spend time doing fine-finishing on pieces from the last load (which is what I usually try to do during firings). With silver pieces, I never really counted any “firing” time into their cost because I could accomplish other things while that was happening; with these pieces, however, now I do have to factor that into the price I charge for them. (I’d have that same dilemma with the in-kiln pre-fire method.) So I’m still trying to figure out how I feel about all this, but at least I have that feeling of accomplishment over approaching mastery of what currently seems to be the most popular method for pre-firing Hadar’s clays.

Seven Butterflies with
preliminary polishing complete.

By the way, even though I really am kind of swamped with to-dos, I finally figured out a way to add captions to photos that would work with this blog! It was easy, once I spent a bit of time on the task. I mention it, however, because there are some other metal clay hints buried in those notes; I’m really hoping to find time to write more about other aspects of firing in the coming weeks….

Oh, and all the pollinator-pieces used as illustrations here will be available at the Western PA Garden Marketplace on April 20. It’s not an art-event: the emphasis is on gardens and landscaping. My being there is just a little “bonus” treat, on top of all the plants and garden supplies. But if you’re reading this from the western PA area, it’d be great if you were to stop by and say “Hello!” on Saturday.
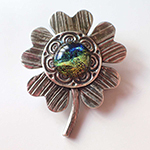
Posted in General Techniques, Learning Metal Clay, Technical Details | Tagged: , , , , , , | 6 Comments »

Accreditation Program for Hadar’s Clay™ Teachers

Posted by C Scheftic on 2013/03/08

Well, I still don’t seem to have my head above water, schedule-wise, but there is a bit of news I’ve been sitting on for over a week now, and I just have to say something about that!

I have mentioned Hadar Jacobson in this blog before. I’ve found myself inspired by much of her metal clay art. I really enjoyed participating in a workshop she taught here just about two years ago (which I reported about in a series of six posts that started here). I find her clays to be delightful to work with. And I’ve been honored to have three of the pieces I’ve made using those clays selected as illustrations in two of her books.

And the latest news items, both Hadar-related, are these:


  1. She is starting an Accreditation Program for Hadar’s Clay™ Teachers … and … [drum roll …] …
  2. She has invited me to be in the “charter group” of teachers to participate in this!

(If it weren’t for the jaw-pain that, at the moment, I know would result from jumping up and down (even just once, let alone for days on end now), I’d show a video of that here. Instead, I’ll just include a photo of of one of my pieces from her book, Patterns of Color in Metal Clay.)

Now, we are just at the beginning of a year-long process. On the one hand, I am thrilled that there will be a cadre of us (all around the world!) spending pretty much a whole year working on a series of common projects, talking about the results, comparing notes, seeing what is and is not reproducible and what really does vary by individual, how to handle all this in various situations both in-class and on-line, and more, all culminating in a series of get-together workshops next year. On the other hand, I am also a bit intimidated to think that this will take a whole year of regular tasks and assignments just to get through the process, so I’m betting that some folks will drop out along the way. At the moment, I am simply hoping that I can hold on (although, of course, another part of me really does want to make it through “with flying colors”…).

But one of the things that really helps to maintain my fascination with the whole metal clay / powder metallurgy process is how intrigued I am by the continual learning that I am privileged to gain with it, and the opportunities I then have to share all that with others through classes, workshops, demonstrations, publications, and more. So that is the spirit in which I accepted the invitation. We’ll just have to see how it goes!

Posted in Learning Metal Clay, Teaching Metal Clay | Tagged: , , , , | 1 Comment »

Pushing, in more ways than one….

Posted by C Scheftic on 2012/07/18

About a month ago, I wrote a post about some pieces I am calling “Push Pendants” because they are made by pushing some metal clay through a piece of metal mesh. Given that I like making reversible pieces, furthermore, if you read my last post you would have seen a photo of the “other side” of yet another one of these pushed-pieces. The first photo with this post shows its pushed-side, all polished up to a nice shine. (You should be able to tell from the shape which (un-polished) “other” side it matches there….)

They’re fun to make, and I admit the original idea was not mine. They are adapted from a slightly different project I noticed a while ago in Mary Hettmansperger’s delightful book, Mixed Metal Jewelry Workshop. The approach used by “Mary Hetts” is really simple: you make the combo, fire it, then frame it in sheet metal. (Check out her book for all sorts of other useful details!) That strategy minimized one major potential issue: as the clay is fired–both burning off binder and sintering the powder into a solid metal–it shrinks. The wire mesh does not shrink. Warping and cracking can occur in the parts that began as clay! Her process minimizes that as a problem by having you frame the sintered metal with some other solid product (e.g., sheet metal, but you could use wood or fiber or plastic or whatever else you want). First of all, you don’t get very much cracking that way; secondly, you can probably just cover up any you do get.

But I started to wonder: what if you just framed it with more clay from the start? How much of a problem could that be? What are the variables involved? How much more difficult would that make the whole task? Would it still be a good project for a workshop that included both experienced and novice metal clay artisans?

After several months of experimenting (and confirming a few of my suspicions with Hadar Jacobson at the recent PMC Guild conference), it is looking to me as though:

  • With these, it helps if you are someone who is willing to accept what the kiln gives you: they’re not totally unpredictable, but even tiny variations in construction can have very noticeable effects!
  • Giving the piece a bit of curvature, a hint of the direction in which you want it to warp, can be helpful.
  • Really thin surfaces, front or back, do tend to crack.
  • Thicker surfaces have a more complex relationship to the warping and cracking, but there are ways to minimize such problems (and to make it easier on yourself to patch cracks and refire if you find that desirable).
  • The position of the mesh in relation to the frame matters as to whether and how much the piece will crack along the side.
  • The variance in shrinkage rates across the different clays makes a difference in the patterns of shrinkage and warping in these pieces. The pattern of least to worst is predictable; the exact extent seems not to be.

I’ve had people ask me why I bother with these clays if I have such problems with them. Well, the answer is that both the explorations and the results are, overall, delightful. Most of the time, pieces do turn out fine. And some of the so-called problems that do occur are ones I’d never have with silver because it’s just much simpler and more reliable to fire. But I realize that others happen because I try things with these metals that I would never think to try with silver or, if I did think of them, would be unlikely to try because of the price of silver.

In this example, besides simply pushing clay through mesh, I feel like I am pushing the envelope; that is, I feel like I am also extending the current limits of the clay’s performance, going beyond some commonly-perceived boundaries of working with it. I find the process of exploration to be fun, itself, in addition to any reactions I have to the resulting pieces or the subsequent workshops I may teach from what I’ve learned.

Posted in General Techniques, Learning Metal Clay, Teaching Metal Clay, Technical Details | Tagged: , , , | Leave a Comment »

Networking: Human versus Electronic

Posted by C Scheftic on 2012/06/25

I’m just back from the (last ever) PMC Guild Conference, held just outside of Cincinatti, Ohio.

The very BEST thing about the gathering involved the interactions among all the participants. Whether it was a presenter sharing information, an audience member asking or answering a question, folks in the vendor’s hall doing a demonstration, or all the interactions among everyone at the various social events (including out in the swimming pool under the stars late at night) … well, those interactions are the things that make this such a valuable event.

Blogs, websites, newsgroups, Facebook, online workshops, etc., are fine, but nothing like that wonderful, live, personal interaction among the hundreds of attendees. And seeing everyone’s “bling” live, for real, in person! Yes, many of the initiatives that the PMC Guild and Art Clay Society started have been picked up elsewhere. But not the big conferences; at least, not yet. And I’ve always found those to be very special events; and, coming from someone who generally prefers small groups to crowds, that’s really saying something! A girl can hope that good, strong, viable alternatives will re-appear in the next year or two….

Because I found that electronic-versus-human difference to be magnified even further by what I consider the worst part of this year’s event: the extremely limited ‘net access at the meeting site itself (especially since it had promoted its “Free WiFi” as part of the service). I really had hoped to get started on at least some new posts while on the road immersed in thoughts of metal clay (a few to finish and post immediately, and others to continue working on to post over the next week or two). But those posts just didn’t happen, and my schedule now is jammed up. I’ll try to get a couple of posts going, but it may be a few weeks before I can get back to any real writing.

Since I want to end this note with a positive thought, more in keeping with my overall positive feeling about the event, I will end with a photo from Tim McCreight’s “History of PMC” talk, showing him with CeCe Wire. My guess is that this was taken in 2006? Anyway, I’ve enjoyed learning things from both of them (whether it was when we agreed, or disagreed, about the best way to approach a construction…).

There’ll be more here about other people and interactions, plus news about my own workshops and projects, as soon as I can find the time. In the meantime, regarding the title of this post: yep, the direct human interaction won, for sure!

Posted in Events, Guild, Learning Metal Clay | Tagged: | 2 Comments »

Doubly-Coiled Metal Bracelets

Posted by C Scheftic on 2012/05/15

While it does take study, practice, more practice, patience, practice, skill, more practice, talent, and still more study and practice to do exceptional work with any medium, including metal clay, one of the things I love about this approach is the way that even a first-time novice can actually produce a delightful and amazing piece. You just have to be willing to take the plunge and try it!

But if you don’t really have a clue what the stuff is, how do you convince yourself to do that? As an instructor, one of the challenges I’ve found is to devise projects that are simple enough for even a beginner to complete in a reasonable amount of time, yet with something “new” that the returning student can learn. So I have a particular appreciation for others who clearly address that conundrum.

And there I was one recent day, browsing through my copy of the book, Mixed Metal Jewelry Workshop, by the delightful Mary Hettmansperger, when I saw what she describes as “probably the simplest project in this book.” It involves winding wire into a bangle-bracelet shape, taking some care with the sizing of that, and then wrapping it with “organic coils” of metal clay. The end result is so interesting, but the process permits lots of exploration!

How “wonky” can you make the clay-coils before they break all apart as you wrap them? How thin can you work them before they dry out and crack too much? How thick can they be and still let you wrap them? How does the shrinkage of the clay work with the fixed size of the wire? How (and how much) does any coiling on the wire interact with the coiling of the clay? How can you use combinations of different clays? How do you want to design them so they fit nicely and are comfortable to wear? Those are the questions that came to my mind in the first half-minute of looking at the project; after a few hours of trying this, I had dozens more, going well beyond what was covered in the book.

The photo shows my first four attempts. (Two were brushed after firing, while two are shown with their magical kiln-colors.) More exist already (still unphotographed…), already veering in other directions, with yet more to come after those! I hope to offer some of those variations in workshops over the summer: Of course, I will credit “Mary Hetts” for the original idea, direct everyone to the book that inspired my path to new options, and suggest that folks get it to inspire their own explorations in other ways.

Of course, one advantage to making pendants and earrings, rather than bracelets or rings, is that exact-sizing is not such an issue with them. Even with cuff- or link-style bracelets, you have more sizing options than with these bangles. So that’s a major feature to address. And one disadvantage to using the “base metal” clays for these is how few you can fire at one time. So this fun project is slow going in its own way, but it’s my incentive, at last, to look at alternative firing approaches. There has to be an easier way to make lots more of these, for my own enjoyment as well as for both my students and customers. Ahhh, just what I needed: yet another exploration on which to spend time! But, what else are summers for, eh?

Posted in Learning Metal Clay, Teaching Metal Clay | Tagged: , , , | Leave a Comment »

Plan – Execute – Be Surprised…

Posted by C Scheftic on 2011/11/26

Another unplanned gap in posting here, sigh. I just did a couple of things that, I’m told, are not what others think of as typical for a grandmother. What can I say? So what if I went to visit the week before Thanksgiving? And spent part of the time helping the younger one with his statistics class? Between my schedule and theirs, my interests and theirs, it sure made sense to me.

For reasons not worth going into, however, on top of that there was also a bit of a problem with ‘net connections. I could get on, but it involved either various contortions (due to short cables instead of my usual wireless set-up) or tiny keyboard (on phone instead) rather than comfortable seating. So I just figured I’d take time to enjoy the people I was with, give thanks for that opportunity, and think about posting again after I got back to my own home. Even though, now, I’m into the crush of holiday-events, I’ll keep trying to find spare moments….

So, given those surprises, let me re-start with something else that surprised me.

Regular readers of this blog will have already seen the piece in the upper right of the first photo with this post (the one, in that photo, with the black cord). It contains a draped-disk of bronze positioned on a square of rose bronze. The other piece in that photo, in the lower left position and not yet hung from anything, includes a draped-disk of bronze positioned on a square of copper that I finished about a month later (just a few days before I headed out of town).

To summarize: both the draped disks are made from (regular) yellow bronze; the backing disks are made of either copper or (special) rose bronze. At first glance, all the colors seemed fairly close to each other: both yellow-bronzes looked the same, and the copper was pretty close in color to the rose bronze. There was just a tiny bit of “aging” visible on the older, all-bronze piece. I liked how both of them had turned out, so they were among the ones I packed up with chains, beads, stringing material, crimps, jump rings, clasps, plus of course a collection of tools, and headed south on my trip to spend time with “the kids.”

A day or so later, I took out the first one, and chose an assortment of items to hang it from. On multi-strand beading wire, I made little segments of some copper- and bronze-colored freshwater pearls, connected them with chain segments, added one of my hand-made bronze toggle clasps (embellished with a little coil of copper), and connected all the bits together. So far, so good.

The next day, I took out another assortment to work on. This time, I used bronze wire to build up little segments of goldstone beads, and connected them with bits of chain (different than I’d used the previous day). There were more events going on that day so, once I had what I thought was a good length of that, I went off to play.

On the third day, I took out the bronze on copper focal bead. I wasn’t particularly surprised that the copper had begun to “age” already, darkening more (much more quickly) than had the rose bronze piece. But I did find three surprises: (1) the yellow bronze on this piece had started to darken with a distinctly green-ish hue; (2) there were bits of copper near the draped dome that (I am guessing) must have alloyed with the bronze in that (to a sort of rose-bronze that had not been immediately apparent) and those areas were not aging as quickly, leaving them a bit lighter; and (3) that this difference (alloying?) was also visible on the flat side of the piece, where a huge “central’ area of the texture was slightly lighter too. Once I recovered from my surprise, I decided I was delighted with these changes. I finished assembling everything: two more pieces done and ready to be given the opportunity to go to new homes themselves.

As soon as I got back, these were among the pieces I delivered to the Sweetwater Art Center for their annual (and delightful) “h*oliday mART” show. If you’re in the area (they are in Sewickley, PA, just down the Ohio River a few miles from its beginning in Pittsburgh), do check it out; it’s one of my favorite local art shows each year. It will run from November 27 through December 4. (Well, actually, it opens with a preview party / fundraiser tonight, and I’ll be there!)

Posted in Learning Metal Clay, Technical Details | Tagged: , , | 3 Comments »

Trying Rose Bronze (Part 4 of 4 … for now, at least)

Posted by C Scheftic on 2011/10/15

Before I end this series of posts about rose bronze, I’ll note the one major lesson learned (or, more accurately, re-learned) while working with that form of metal clay for the very first time:

Precious Metal Clays (silver, gold) and Non-precious ones (bronze, copper, steel) differ in how they dry! I can’t quantify the difference, but it’s there, mixed in with a number of related factors. With silver, for example, I will often just let pieces air-dry. I will have several pieces under construction at once so, while one is drying, I’ll work on others. If I want to finish a particular piece more quickly, I’ll put it in dehydrator. (I have a very old Excalibur that I use in my studio. For workshops elsewhere, I cart around a hairdryer and a cardboard box with a hole for the dryer nozzle.) I have several mug warmers, but rarely use them.

With non-precious metals, “the word” is that they may not sinter as well if they’ve been air-dried: It’s best to dry them as quickly as possible. When Hadar was here last March, we did use mug warmers in that workshop. I’ve done that with other pieces made since then too: not a deliberate choice, but more because I was rearranging furniture in my studio and didn’t have a good place for the dehydrator during the stretch when I made a lot of other bronze and copper pieces. With these, however, I just stuck them into the dehydrator, like I do with silver I want to dry quickly. Wrong!!! ‘Tis best to keep this stuff right in front of you, on a mug warmer, so you can flip them over frequently to avoid warping. (Silver may warp too, but there’s a difference: either it takes a bit longer to happen, such that it’s easier for me to catch before it gets really bad, or else I somehow work more quickly with the product, such that I’m setting a new piece off to dry and thus checking on previous ones more quickly. I am tempted to believe it’s the former but, since before this I never thought to time it all, I can’t rule out the latter.)

I had to apply some serious repair techniques to several of these, to restore flat surfaces that had warped so much that elements I’d planned to pair up and attach together no longer fit snugly against each other. It wasn’t that difficult to do, but having to re-moisten the warped surfaces and press them between two flat surfaces did take up both time and workspace area that could have been used more productively.

Hadar does say that flat pieces are the most likely to warp while drying but, in this case, even the simple domed piece (lower left) warped slightly out of round. I did not try to repair that. I decided that, by sheer luck, that piece looked fine even if it is slightly oval. But I’ll have to pay more attention to domed pieces in the future too, because there are times when that will matter.

Still, I think the all turned out fine in the end and I had lots of fun making these pieces. Plus, working on them helped to generate some other ideas I want to try out with these clays too. As ever, the question remains: how to find the time to make them! Please stay tuned for reports on that….

Posted in General Techniques, Learning Metal Clay | Tagged: , , | Leave a Comment »

Trying Rose Bronze (Part 3 of 4)

Posted by C Scheftic on 2011/10/14

So far, I’ve polished five of the eight sides, plus just the edge of a sixth. I may or may not polish the remaining three.

The thing about polishing is that it removes all the really vivid coloring that often comes out during the firing. And, although you can still see a bit of contrast between the yellow- and rose-bronze colors, even that is no longer anything like the difference that was there before the pieces were fired. But polishing does give that more-expected “metal” look to the pieces. I like the result of polishing, but I also like the look from not polishing absolutely everything. What about you?

The one thing that is tempting me to polish at least part of the double-drape piece in the upper right position is to check its color. (Or, I could just wait and check this with some other pieces later on.) Because it seems that the “rose” of the domed circle (lower left), as shown on its one fully-polished side, is darker than the “rose” of the two that have some yellow bronze elements in addition to ones in rose bronze (upper left and lower right). Did the addition of the yellow bronze lead to that? Or is it, at this point, just a spurious correlation from insufficient data?

Time will tell, I guess: How might the color of these pieces change over time? Will I see the same effect in future pieces of pure rose bronze, of rose with yellow bronze, of rose bronze with copper, etc.? What if I made several more “pairs” of pieces, with half having different “color” elements attached as I’ve done here, and the other half with elements attached (perhaps riveted?) together after firing? Hmmm, thinking about how to test that has prompted a few new designs entirely in my mind.

That’ll take me a while to get to. In the meantime, I’ll finish this series shortly, with one more post where I’ll share some notes to myself about what I want to remember from the making of these pieces.

Posted in General Techniques, Learning Metal Clay | Tagged: , , | Leave a Comment »

Trying Rose Bronze (Part 2 of 4)

Posted by C Scheftic on 2011/10/13

Returning to the same four pieces I introduced in my last post, the photos here show what they looked like straight from the kiln. All the colors, from the vivid yellow and rose ones to the charred black, are simply what the kiln chose to give me.

Perhaps I should add that the “charred” black is just a “color” — the texture of the metal itself held up just fine.

Notice that, at this point, only the flat side of the square one (lower right in the second photo) really seems to show that I used two different colors of bronze.

The other thing I notice is that the “convex” sides are, in general, darker than the “other” sides. When placed in the firing box, I just happened to position them so all the convex sides faced up (i.e., like the first photo in each pair that I’m using with the posts in this series). At this point, I suspect that positioning, not doming, is the cause of that darkening, but it’s something I’ll try to remember to keep checking in the future.

After taking those photos, it was time to go do some post-fire polishing. I’ll show the results from that shortly….

Posted in General Techniques, Learning Metal Clay | Tagged: , , | 2 Comments »

Trying Rose Bronze (Part 1 of 4)

Posted by C Scheftic on 2011/10/10

As I’d mentioned a couple of posts ago, I finally got around to seeing what it’s like to work with some of Hadar Jacobson’s Rose Bronze metal clay. Shown with this post are the first four pieces I tried.

Let me begin with this question: what is rose bronze? To answer that, it helps to know what bronze is, in general: an alloy of copper and tin. If you put in “enough” tin, the result moves from the reddish “copper” color to more of a yellow or brown that we typically think of as the “bronze” color (as well as giving it the strength and other characteristics of bronze). If you use less tin, and thus more copper, the final product retains more of that coppery-color while still acting much like bronze in general. (Similarly, rose gold is an alloy that contains both gold and copper, such that it there is enough copper to give it that rosy-coppery color.)

So the questions that I had about this product were:
(a) How would it work, in general (would it act much like regular bronze)?
(b) How would it work in combination with other metal clays (starting with the standard yellow bronze, for now, but eventually I’ll check others too)?
(c) What would it look like, in comparison with, and contrast to, copper and bronze?

For my first attempts then, until I was sure of how it would work, I didn’t spend very much time either designing or making the pieces. Then again since I had every reason to believe it would work much like cooper and bronze do, my first pieces involved more than the simple “charms” I often use for testing a completely new product. Still, I did not go much beyond the very basic techniques of rolling, texturing, draping, layering, and doming, though I did try a mix of flat and curved shapes.

Of course, this being me … I did make all four of my first “test” pieces reversible! In the first photo, above, you can see that each of them has some curvature to it, with one side that is clearly convex (like the bottom or underside of a bowl). The second photo, to the left, shows the range I first tried on the “other” side of each one: perhaps concave (like the inside of a bowl), or else flat and layered, or even another convex draped shape. I don’t consider the sides shown in the second set to be the “back” of any piece: I just consider those to be the “other” sides, ones which could easily be worn in front.

Note that, while I used mostly the darkish reddish “rose bronze” clay, three of the eight sides also contain one or more elements made from regular “yellow bronze” too. While the difference in color between the two is highly obvious with pieces in the greenware (dried clay) state, I suspected that they’d end up almost similar after being fired. And I was right!

More on that shortly….

Posted in General Techniques, Learning Metal Clay | Tagged: , , | Leave a Comment »

Making My Ring Come Out the Size I Wanted.

Posted by C Scheftic on 2011/09/16

Given how many pieces of various sorts I have made out of the different metal clays over the years, relatively speaking I have not made many rings. What’s the difference? I do make rings for myself; I will teach others how to make them; I may give the occasional one as a gift; but, at this point at least, I rarely make rings to sell.

Sizing is an issue for any ring-maker. Since metal clays shrink as they sinter into a more-solid metal form, however, size is a detail that really matters when making rings. (This is one reason why I would never use a mix of clays for a basic band ring. If I can’t be sure of the shrinkage, I may have to spend more time post-fire in resizing it. Using “fresh” clay is a simple way to reduce the chance of that! That’s also why I held off posting this item until I could write the two entries that preceded it this month….)

When I do make rings, I often start by making a flat piece that will become my ring’s band, firing that, then shaping, sizing, and adjusting the resulting piece of metal as needed, all before adding the top and re-firing. While that method does require two firings, there are several very simple ways to test and adjust the ring band before proceeding. The already-fired band won’t shrink any more, so I can be pretty sure what size the ring will come out to be before I start on its decorative top.

The recent class I took at the Valley Art Center with Gordon Uyehara, however, used a different technique. We formed the clay around a ring mandrel, let that dry, then added the top, and fired everything at once. It’s a hold-your-breath situation waiting for the rings to come out of the kiln, to see what size you end up with. Yes, there are methods for adjusting size, if necessary, to make rings larger (relatively easy with a simple band) or smaller (can be trickier, depending on the ring, and does require yet another firing, whether in kiln or via soldering). Personally, I find it more thrilling to have the ring go into the kiln and come back out the right size in the first place, but I was happy to venture down the other route for that one day.

Also, while I’ve used both PMC and Art Clay for rings with the double-fire method, I’ve only used PMC-brand clays for band-rings made the way we did at that workshop. (Why? Because I’ve only done them that way in workshops, specifically, in ones where the clay was included in the class price.) For Gordon’s Pearl Box Ring class, however, we could bring whatever clay we wanted. Since he works mostly with Art Clay, that’s what I took. If I had questions about working with it on the ring, I could get help from someone with lots of experience using it. Here’s what happened with sizing (sorry, but rings require simple math):


  • My goal was a size 8 ring. Anything from 7.75 to 8.25 would be OK. A little smaller would be tolerable. But 8.5 would be bigger than I wanted, and I did not want to have to do anything to reduce the size afterwards.

  • Gordon reported that Art Clay says to make a ring 2 sizes larger, to account for shrinkage.

    • Thus I should make it a 10, so it’d shrink to an 8.


  • But, he added, since you’re covering your ring mandrel with a teflon strip or another easy-release surface, you should figure that adds about a half-size. Position it 1.5 sizes beyond your goal.

    • If I made it on the mandrel mark of 9.5 then, with wrap, that would give me the 10 that would shrink to an 8.


  • With rings, I always try to “work-harden” them a bit after they’ve been fired. The “99.9% pure” fine silver of regular metal clay comes out of the kiln annealed (i.e., soft). Fine silver will always be softer than sterling or Argentium silver (and even those are not necessarily the strongest choices for rings). But any form of silver will harden up, at least to some extent, if you “work” it for a while: hit it (gently…) between two hard surfaces (e.g., a between a hammer or mallet and ring mandrel or a steel bench block), to “re-align” the silver crystal structure. But, in my experience, that hitting tends to increase the ring size at least a little. (If a ring comes out to small, that’s one of the easiest ways to size it up as needed!) In the end, I chose to position mine only 1 size larger, and use the work-hardening, along with a little reshaping, to get it back up where I wanted.

    • I built it on the mandrel at 9. I had some moderately heavy teflon wrapped around it so, per Gordon’s logic, I guess that took it up just a tad above 9.5.


  • It came out just a tad above 7.5.


    • Once I finished hardening and reshaping the band, it ended up right at 8, maybe a hair over that. Perfect!


Why did I reshape the band to no longer be the perfect round I had out of the kiln? (The round band is shown in the first photo with this post, above. The slight change should be just visible in the second photo above.) Because I find that round rings with heavy tops tend to topple over on my finger. The thing that really controls the ring size you wear is rarely the space where you’re wearing it! In most cases, it’s the knuckle the ring must pass over to reach that spot. (And the extra size of the knuckle often helps to keep the ring from just falling off the finger.)

With an oval band shape, you can make it a bit smaller than you think you need, turn the ring sideways to put it on, then straighten it back up to wear. Or, with a squarer band, the sides of the band and the sides of your finger are fairly well matched up, so the ring sits in place as intended.

(If I’d made this in my studio, rather than in a class, I’d’ve taken the extra time to add a few embellishments to the top. In the workshop, we didn’t have that much extra time, and I wanted to wear mine home. But, at least, I got the “fronds” to sort of sprout from the space where I set the pearl, so I’m OK with it as it is.)

What’s your favorite “tip” for making metal clay rings, using whatever method you prefer?

Posted in General Techniques, Learning Metal Clay | Tagged: , , , , | Leave a Comment »

How I Spent Last Weekend.

Posted by C Scheftic on 2011/09/04

With a bit of island-themed whimsy, in honor of the workshops led by Gordon Uyehara at the Valley Art Center in Chagrin Falls, OH, last weekend, I open this post with a photo of the “Cosmic Honu” turtle pendant made last Saturday by one of my local guild-friends, Michelle Glaeser (who is also the developer of rose gold clay), checking out the “Pearl Box” ring that I made on the Sunday. As I’d mentioned in my last post, not everyone who went had been able to stay for all the events, but Michelle and I met at my studio for an hour or so a few days later to talk about the different workshops each of us had taken.

There are several ways to approach the making of a ring using metal clay, and this class from Gordon uses the method I practice the least myself. So, why did I take this class? First of all, I wanted to push myself to practice this method. Even though I don’t find it particularly easy, if you look at book and magazine articles plus a range of on-line posts, it appears to be the one most commonly used by metal clay artists. (I don’t know how many are just starting from the same point they first learned and extending that for their project, or if they have tried others and simply prefer this one. It is the first method I learned too, but I later figured out, read about, and otherwise explored others that I find easier (not necessarily quicker, just easier) and have, myself, mostly expanded on those. I guess I’d better think about making, and writing about, some of those this winter….) In the meantime, rather than struggle on my own to master this technique, I figured I’d take it (again) from someone reported to have many happy customers (both product buyers and workshop students), and maybe I’d be able to pick up a few tips I’d missed. Besides, there can actually be two ring-bands in this particular design: one that goes around the finger and another that goes around the decorative top. So, this offered double the practice all in one day!

[Several asides: I wasn’t the only one with questions either. At left, you can see Gordon doing a little demonstration for Carole B from Columbus. It was fun to meet her in person at last! We’d emailed each other for months, first over organizing workshops in separate cities when our three groups brought in Hadar Jacobson, which I wrote about early last April, and then there was more mail setting up this combined effort with Gordon last week.]

The finished samples Gordon brought, one of which was shown in my last post, all had the pearl set into a flat-topped, circular box, with the pearl off from the center of the box but positioned centrally in line along the finger when worn. He also discussed, had unfired versions of, and constructed during demos, some other styles: different box shapes, different top-shapes, various wall heights, with the pearl positioned in different ways (e.g., centered or offset relative to the top or to the textured design). At the right, in a snapshot that shows eight of the sixteen pieces that participants made (one kiln-load), you can get a clue about their choices: I can see oval, oblong, and triangular as well as circular, and having flat, curved, or fully-domed tops.

Those who know my work, especially those who take my classes, know that I love various curved shapes: domes, waves, loops, and more. And that, although I often use some fairly “subtle” textures, I do tend to put textures just about everywhere: fronts and backs (making pieces reversible), inside little openings (whether visible in public or a little secret about the space known only to the wearer), and so on. Also, having gotten some of my design sense through working within the math world as a geometer, I know how to find centers and figure angles and such. So one funny thing about this ring, for me, is that I made it with:

  • a flat top;
  • a simple satin-finish on both the wall-sides and finger-ring;
  • the pearl at some almost-random off-center, not-aligned position; and
  • the whole box deliberately set ever-so-slightly off-center on the band (both left-to-right and front-to-back) because it just seemed while I was assembling it as though it would sit nicely that way (too far off might want to topple, but a tiny bit off just felt better to me).

But another, even-funnier thing is that, without us ever discussing any of this during the session (because we were so busy working away on our own projects), both Alice (another local guild-friend, and my traveling companion for the weekend) and I made almost identical choices all along the way! (And this is not her typical style either, which usually has lots of curls and swirls.) We had brought different textures to use, and hers (left) was one that comes out a tiny bit deeper than mine (right). Other than that, however, I don’t think we could have made more-matching rings if we’d tried! We had a good laugh when we each saw what the other had done….

Posted in Guild, Learning Metal Clay | Tagged: , , , , | Leave a Comment »