") Artsmiths of Pittsburgh
Artsmiths of Pittsburgh") Hoyt Center for the Arts, New Castle, PA
Hoyt Center for the Arts, New Castle, PA") Portage Hill Gallery, Westfield, NY
Portage Hill Gallery, Westfield, NY") _Open Houses in my Studio
_Open Houses in my Studio _Or…contact me about hosting a private party!
Now, the delay in posting this is not entirely my fault. OK, some of the delay is, just not all of it.
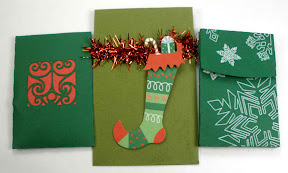
Most (but not all) years, members of the Western PA Metal Clay guild hold a holiday-season charm exchange. For some reason, it rarely gets agreed to very far in advance (which, of course, is why some years it just doesn’t happen…). In 2014, well into the fall, it was decided to not do it in December but, instead, skip that gathering (fair enough, it is a very busy time of year for everyone) and do the exchange in November. Aack!
 One of the things with the last minute planning is that we do let people exchange IOUs. That is, if you want to participate, but can’t get charms made in time, you can exchange an IOU that you’ll deliver your charms by our next meeting. Me, I find November easily as frantic a time as December and, though I made several attempts to block out a chunk of time for charm-making, each block kept getting eaten up by something else for which there was no escape. But I do enjoy the exchanges, so I jumped at the chance to use the IOU option. We typically exchange three (3) charms according to some rule or other. In the past, for example, we’ve put all the charms in a stocking and drawn pieces at random. This time, we changed the plan and did direct back-and-forth exchanges.
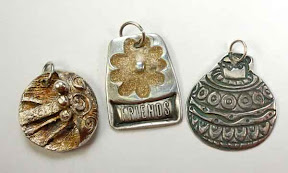
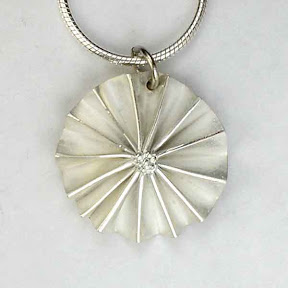
The first photo shows the charms I received in the exchange. The bee in a circle, highlighted with gold colored guilder’s paste, was from Holly Dobkin. The puzzle piece, highlighted with Vintaj patina color, was from Debbie Rusonis. And the abstract circle, highlighted with a liver of sulphur (LOS) patina, was from Georgie Nix. I love the artistry of all three, in general, and was very happy to receive their 2014 ideas.
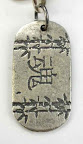
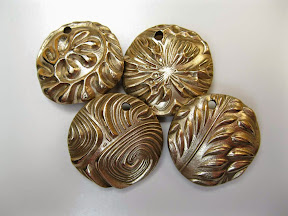 Now, I could have posted that much right away. But I decided I wanted to wait until I could post the pieces I offered in exchange. I started them in mid-December (after my last show of the season), but we didn’t have a meeting set for that month, so I let the final step slip into early January. Except, we cancelled the January meeting due to weather issues … and I didn’t want to post my pics until the recipients had their pieces in hand. Finally, we met (despite winter weather this time) in February. Yesterday afternoon. So, at last, here’s what I offered in return. They were made from Hadar’s Quick-fire bronze. (The photos were taken before I added oval bronze jump rings.)
Even though we typically exchange three charms, while I’m making mine I always add at least one and sometimes several more. This time, I tried to make five: three for the exchange, one for me to keep, and one extra for some time when having a little treat to offer would be useful. Except, somehow, I managed to crack one of the pieces while I was joining its two dried segments (I was so annoyed with myself: I even managed to crack both parts at once!) and it just did not seem worth the trouble to try to repair it. Instead, I reconstituted that clay and used it for something else later on.
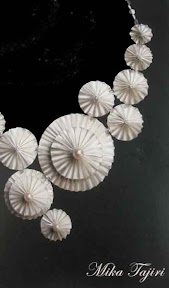
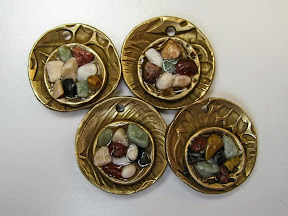 Regular readers of this blog will know that I love to make reversible pieces, and I do that even for little charms. For these, one side simply displays a deeply-textured pattern. I ended up being very happy I’d waited until December to even start these, because that permitted me to use the charms as my very first attempt at a variation on the Chip Inlay Project for the Holidays posted by Hadar Jacobson on December 3rd! The final photos shows what I did on the “other” side of each charm: I made little cups that I could fill with something called “Painted Desert Sand” that I’d gotten a while back for a completely different reason. As my first attempt at this process, I’m definitely keeping the fourth charm, both as a reminder to myself and as a sample to use in discussions with other artists or students.
I hope my guild-mates will let me know how these seem to hold up. I believe they’ll be fine, and I’ll be happy to replace any that appear to have any problems, but I’d sure rather learn about that from a sympathetic fellow artist than a possibly irritated customer. I’ve since used the technique on a few other pieces I’m testing out myself. Basic images of those, if not more detailed reports, will appear here eventually. (For now, I will say only that there are both similarities and differences among various fillers and holding agents…) I’ll say more once I’m confident in what I’m talking about with these, not just displaying untested guesses.
For now, though, I just want to be sure folks know that making these sure is fun!